Brother International MFC-5200C Quick Setup Guide - English - Page 26
For Windows, XP Users Only - drivers
 |
View all Brother International MFC-5200C manuals
Add to My Manuals
Save this manual to your list of manuals |
Page 26 highlights
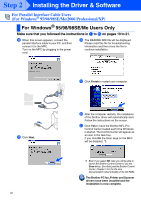
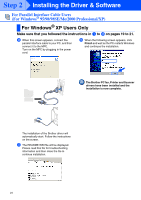
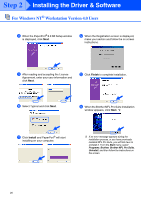
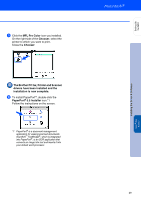
Step 2 Installing the Driver & Software For Parallel Interface Cable Users (For Windows® 95/98/98SE/Me/2000 Professional/XP) For Windows® XP Users Only Make sure that you followed the instructions in 1 to E on pages 19 to 21. F When this screen appears, connect the parallel interface cable to your PC, and then connect it to the MFC. Turn on the MFC by plugging in the power cord. H When the following screen appears, click Finish and wait as the PC restarts Windows and continues the installation. The Brother PC fax, Printer and Scanner drivers have been installed and the installation is now complete. . The installation of the Brother driver will automatically start. Follow the instructions on the screen. G The README.WRI file will be displayed. Please read this file for troubleshooting information and then close the file to continue installation. 24
-
 1
1 -
2
-
3
-
4
-
5
-
6
-
7
-
8
-
9
-
10
-
11
-
12
-
13
-
14
-
15
-
16
-
17
-
18
-
19
-
20
-
 21
21 -
 22
22 -
 23
23 -
 24
24 -
 25
25 -
 26
26 -
 27
27 -
 28
28 -
 29
29 -
 30
30 -
 31
31 -
32
-
33
-
34
-
35
 |
 |
