Brother International MFC-J6710DW Quick Setup Guide - English - Page 19
For wired network interface users, Before you install, Connect the network, cable - driver for
 |
UPC - 012502626633
View all Brother International MFC-J6710DW manuals
Add to My Manuals
Save this manual to your list of manuals |
Page 19 highlights
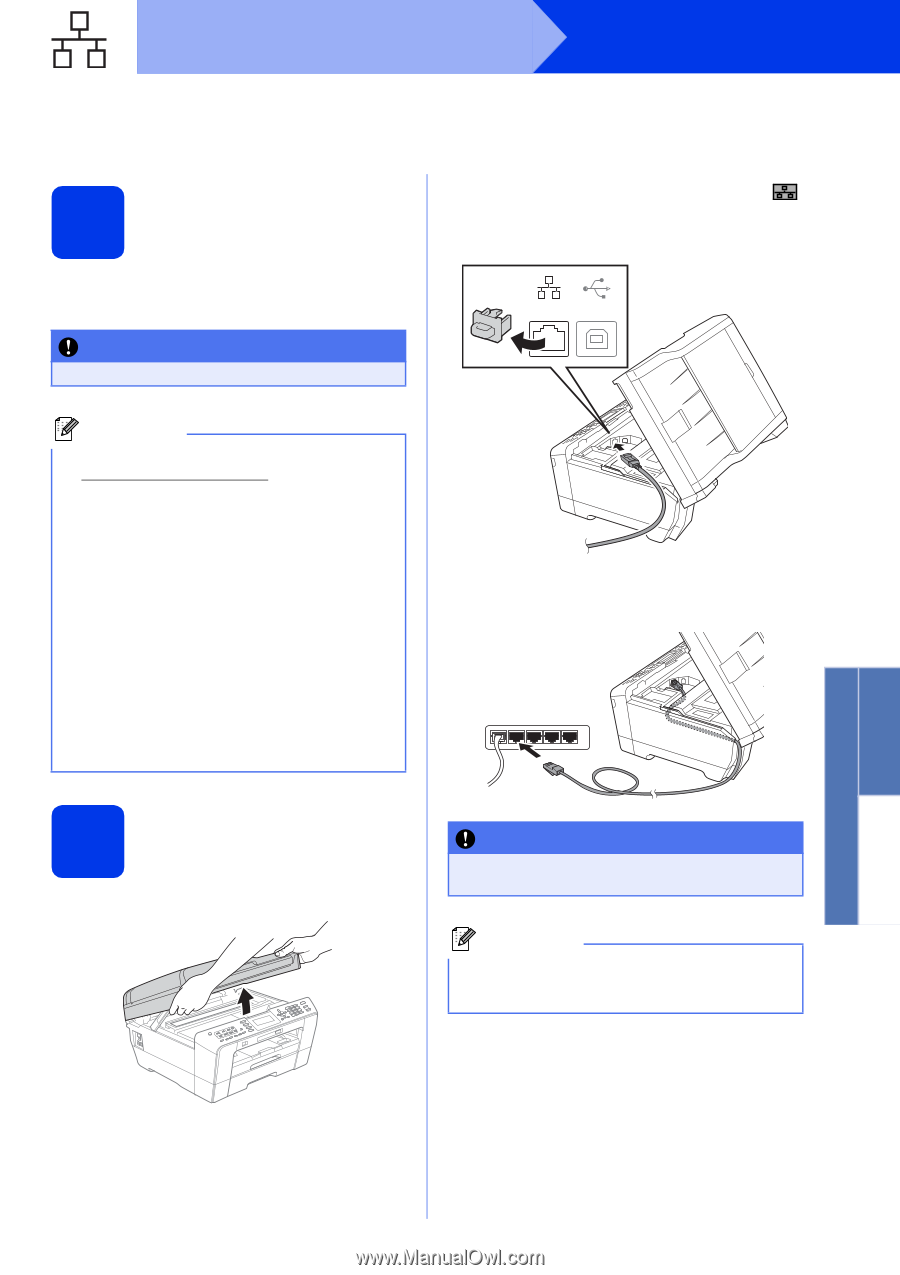
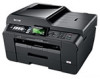
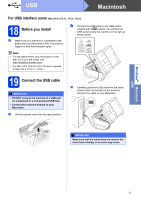
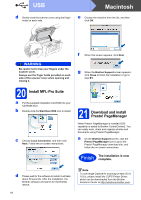
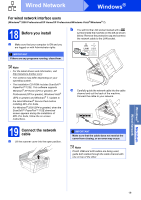
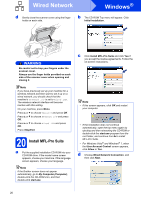
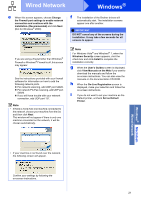
Wired Network Windows® For wired network interface users (Windows® 2000 Professional/XP Home/XP Professional/Windows Vista®/Windows® 7) 18 Before you install a Make sure that your computer is ON and you are logged on with Administrator rights. IMPORTANT If there are any programs running, close them. b You will find the LAN socket marked with a symbol inside the machine on the left as shown below. Remove the protective cap and connect the network cable to the LAN socket. LAN USB Note • For the latest drivers and information, visit http://solutions.brother.com/. • The screens may differ depending on your operating system. • The installation CD-ROM includes ScanSoft™ PaperPort™12SE. This software supports Windows® XP Home (SP3 or greater), XP Professional (SP3 or greater), Windows Vista® (SP2 or greater) and Windows® 7. Update to the latest Windows® Service Pack before installing MFL-Pro Suite. For Windows® 2000 (SP4 or greater), when the ScanSoft™ PaperPort™11SE download screen appears during the installation of MFL-Pro Suite, follow the on-screen instructions. 19 Connect the network cable a Lift the scanner cover into the open position. c Carefully guide the network cable into the cable channel and out the back of the machine. Connect the cable to your network. IMPORTANT Make sure that the cable does not restrict the cover from closing, or an error may occur. Note If both USB and LAN cables are being used, guide both cables through the cable channel with one on top of the other. Windows® Macintosh Wired Network 19
-
 1
1 -
2
-
3
-
4
-
5
-
6
-
7
-
8
-
9
-
10
-
11
-
12
-
13
-
 14
14 -
 15
15 -
 16
16 -
 17
17 -
 18
18 -
 19
19 -
 20
20 -
 21
21 -
 22
22 -
 23
23 -
 24
24 -
25
-
26
-
27
-
28
-
29
-
30
-
31
-
32
-
33
-
34
-
35
-
36
-
37
-
38
-
39
-
40
 |
 |