Brother International S-7200B Service Manual
Brother International S-7200B Manual
 |
View all Brother International S-7200B manuals
Add to My Manuals
Save this manual to your list of manuals |
Brother International S-7200B manual content summary:
- Brother International S-7200B | Service Manual - Page 1
S-7200B SERVICE MANUAL (MD-741B, 751B, 741C, 751C) Please read this manual before making any adjustments. SINGLE NEEDLE DIRECT DRIVE STRAIGHT LOCK STITCHER WITH THREAD TRIMMER - Brother International S-7200B | Service Manual - Page 2
This service manual is intended for S-7200B; be sure to read the S-7200B instruction manual before this manual. Carefully read the "SAFETY INSTRUCTIONS" and the whole of this manual to understand this product before you start maintenance. As a result of research and improvements regarding this - Brother International S-7200B | Service Manual - Page 3
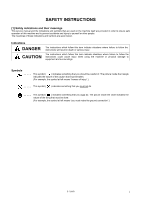
SAFETY INSTRUCTIONS [1] Safety indications and their meanings This service manual and the indications and symbols that are used on the machine itself are provided in order to ensure safe operation of this machine and , the symbol at left means "you must make the ground connection".) S-7200B i - Brother International S-7200B | Service Manual - Page 4
problems with correct operation. Installation Machine installation should only be carried out by a qualified technician. Contact your Brother dealer or a qualified electrician for any electrical work that may need to be done. The sewing machine the oil out of the reach of children. ii S-7200B - Brother International S-7200B | Service Manual - Page 5
. Use only the proper replacement parts as specified by Brother. Maintenance and inspection Disassembly, assembly, maintenance and inspection of the sewing machine should only be carried out by a qualified technician. Ask your Brother dealer or a qualified electrician to carry out any maintenance - Brother International S-7200B | Service Manual - Page 6
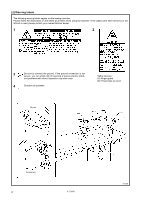
labels The following warning labels appear on the sewing machine. Please follow the instructions on the labels at all times when using the machine. If the labels have been removed or are difficult to read, please contact your nearest Brother dealer. 1 2 3 Be sure to connect the ground. If - Brother International S-7200B | Service Manual - Page 7
MACHINE SPECIFICATIONS 1 2. NOTES ON HANDLING 2 3. FUNCTION SETTINGS (OPERATION PANEL 3 3-1. Maximum sewing speed and start backtack sewing take-up spring 26 6-4. Adjusting arm thread guide R 27 6-5. Adjusting the presser foot 13. TROUBLESHOOTING 64 13-1. Sewing 64 13-2. Error code - Brother International S-7200B | Service Manual - Page 8
, 450W) Microprocessor *...When sewing at speeds of 4,000 rpm or higher, set the stitch length to 4.2 mm or less. -305 -405 4,500 rpm* 1.2 mm #19 - #22 Rotary hook -33S -43S Lubricated / for light materials -303, -403 -333, -433 Lubricated / for medium materials -305 -405 Lubricated / for heavy - Brother International S-7200B | Service Manual - Page 9
such equipment may be affected by electronic interference from the sewing machine. ・ The sewing machine should be plugged directly into an AC wall outlet. Operation problems may result if extension cords are used. Carrying the machine ・ The machine should be carried by the arm by two people as - Brother International S-7200B | Service Manual - Page 10
sewing speed Start backtack sewing speed 2 Maximum sewing speed setting Example: 4,500 rpm 2233M ・ The maximum sewing speed can be set to a speed from 220 rpm to the maximum sewing sewing speed setting Example: 1,600 rpm 2235M ・ The start backtack sewing When sewing starts, the sewing speed - Brother International S-7200B | Service Manual - Page 11
is used to lower the presser foot, the treadle can not be used to raise the presser foot while the machine is stopped; at this time, only the knee lifter is able to raise and lower the presser foot. , the messages " 「 " (green) and " " (orange) will flash alternately in the display. S-7200B 4 - Brother International S-7200B | Service Manual - Page 12
key, the setting value will not be changed. You need to press the ENTER key for each function number for the setting to be accepted. 5 S-7200B - Brother International S-7200B | Service Manual - Page 13
does not lift 1: Presser foot lifts Actuator function 0: Reverse stitch switch during operation, correction sewing switch when stopped 1: Thread trimming switch Slow stop control when treadle is returned to neutral presser foot is raised only while the optional actuator is being pressed. S-7200B 6 - Brother International S-7200B | Service Manual - Page 14
Machine stops after continuous operation for set time, and "Err 8" is displayed. Correction sewing function (See NOTE 3) 0: Half stitch correction sewing/Single stitch correction sewing 1: No correction sewing/Single stitch correction sewing D times Feed direction when stopping immediately 7200B - Brother International S-7200B | Service Manual - Page 15
12 0 - 1 Setting details Actuator function while sewing machine is stopped 0: None 1: Solenoid-type presser foot sewing operation when actuator switch is ON (fixed stitch sewing recall function) [Do not change this setting] Presser foot soft down mode 0: Automatic mode (See NOTE 8) 1: Manual 7200B 8 - Brother International S-7200B | Service Manual - Page 16
pedal turning on until motor starts operating Operation during standing operation when AUTO function is on 0: Sewing pauses when presser foot lifter pedal is on (operation pause) 1: Above function is not used indicated with " * " are enabled when the power is turned off and then back on. 9 S-7200B - Brother International S-7200B | Service Manual - Page 17
operated using the actuator switch. (Example) Default settings: At low speed: 0°; At high speed: 150° Needle up stop point is home point Operating angle range Direction of main shaft rotation Operating angle (At low speed: No. 59) (At high speed: No. 60) 0654B - Brother International S-7200B | Service Manual - Page 18
during automatic backtacking 0: Operation does not stop when switching cloth feed direction 1: Operation momentarily stops when switching cloth feed direction 2248M (NOTE 18) Setting is enabled when Function No. 61 is position and Function No. 79 to change the time before restarting. 11 S-7200B - Brother International S-7200B | Service Manual - Page 19
2: Sewing speed actuator 3: Option actuator Setting details - Brother International S-7200B | Service Manual - Page 20
when Function No. 70 is set to "0". ・ When the sewing machine is stopped, the puller is lowered after 10 seconds in synchronization with the automatic presser foot lifter. ・ During Option Needle up signal Material edge sensor signal 13 Fixed stitch number E S-7200B 2253M - Brother International S-7200B | Service Manual - Page 21
number B to "0". Output will occur while stitches for stitch number A are being sewn. ・ For the sewing end, set stitch number C to "0". Output will occur while stitches for stitch number D are being sewn. output turns off. Needle up stop Motor Presser foot lifting Option 2255M 2256M S-7200B 14 - Brother International S-7200B | Service Manual - Page 22
end backtacking Pause position when switching feed direction Pause time when switching feed direction (NOTE 23) Setting is enabled when sewing machine restarts automatically. ・ If the values are set to values that are less than the initial value (- direction - Brother International S-7200B | Service Manual - Page 23
the treadle neutral position as the 0 point, the values in the forward direction are + (plus) values, and those in the backward direction are - (minus) values, so that the speeds accelerate or decelerate around No. 85 2259M Treadle backward stroke Neutral Depression stroke S-7200B 2260M 16 - Brother International S-7200B | Service Manual - Page 24
27) End backtacking speed (EBT) Automatic speed (AUTO) Maximum sewing speed limit speed (HIL) (See NOTE 29) Lock level for pocket sewing stitches J No. of pocket sewing stitches K No. of pocket sewing stitches L No. of pocket sewing stitches sewing speed setting. Refer to page 3 for details on maximum - Brother International S-7200B | Service Manual - Page 25
Variable input signal Output signal NOTE: If Function No. 112 and No. 113 are set to "0", output is synchronized with the variable input signal. 2263M S-7200B 18 - Brother International S-7200B | Service Manual - Page 26
on 0: E-F-E-F (Name label attaching) 1: E-F-E-F-G 2: E-F-G-H-H-G-F-E (Pocket sewing 1) 3: E-F-G-H-I-H-G-F-E (Pocket sewing 2) 4: E-F-G-H-I-I-H-G-F-E 5: E-F-G-H-I-J-I-H-G-F-E 6: E-F-G-H-I-J-K-L-M 2264M 2265M 2266M 2267M (NOTE . 25. This step is skipped if the number of stitches is zero. 19 S-7200B - Brother International S-7200B | Service Manual - Page 27
xxxx x 10) 134 Cumulative grease-up running time (Time = Display xxxx x 1 hour) / Grease life estimate (%) 135 ROM version (x.xxx) 136 Set maximum speed history (rpm) S-7200B 20 - Brother International S-7200B | Service Manual - Page 28
the control box is connected NOTE: When the power switch is turned on, any of the sewing machine's sewing speeds that are different from the setting data in the head detector unit are reset automatically. When an operation is carried out, the display will return to the normal display. 21 S-7200B - Brother International S-7200B | Service Manual - Page 29
panel settings to the factory default settings. NOTE: The control box panel will not operate when the machine head operation panel is connected. DANGER Wait at least 5 minutes after turning off the power switch be complete. Set DIP switch -3 to ON. (The settings will be locked.) 3150M S-7200B 22 - Brother International S-7200B | Service Manual - Page 30
amount" above. * Turn the adjusting screw (3) and check the lubrication amount repeatedly until the lubrication amount is correct. 4. Check the lubrication amount again after the sewing machine has been used for approximately two hours. 23 S-7200B - Brother International S-7200B | Service Manual - Page 31
6. ADJUSTMENTS CAUTION Maintenance and inspection of the sewing machine should only be carried out by a qualified technician. Ask your Brother dealer or a qualified electrician to carry out actuator (1) to the preferred position or . 3. Tighten the two screws (2). 3687M 3688M S-7200B 24 - Brother International S-7200B | Service Manual - Page 32
too much space between the machine head and the table > The standard amount of clearance between the machine head and the table hole is 1.5 mm (1) so that the washer (2) is on the machine head side as shown in Figure [B]. * If operate. 3.5 mm or more Sewing machine Table Clearance is too large. - Brother International S-7200B | Service Manual - Page 33
take-up spring (1) varies in accordance with the machine specifications as shown in the table. -[][]S specifications spring (1) is at the same height as the base of the thread guide (3), and then measure the tension of the thread take-up spring (1). 35N 0.3 - 0.5N 3694M S-7200B 26 - Brother International S-7200B | Service Manual - Page 34
the adjustable range for arm thread guide R (1). * To adjust the position, loosen the screw (2) and then move arm thread guide R (1). ・ When sewing thick material, move arm thread guide R (1) to the left. pressure using the adjustment screw (4), and then tighten the nut (3). 2278M 27 S-7200B - Brother International S-7200B | Service Manual - Page 35
3696M 1. Turn the pulley until the feed dog (1) rises to the highest position. 2. Tilt back the machine head. 3. Loosen the screw (2). 4. Turn the feed lifting rock bracket stud (3) within a range of Becomes higher Standard Becomes higher Standard Becomes lower Becomes lower 2282M S-7200B 28 - Brother International S-7200B | Service Manual - Page 36
dog (1) to its highest position above the needle plate. 2. Tilt back the machine head. 3. Loosen the two set screws (4). 4. Turn the shaft (2) in the direction of the arrow within a range of 90° with respect to the standard is raised Raise the front Standard Lower the front 2285M 29 S-7200B - Brother International S-7200B | Service Manual - Page 37
lowest position. 1. Turn the machine pulley to set the needle bar 1. Tilt back the machine head. 2. Loosen the the vertical cam (3) as a guide.) ・ To set to the in the direction of (B). direction of (C). Refer to [C] in the illustration.) NOTE: Do not turn the vertical cam (3) too far in the direction - Brother International S-7200B | Service Manual - Page 38
the needle hole and the rotary hook tip (3) will be 0.5 - 0.7 mm.) 1. Turn the machine pulley to raise the needle bar (1) from its lowest position until reference line (b) is aligned with and 0.6 - 1.1 mm for -[][]5 models. 0.4 - 0.7mm 0.6 - 1.1mm 2293M 3700M 31 S-7200B - Brother International S-7200B | Service Manual - Page 39
adjustment > 1. Turn the machine pulley to raise the needle bar bush. Direction of cam rotation 1204B finger in the direction of the arrow. adjustment > 1. Turn the machine pulley, and then push , turn the machine pulley until the and the bushing are aligned as a guide. * Tighten the screw (8) so that - Brother International S-7200B | Service Manual - Page 40
machine sewing take-up support shaft support shaft (4) counterclockwise so that the groove (5) is facing straight downward. 5. With the thread take-up support shaft (4) pushed in as far as it will go, first tighten the set screw (2) until it touches the screw stop on the thread take-up support - Brother International S-7200B | Service Manual - Page 41
rotation of approximately 10° for the upper shaft. * If DIP switch 3 is not set to OFF, this adjustment cannot be carried out. 3657M 2138M 2139M S-7200B 34 - Brother International S-7200B | Service Manual - Page 42
so that the functions can be set.) 3143M 2 While pressing the end backtack key (1), press the power switch (2) to turn on the power. 0706B 35 S-7200B - Brother International S-7200B | Service Manual - Page 43
display. 2. Press the end backtack key (1) to set the value. Becomes lower 2 Becomes higher Set DIP switch -3 to ON. (The settings will be locked.) 0705B S-7200B 36 - Brother International S-7200B | Service Manual - Page 44
sensitivity adjustment> If the machine starts running at low speed presser foot (1) in accordance with the material. 1. Turn the sewing machine pulley by hand to move the feed dog (2) below the nut (4). * After making the adjustment, sew a piece of material to check the floating amount. Raise Lower - Brother International S-7200B | Service Manual - Page 45
back the machine head. 6. Push the thread trimmer connecting rod (3) in the direction of the arrow until the two screws (4) can be seen. 7. Remove the two screws (4), and then remove the movable knife (5). * Carry out the above steps in reverse to install the movable knife (5). 0739B S-7200B 38 - Brother International S-7200B | Service Manual - Page 46
and then remove the motor cover (3). 3. Tilt back the machine head. 4. While pushing the timing belt (4) in the direction of the arrow, turn the machine pulley (5) forward to remove the timing belt (4) from timing Carry out steps 1 and 2 and steps 6 to 8 of . 39 S-7200B - Brother International S-7200B | Service Manual - Page 47
this is not a problem.) Approx. 1mm 1212B Approx. 3mm 6. Adjust the positions of the machine pulley (5) and timing pulley D (6) as follows. 1) Tilt back the machine head. 2) Turn installation > Carry out steps 2 to 5 and step 10 of . S-7200B 40 - Brother International S-7200B | Service Manual - Page 48
is correct. Turn the machine pulley (5) forward to steps. 1) Tilt back the machine head, and then loosen the not move, turn the machine pulley (5) forward to lower sewing machine to needle up stopping, and then operate the sewing machine and let it stop. Check that the reference line (d) on the machine - Brother International S-7200B | Service Manual - Page 49
hook) on sub-class -40[] or -43[] machines, use the following parts. S52936-001 (ROTARY HOOK, rotary hook RP (lubrication-free rotary hook), set the sewing speed to 4,000 rpm or less. 1. the edge (B) of the bed.) NOTE: If the sewing machine is used while the adjusting screw (5) is in - Brother International S-7200B | Service Manual - Page 50
grease as described below and then install the parts to the sewing machine. * Use Brother-specified grease (SA7300-001). Feed bar shaft unit Grease 2316M areas) of each part. 5. Install each part to the sewing machine. Grease 2319M Lifting feed shaft unit Grease Grease 2317M Grease Grease - Brother International S-7200B | Service Manual - Page 51
grease and carry out the reset procedure. * If you continue to use the sewing machine after carrying out the reset procedure but without applying grease, problems with the sewing machine may result. Use Brother-specified . Using the tube S-7200B 3682M 44 - Brother International S-7200B | Service Manual - Page 52
specifications> Marked red Turn the machine pulley to lower the needle bar screws in order to push the grease in. 5. Turn the machine pulley by hand to move the needle bar up and down Depress the treadle to run the sewing machine for 1 second or more. 8. Turn the power switch to - Brother International S-7200B | Service Manual - Page 53
grease and carry out the reset procedure. * If you continue to use the sewing machine after carrying out the reset procedure but without applying grease, problems with the sewing machine may result. Use Brother-specified . Using the tube S-7200B 3682M 46 - Brother International S-7200B | Service Manual - Page 54
and the set screws in order to push the grease in. 5. Turn the machine pulley by hand to move the needle bar up and down several times in D. 7. Carry out the reset procedure given below. After the grease has been applied, carry out .) 2139M 47 S-7200B - Brother International S-7200B | Service Manual - Page 55
(5) that is directly linked to the sewing machine receives a voltage , and this makes the sewing machine operate. B. When the brake is applied in order to stop the sewing machine at the stopping position (needle up or applied in order to stop the sewing machine at the needle up stopping position - Brother International S-7200B | Service Manual - Page 56
clips (2) and (3) in that order, and then disconnect all of the connectors (4) to (7) from the sewing machine. * Be careful not to break the pawls of connectors (5), (6) and (7). 0656B 2. Disconnect the power Install by following the removal procedure in reverse. 2324M 49 S-7200B - Brother International S-7200B | Service Manual - Page 57
panel Sewing machine 1 Japan 2 Asia/Middle East 3 USA/Mexico 4 Canada 5 Oceania (C-TICK) 7 Turkey/ North Africa 9 China L Europe/Greece (CE) 1 100V 2 110V 3 200V 5 220-240V 8 380-415V 4 1 forward 1 backward step type 6 2 forward 2 backward step type 4 External 1 S-7200A 2325M S-7200B 50 - Brother International S-7200B | Service Manual - Page 58
10. CONTROL BOX AND MOTOR Serial No. 2326M 2327M 51 S-7200B - Brother International S-7200B | Service Manual - Page 59
lifter connector Sewing machine connector sewing speed actuator. For input/output signals used by external devices Connect to stitch counter actuator. Only used for three-phase high-voltage specifications. Connect to shorted connector when not using three-phase high-voltage specifications. S-7200B - Brother International S-7200B | Service Manual - Page 60
function selection Indicates power supply circuit board problems. Indicates that the power is on. output (*) Machine shaft sync Not used by the S-7200A] L level: Operation Sewing speed actuator (high speed) Sewing speed actuator (medium speed) Sewing speed actuator (low speed) 53 S-7200B - Brother International S-7200B | Service Manual - Page 61
switch and disconnect the power cord from the wall outlet before carrying out these operations. The machine may operate if the treadle is depressed by mistake, which could result in injury. If the 4-5, 5-6 and 6-4. [B] For single-phase Measure the AC voltage between terminals 4-6. 1884M S-7200B 54 - Brother International S-7200B | Service Manual - Page 62
high voltages are present can result in severe injury. Control box 0743B Sewing machine connector 14P Thread trimmer solenoid Thread wiper solenoid Quick reverse solenoid Actuator switch : Approx. 9.6 Ω When knee switch is pressed: 0 Ω When knee switch is released: ∞ Ω 55 S-7200B - Brother International S-7200B | Service Manual - Page 63
presser lifter signal is output at the point before the depression force suddenly changes, and the sewing machine starts at the point after the depression force suddenly changes. (NOTE 1) The presser foot foot lifter control signal is not output when the treadle is depressed backward. S-7200B 56 - Brother International S-7200B | Service Manual - Page 64
S1 and S2, and the point of change (R) in the backward depression force is between S6 and S7. Speed Backward depression Neutral Forward depression 57 S-7200B 1841M - Brother International S-7200B | Service Manual - Page 65
below. Use the following procedure to set the operating positions for the depression stroke. ・ For sewing machines with operation panel, make the settings using the operation panel. (Refer to "A. For the operation trimming key (2). "Pdnn x.xxx" will appear in the main display (3). 2334M S-7200B 58 - Brother International S-7200B | Service Manual - Page 66
not press the ENTER key (4), the settings will not be memorized. 2337M 2. Turn off the power switch (1). 3. Set DIP switch No.4 to OFF. 0653B 59 S-7200B - Brother International S-7200B | Service Manual - Page 67
position With the treadle depressed forward to the maximum forward position, press the start backtack key (4). "Pn" will appear in the stitch number display (3). 3196M S-7200B 60 - Brother International S-7200B | Service Manual - Page 68
key (4). The stitch number display (3) will switch off. 5) Completion of setting 3198M 1. Turn off the power switch (1). 2. Set DIP switch No.4 to OFF. 0653B 61 S-7200B - Brother International S-7200B | Service Manual - Page 69
the standing pedal connector (2) to the foot plug (1). 3. Secure the cord (3) of the standing pedal with the shielded wire clip (5) and the cable tie (4). 0703B S-7200B 62 - Brother International S-7200B | Service Manual - Page 70
1867M Two-step pedal Variable speed pedal Presser foot Low speed Thread trimming High speed Presser foot Low speed Thread trimming High speed 1868M 63 S-7200B - Brother International S-7200B | Service Manual - Page 71
power cord before carrying out troubleshooting. The machine may operate if the treadle is depressed by mistake, which could result in injury. 13-1. Sewing Problem 1 Upper thread is not tight tip of the rotary hook. Instruction manual Instruction manual Instruction manual 27 26 30 31 S-7200B 64 - Brother International S-7200B | Service Manual - Page 72
sewing speed. Is the angle of the feed dog correct? Tilt the front of the feed dog down slightly. Instruction manual Instruction manual 26 26 Instruction manual Instruction manual 29 Is the presser foot pressure too strong? Adjust the presser foot pressure. Instruction manual 0750M 65 S-7200B - Brother International S-7200B | Service Manual - Page 73
by Brother. Page Instruction manual Instruction manual Instruction manual Instruction manual Is the needle tip bent? Is the needle tip blunt? If the needle tip is bent or blunt, replace the needle. Is the needle properly installed? If it is incorrect, install the needle correctly. Is the machine - Brother International S-7200B | Service Manual - Page 74
empty? (-[]0[], []3[] specifications) Fill the oil tank with oil. Instruction manual 2195M 15 Machine does not operate when power is turned on and treadle is pressed. 16 Machine does not operate at high speed. 17 Machine stops during sewing. Is the power supply connector disconnected from the - Brother International S-7200B | Service Manual - Page 75
TROUBLESHOOTING Problem 18 Nothing appears on the operation panel display. Possible cause Is the power supply connector disconnected from the control box? Insert the connector securely. 2196M Page Instruction manual to apply grease. Apply grease. 3154M Instruction manual 44, 46 S-7200B 68 - Brother International S-7200B | Service Manual - Page 76
13. TROUBLESHOOTING 13-2. Error rating label Is the power supply voltage abnormally high? Check. Problem with control box. Replace the control box. Is the electrical 52 3156M 49 Has the machine locked up? Turn off the power and then turn the machine pulley by hand and check that it turns easily. - Brother International S-7200B | Service Manual - Page 77
TROUBLESHOOTING Error code Err 5 (Safety switch operated) Possible cause Is the machine connector inside the control box disconnected? Insert the connector securely. Page 52 Err 6 (Voltage drop) Is the machine head tilted back? Return the machine the sewing machine as normal. Problem with - Brother International S-7200B | Service Manual - Page 78
TROUBLESHOOTING Error code Err 12 (Solenoid power supply error) Possible cause Is solenoid fuse F2 (5A) blown? Replace the fuse. Err 13 (Treadle unit error) Err 14 (Head detector unit error) Problem 15 (Problem with sewing machine motor problems with the cooling fan. If there is a problem - Brother International S-7200B | Service Manual - Page 79
box disconnected? Insert the connector securely. 13. TROUBLESHOOTING Page 52 3159M Err 100 This appears on the display when the sewing machine has continued to be used for a certain or if carrying out the specified remedy does not solve the problem, contact the place of purchase. S-7200B 72 - Brother International S-7200B | Service Manual - Page 80
13. TROUBLESHOOTING (Error code) If an error code is displayed 13 Treadle unit error 14 Head detector unit error 15 Problem with sewing machine motor operation 16 Thread trimming solenoid timeout 18 EEROM error 19 does not solve the problem, contact the place of purchase. 73 S-7200B - Brother International S-7200B | Service Manual - Page 81
14. SEGMENT DISPLAY DEFINITION TABLE 14. SEGMENT DISPLAY DEFINITION TABLE LCD display character list 1203B S-7200B 74 - Brother International S-7200B | Service Manual - Page 82
MEMO 75 S-7200B - Brother International S-7200B | Service Manual - Page 83
MEMO S-7200B 76 - Brother International S-7200B | Service Manual - Page 84
SERVICE MANUAL Printed in Japan S-7200B I6100914B 2007. 03. B (1)
-
 1
1 -
 2
2 -
 3
3 -
 4
4 -
 5
5 -
 6
6 -
 7
7 -
8
-
9
-
10
-
11
-
12
-
13
-
14
-
15
-
16
-
17
-
18
-
19
-
20
-
21
-
22
-
23
-
24
-
25
-
26
-
27
-
28
-
29
-
30
-
31
-
32
-
33
-
34
-
35
-
36
-
37
-
38
-
39
-
40
-
41
-
42
-
43
-
44
-
45
-
46
-
47
-
48
-
49
-
50
-
51
-
52
-
53
-
54
-
55
-
56
-
57
-
58
-
59
-
60
-
61
-
62
-
63
-
64
-
65
-
66
-
67
-
68
-
69
-
70
-
71
-
72
-
73
-
74
-
75
-
76
-
77
-
78
-
79
-
80
-
81
-
82
-
83
-
84
 |
 |

S-7200B
(MD-741B, 751B, 741C, 751C)
Please read this manual before making any adjustments.
SINGLE NEEDLE DIRECT DRIVE STRAIGHT LOCK STITCHER
WITH THREAD TRIMMER
SERVICE MANUAL