Brother International SE 350 Users Manual - English - Page 22
Example: Changing the needle stop position
 |
UPC - 012502619703
View all Brother International SE 350 manuals
Add to My Manuals
Save this manual to your list of manuals |
Page 22 highlights
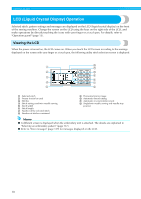
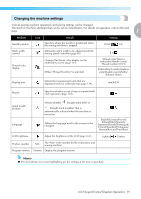
GETTING READY Turn on the sewing machine. a The highlighted display is the initial setting. X The LCD comes on. Press b panel. (Settings key) on the display Example: Changing the needle stop position X The setting screen appears. Press the item to be set. c Switch the screen using (Previous page key) and (Next page key). • The following screens show their default settings. When settings are complete, press d (Back key). X The initial stitch screen appears again. Memo z "NO" is the individual number for the sewing machine. z "VERSION" is the program version which is installed in the sewing machine. z Settings that are changed are saved even if the power is turned off. 20
-
 1
1 -
2
-
3
-
4
-
5
-
6
-
7
-
8
-
9
-
10
-
11
-
12
-
13
-
14
-
15
-
16
-
 17
17 -
 18
18 -
 19
19 -
 20
20 -
 21
21 -
 22
22 -
 23
23 -
 24
24 -
 25
25 -
 26
26 -
 27
27 -
28
-
29
-
30
-
31
-
32
-
33
-
34
-
35
-
36
-
37
-
38
-
39
-
40
-
41
-
42
-
43
-
44
-
45
-
46
-
47
-
48
-
49
-
50
-
51
-
52
-
53
-
54
-
55
-
56
-
57
-
58
-
59
-
60
-
61
-
62
-
63
-
64
-
65
-
66
-
67
-
68
-
69
-
70
-
71
-
72
-
73
-
74
-
75
-
76
-
77
-
78
-
79
-
80
-
81
-
82
-
83
-
84
-
85
-
86
-
87
-
88
-
89
-
90
-
91
-
92
-
93
-
94
-
95
-
96
-
97
-
98
-
99
-
100
-
101
-
102
-
103
-
104
-
105
-
106
-
107
-
108
-
109
-
110
-
111
-
112
-
113
-
114
-
115
-
116
-
117
-
118
-
119
-
120
-
121
-
122
-
123
-
124
-
125
-
126
-
127
-
128
-
129
-
130
-
131
-
132
-
133
-
134
-
135
-
136
-
137
-
138
-
139
-
140
-
141
-
142
-
143
-
144
-
145
-
146
-
147
-
148
-
149
-
150
-
151
-
152
-
153
-
154
-
155
-
156
-
157
-
158
-
159
-
160
-
161
-
162
-
163
-
164
-
165
-
166
-
167
-
168
-
169
-
170
-
171
-
172
 |
 |
20
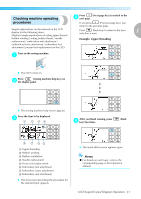
GETTING READY
— — — — — — — — — — — — — — — — — — — — — — — — — — — — — — — — — — — — — — — — — — — —
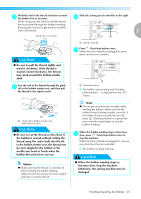
a
Turn on the sewing machine.
The highlighted display is the initial setting.
The LCD comes on.
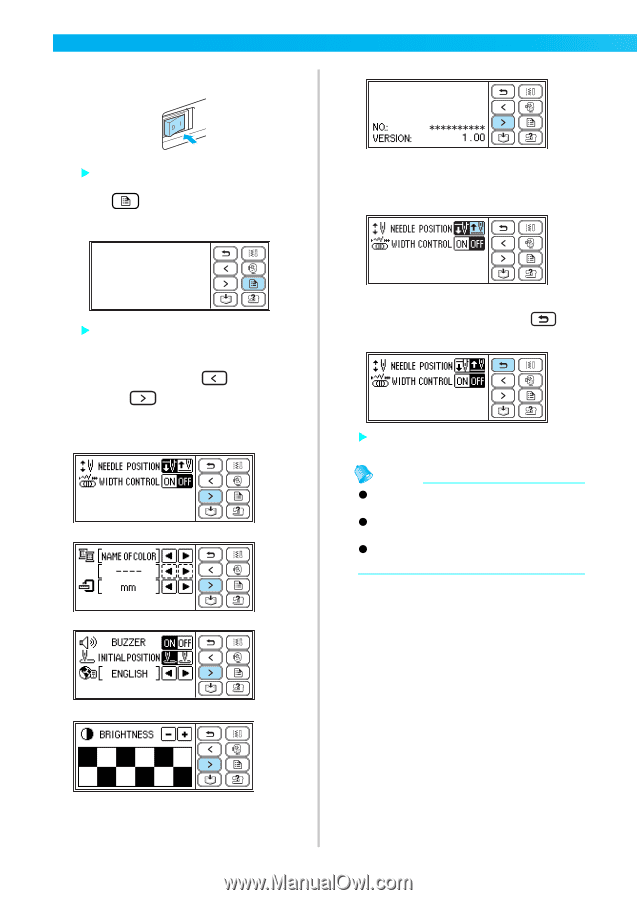
b
Press
(Settings key) on the display
panel.
The setting screen appears.
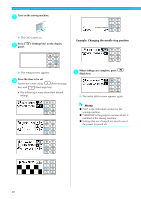
c
Press the item to be set.
Switch the screen using
(Previous page
key) and
(Next page key).
• The following screens show their default
settings.
Example: Changing the needle stop position
d
When settings are complete, press
(Back key).
The initial stitch screen appears again.
Memo
"NO" is the individual number for the
sewing machine.
"VERSION" is the program version which is
installed in the sewing machine.
Settings that are changed are saved even if
the power is turned off.