Bushnell 110718 Instruction Manual - Page 4
BEFORE CONNECTING THE IMAGEVIEW TO A COMPUTER, first install the driver from - drivers
 |
View all Bushnell 110718 manuals
Add to My Manuals
Save this manual to your list of manuals |
Page 4 highlights
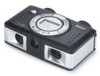
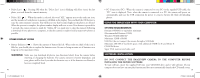
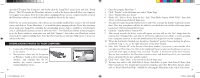
TAKE A PHOTO (TIPS FOR BETTER QUALITY PHOTOS) With the camera turned on, press the SNAP button to take a new photo. For best results, hold the ImageView steady using both hands, and lightly press down the SNAP button using the flat end of your finger rather than "punching" it with a fingertip. For normal photos of distant objects over 25 feet (8 meters) away, leave the 2-position focus switch at the front of the camera on the "mountain" icon (left position). If you need to take photos of closer objects, set the focus switch to the "flower" icon (right position). This will change the camera focus to a range from approx. 10 to 25 feet (3-8 meters). Be sure the focus switch is set back to the normal (mountain) setting when you are no longer taking close range photos. USING THE IMAGEVIEW WITH YOUR COMPUTER BEFORE CONNECTING THE IMAGEVIEW TO A COMPUTER, first install the driver from the CD-ROM as directed in "Software Installation". After the driver has been installed, you may install Roxio" PhotoSuite 5 as well, following the on-screen instructions (if you do not already have photo software you prefer to use). Connect the supplied USB cable between the ImageView and your computer, using a USB port on the computer itself (avoid "hubs"). Please read "Downloading Photos to Your Computer" for detailed instructions on transferring photos to a PC using PhotoSuite. 11-0718 6LIM.indd 6-7 Congratulations on your purchase of a Bushnell ImageView binocular. Before using the product, please read these instructions and take time to familiarize yourelf with the different parts and features of the product. BINOCULAR INSTRUCTIONS TURNING THE CAMERA ON AND OFF Insert 2 AAA alkaline batteries as indicated on the inside lid of the battery compartment, located at the side of the left eyepiece. Turn the camera on by pressing and holding the MODE/POWER( ) button until the display comes on and the camera beeps. To turn the unit off, press and hold the MODE/ POWER( ) button until the display goes out. The camera will turn itself off automatically to save batteries if none of the buttons have been pressed for three minutes. SNAP OK (Shutter Release) MODE / POWER (On/Off ) 1 7/19/04 8:50:24 AM
-
 1
1 -
 2
2 -
 3
3 -
 4
4 -
 5
5 -
 6
6 -
 7
7 -
 8
8 -
 9
9 -
 10
10 -
11
-
12
-
13
-
14
-
15
-
16
-
17
-
18
-
19
-
20
-
21
-
22
-
23
-
24
-
25
-
26
-
27
-
28
-
29
-
30
-
31
-
32
-
33
-
34
-
35
-
36
-
37
-
38
-
39
-
40
-
41
-
42
-
43
 |
 |
