Bushnell 201951 User Manual - Page 18
Next, select MAP GPS POINTS and press OK/SHOT Fig. 16. Select the hole Fig. 17, then
 |
View all Bushnell 201951 manuals
Add to My Manuals
Save this manual to your list of manuals |
Page 18 highlights
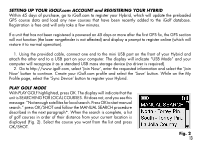
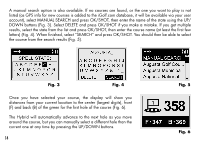
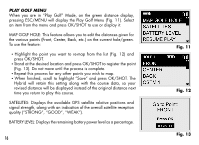
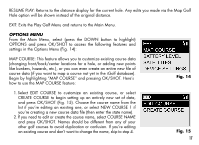
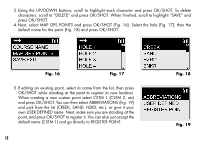
3. Using the UP/DOWN buttons, scroll to highlight each character and press OK/SHOT. To delete characters, scroll to "DELETE" and press OK/SHOT. When finished, scroll to highlight "SAVE" and press OK/SHOT. 4. Next, select MAP GPS POINTS and press OK/SHOT (Fig. 16). Select the hole (Fig. 17), then the default name for the point (Fig. 18) and press OK/SHOT. Fig. 16 Fig. 17 5. If editing an existing point, select its name from the list, then press OK/SHOT while standing at the point to register its new location. When creating a new custom point select CSTM 1 (CSTM 2, etc) and press OK/SHOT, You can then select ABBREVIATIONS (Fig. 19) and pick from the list (CREEK, SAND, HZRD, etc.), or give it your own USER DEFINED name. Next, make sure you are standing at the point, and press OK/SHOT to register it. You can also just accept the default name (CSTM 1) and go directly to REGISTER POINT. 18 Fig. 18 Fig. 19
-
 1
1 -
2
-
3
-
4
-
5
-
6
-
7
-
8
-
9
-
10
-
11
-
12
-
 13
13 -
 14
14 -
 15
15 -
 16
16 -
 17
17 -
 18
18 -
 19
19 -
 20
20 -
 21
21 -
 22
22 -
 23
23 -
24
-
25
-
26
-
27
-
28
-
29
-
30
-
31
-
32
-
33
-
34
-
35
-
36
-
37
-
38
-
39
-
40
-
41
-
42
-
43
-
44
-
45
-
46
-
47
-
48
-
49
-
50
-
51
-
52
 |
 |
