Bushnell Trophy Trail Cam Owner's Manual - Page 26
Camera won't power up, Still Photo and/or Video Quality Problems
 |
View all Bushnell Trophy Trail Cam manuals
Add to My Manuals
Save this manual to your list of manuals |
Page 26 highlights
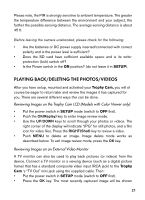
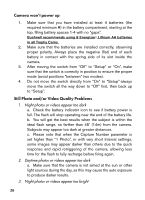
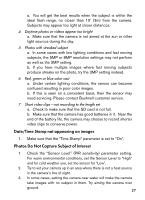
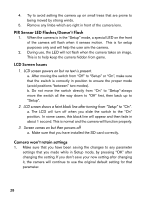
Camera won't power up 1. Make sure that you have installed at least 4 batteries (the required minimum #) in the battery compartment, starting at the top, filling battery spaces 1-4 with no "gaps". Bushnell recommends using 8 Energizer® Lithium AA batteries in all Trophy Cams. 2. Make sure that the batteries are installed correctly, observing proper polarity. Always place the negative (flat) end of each battery in contact with the spring side of its slot inside the camera. 3. After moving the switch from "Off" to "Setup" or "On", make sure that the switch is correctly in position to ensure the proper mode (avoid positions "between" two modes). 4. Do not move the switch directly from "On" to "Setup"-always move the switch all the way down to "Off" first, then back up to "Setup". Still Photo and/or Video Quality Problems 1. Night photos or videos appear too dark a. Check the battery indicator icon to see if battery power is full. The flash will stop operating near the end of the battery life. b. You will get the best results when the subject is within the ideal flash range, no farther than 45' (14m) from the camera. Subjects may appear too dark at greater distances. c. Please note that when the Capture Number parameter is set higher than "1 Photo", or with very short Interval settings, some images may appear darker than others due to the quick response and rapid retriggering of the camera, allowing less time for the flash to fully recharge before firing again. 2. Daytime photos or videos appear too dark a. Make sure that the camera is not aimed at the sun or other light sources during the day, as this may cause the auto exposure to produce darker results. 3. Night photos or videos appear too bright 26
-
 1
1 -
2
-
3
-
4
-
5
-
6
-
7
-
8
-
9
-
10
-
11
-
12
-
13
-
14
-
15
-
16
-
17
-
18
-
19
-
20
-
 21
21 -
 22
22 -
 23
23 -
 24
24 -
 25
25 -
 26
26 -
 27
27 -
 28
28 -
 29
29 -
 30
30 -
 31
31 -
32
-
33
-
34
-
35
-
36
-
37
-
38
-
39
-
40
-
41
-
42
-
43
-
44
-
45
-
46
-
47
-
48
-
49
-
50
-
51
-
52
-
53
-
54
-
55
-
56
-
57
-
58
-
59
-
60
-
61
-
62
-
63
-
64
-
65
-
66
-
67
-
68
-
69
-
70
-
71
-
72
-
73
-
74
-
75
-
76
-
77
-
78
-
79
-
80
-
81
-
82
-
83
-
84
-
85
-
86
-
87
-
88
-
89
-
90
-
91
-
92
-
93
-
94
-
95
-
96
-
97
-
98
-
99
-
100
-
101
-
102
-
103
-
104
-
105
-
106
-
107
-
108
-
109
-
110
-
111
-
112
-
113
-
114
-
115
-
116
-
117
-
118
-
119
-
120
-
121
-
122
-
123
-
124
-
125
-
126
-
127
-
128
-
129
-
130
-
131
-
132
-
133
-
134
-
135
-
136
-
137
-
138
-
139
-
140
-
141
-
142
-
143
-
144
-
145
-
146
-
147
-
148
-
149
-
150
-
151
-
152
-
153
-
154
-
155
-
156
-
157
-
158
-
159
-
160
-
161
-
162
-
163
-
164
-
165
-
166
-
167
-
168
-
169
-
170
-
171
-
172
-
173
-
174
-
175
-
176
-
177
-
178
-
179
-
180
-
181
-
182
-
183
-
184
-
185
-
186
-
187
-
188
-
189
-
190
-
191
-
192
-
193
-
194
-
195
-
196
-
197
-
198
-
199
-
200
 |
 |
