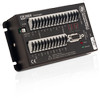
Campbell Scientific CR200X CR200/CR200X-series Dataloggers - Page 24
Table 2., PC200W EZSetup Wizard Example Selections.
 |
View all Campbell Scientific CR200X manuals
Add to My Manuals
Save this manual to your list of manuals |
Page 24 highlights
Section 2. Quickstart Tutorial Example Selections (p. 12) indicates what information needs to be entered on each screen. Click on Next at the bottom of the screen to advance to the next screen. Table 2. PC200W EZSetup Wizard Example Selections. Start the wizard to follow table entries Screen Name Information Needed Introduction Provides and introduction to the EZSetup Wizard along with instructions on how to navigate through the wizard. Datalogger Type and Name Select the CR200(X) from the scroll window. Accept the default name of "CR200(X)." COM Port Selection Select the correct COM port for RS-232 connection. Typically, this will be COM1. Other COM numbers are possible, especially when using a USB to serial cable. Leave the COM Port Communication Delay at "00 seconds." Note: When using a USB to serial cable, the COM number may change if the cable is moved to a different USB port. This will prevent data transfer between the software and CR200(X). Should this occur, simply move the USB cable back to the original port. If this is not possible, it will be necessary to close the PC200W software and open it a second time to refresh the available COM ports. Click on "Edit Datalogger Setup" and change the COM port to the new port number. Datalogger Settings Used to configure how the CR200(X) communicates through the COM port. For this tutorial, accept the default settings. Communication Setup Summary Provides a summary of the settings made in previous screens. Communications Test A communications test between the CR200(X) and PC can be performed in this screen. For this tutorial, the test is not required. Press Finish to exit the Wizard. After exiting the wizard, the main PC200W window becomes visible. The window has several tabs available. By Default, the Clock/Program tab is visible. This tab displays information on the currently selected datalogger along with clock and program functions. The Monitor Data or Collect Data tabs may be selected at any time. A number of icons are available across the top of the window. These access additional functions available to the user. 12
-
 1
1 -
2
-
3
-
4
-
5
-
6
-
7
-
8
-
9
-
10
-
11
-
12
-
13
-
14
-
15
-
16
-
17
-
18
-
 19
19 -
 20
20 -
 21
21 -
 22
22 -
 23
23 -
 24
24 -
 25
25 -
 26
26 -
 27
27 -
 28
28 -
 29
29 -
30
-
31
-
32
-
33
-
34
-
35
-
36
-
37
-
38
-
39
-
40
-
41
-
42
-
43
-
44
-
45
-
46
-
47
-
48
-
49
-
50
-
51
-
52
-
53
-
54
-
55
-
56
-
57
-
58
-
59
-
60
-
61
-
62
-
63
-
64
-
65
-
66
-
67
-
68
-
69
-
70
-
71
-
72
-
73
-
74
-
75
-
76
-
77
-
78
-
79
-
80
-
81
-
82
-
83
-
84
-
85
-
86
-
87
-
88
-
89
-
90
-
91
-
92
-
93
-
94
-
95
-
96
-
97
-
98
-
99
-
100
-
101
-
102
-
103
-
104
-
105
-
106
-
107
-
108
-
109
-
110
-
111
-
112
-
113
-
114
-
115
-
116
-
117
-
118
-
119
-
120
-
121
-
122
-
123
-
124
-
125
-
126
-
127
-
128
-
129
-
130
-
131
-
132
-
133
-
134
-
135
-
136
-
137
-
138
-
139
-
140
-
141
-
142
-
143
-
144
-
145
-
146
-
147
-
148
-
149
-
150
-
151
-
152
-
153
-
154
-
155
-
156
-
157
-
158
-
159
-
160
-
161
-
162
-
163
-
164
-
165
-
166
-
167
-
168
-
169
-
170
-
171
-
172
-
173
-
174
-
175
-
176
-
177
-
178
-
179
-
180
-
181
-
182
-
183
-
184
-
185
-
186
-
187
-
188
-
189
-
190
-
191
-
192
-
193
-
194
-
195
-
196
-
197
-
198
-
199
-
200
-
201
-
202
-
203
-
204
-
205
-
206
-
207
-
208
 |
 |
