Canon 1236B001 ZoomBrowser EX Instruction Manual Windows - Page 8
Downloading Images from Your Camera, Displaying Images, Handling the Folders
 |
UPC - 013803066098
View all Canon 1236B001 manuals
Add to My Manuals
Save this manual to your list of manuals |
Page 8 highlights
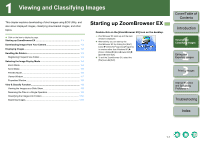
Downloading Images from Your Camera You can download shot images saved on the CF card in your camera to your computer using EOS Utility, software for the camera. For detailed instructions on EOS Utility, refer to the "EOS Utility Instruction Manual". 1 Start up ZoomBrowser EX (p.1-1). 2 Click [Acquire & Camera Settings]. ¿ [Acquire & Camera Settings] menu appears. 3 Click [Connect to EOS Camera]. ¿ [EOS Utility] starts up. 4 Connect the camera to your computer with the interface cable and set the camera's power switch to . 5 Click the [Starts to download images] button in [EOS Utility]. ¿ The images are downloaded to the computer and the downloaded images are displayed in the ZoomBrowser EX main window. When downloading images using a third-party card reader, insert the memory card removed from the camera in the card reader, and click [Acquire Images from Memory Card] in step 3. The image download window appears. You can then download images by clicking the [Starts to download images] button. For detailed information on downloading images using a third-party card reader, refer to "Downloading Images Using Your Card reader" in the "EOS Utility Instruction Manual". Displaying Images The images in the folder selected in the folder area are displayed in the image display area. Select the folder where the images to be displayed are saved. ¿ The images in the folder are displayed in the main window. Handling the Folders You can handle the folder from the menu that appears by clicking the folder with the right button on the mouse. Click on the folder with the right button on the mouse and select an option from the menu that appears. Registering Frequent Use Folder You can register a frequently used folder as a [Favorite Folders]. 1 Select the [All Folders] tab. 2 Select the folder you want to register and then click the [Add to Favorites] button. ¿ The folder is displayed as [ ] 3 Select the [Favorite Folders] tab. ¿ The registered folder appears. O Alternatively, you can register a favorite folder in the dialog box displayed when you click the [Add] button in the [Favorite Folders] tab sheet. O To remove the registered folder, click the [Remove] button in the [Favorite Folders] tab sheet. The removed registered folder is deleted only from the [Favorite Folders] tab sheet and the actual folder or images inside the folder are not deleted. Cover/Table of Contents Introduction 1 Viewing and Classifying Images 2 Editing and Exporting Images 3Printing Images 4 Internet Function and Specifying Preferences Troubleshooting Index 1-3
-
 1
1 -
2
-
 3
3 -
 4
4 -
 5
5 -
 6
6 -
 7
7 -
 8
8 -
 9
9 -
 10
10 -
 11
11 -
 12
12 -
 13
13 -
14
-
15
-
16
-
17
-
18
-
19
-
20
-
21
-
22
-
23
-
24
-
25
-
26
-
27
-
28
 |
 |
