Canon 2092B001 PowerShot A720 IS Camera User Guide - Page 185
indicated by the arrow.
 |
View all Canon 2092B001 manuals
Add to My Manuals
Save this manual to your list of manuals |
Page 185 highlights
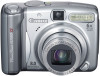
4 Remove the battery holder in the direction indicated by the arrow. Appendix 183 5 Remove the battery by pull- ing it up in the direction indicated by the arrow. (-) Side 6 Insert a new battery with the (-) side facing up. 7 Replace the battery holder and close the cover. 8 When the Date/Time menu appears, set the date and time (p. 12). After purchasing the camera and turning on the power for the first time, although the Date/Time menu will appear, you do not need to replace the date battery. If you ever dispose of your camera, first remove the date battery for recycling according to the recycling system of your country.
-
 1
1 -
2
-
3
-
4
-
5
-
6
-
7
-
8
-
9
-
10
-
11
-
12
-
13
-
14
-
15
-
16
-
17
-
18
-
19
-
20
-
21
-
22
-
23
-
24
-
25
-
26
-
27
-
28
-
29
-
30
-
31
-
32
-
33
-
34
-
35
-
36
-
37
-
38
-
39
-
40
-
41
-
42
-
43
-
44
-
45
-
46
-
47
-
48
-
49
-
50
-
51
-
52
-
53
-
54
-
55
-
56
-
57
-
58
-
59
-
60
-
61
-
62
-
63
-
64
-
65
-
66
-
67
-
68
-
69
-
70
-
71
-
72
-
73
-
74
-
75
-
76
-
77
-
78
-
79
-
80
-
81
-
82
-
83
-
84
-
85
-
86
-
87
-
88
-
89
-
90
-
91
-
92
-
93
-
94
-
95
-
96
-
97
-
98
-
99
-
100
-
101
-
102
-
103
-
104
-
105
-
106
-
107
-
108
-
109
-
110
-
111
-
112
-
113
-
114
-
115
-
116
-
117
-
118
-
119
-
120
-
121
-
122
-
123
-
124
-
125
-
126
-
127
-
128
-
129
-
130
-
131
-
132
-
133
-
134
-
135
-
136
-
137
-
138
-
139
-
140
-
141
-
142
-
143
-
144
-
145
-
146
-
147
-
148
-
149
-
150
-
151
-
152
-
153
-
154
-
155
-
156
-
157
-
158
-
159
-
160
-
161
-
162
-
163
-
164
-
165
-
166
-
167
-
168
-
169
-
170
-
171
-
172
-
173
-
174
-
175
-
176
-
177
-
178
-
179
-
 180
180 -
 181
181 -
 182
182 -
 183
183 -
 184
184 -
 185
185 -
 186
186 -
 187
187 -
 188
188 -
 189
189 -
 190
190 -
191
-
192
-
193
-
194
-
195
-
196
-
197
-
198
-
199
-
200
-
201
-
202
-
203
-
204
-
205
-
206
-
207
-
208
-
209
-
210
-
211
 |
 |

Appendix
183
4
Remove the battery holder
in the direction indicated
by the arrow.
5
Remove the battery by pull-
ing it up in the direction
indicated by the arrow.
6
Insert a new battery with the (–) side facing up.
7
Replace the battery holder and close the
cover.
8
When the Date/Time menu appears, set the
date and time (p. 12).
After purchasing the camera and turning on the power for the
first time, although the Date/Time menu will appear, you do not
need to replace the date battery.
If you ever dispose of your camera, first remove the date battery for
recycling according to the recycling system of your country.
(–) Side