Canon 3079B001 VIXIA HF11 Instruction Manual - Page 49
Self Timer, ON or AUTO
 |
View all Canon 3079B001 manuals
Add to My Manuals
Save this manual to your list of manuals |
Page 49 highlights
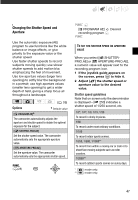
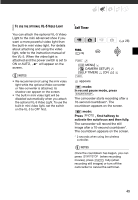
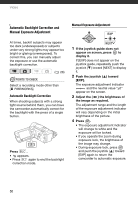
TO USE THE OPTIONAL VL-5 VIDEO LIGHT You can attach the optional VL-5 Video Light to the mini advanced shoe if you want a more powerful video light than the built-in mini video light. For details about attaching and using the video light, refer to the instruction manual of the VL-5. When the video light is attached and the power switch is set to ON or AUTO, will appear on the screen. NOTES • We recommend not using the mini video light while the optional Wide-converter or Tele-converter is attached; its shadow can appear on the screen. • The built-in mini video light will be disabled automatically when you attach the optional VL-5 Video Light. To use the built-in mini video light, set the switch on the VL-5 to OFF first. Self Timer ( 26) FUNC. ( 28) FUNC. [ MENU] [ CAMERA SETUP] [SELF TIMER] [ON ] FUNC. appears. mode: In record pause mode, press START/STOP . The camcorder starts recording after a 10-second countdown*. The countdown appears on the screen. mode: Press PHOTO , first halfway to activate the autofocus and then fully. The camcorder will record the still image after a 10-second countdown*. The countdown appears on the screen. * 2 seconds when using the wireless controller. NOTES Once the countdown has begun, you can press START/STOP (when recording movies), press PHOTO fully (when recording still images) or turn off the camcorder to cancel the self timer. 49
-
 1
1 -
2
-
3
-
4
-
5
-
6
-
7
-
8
-
9
-
10
-
11
-
12
-
13
-
14
-
15
-
16
-
17
-
18
-
19
-
20
-
21
-
22
-
23
-
24
-
25
-
26
-
27
-
28
-
29
-
30
-
31
-
32
-
33
-
34
-
35
-
36
-
37
-
38
-
39
-
40
-
41
-
42
-
43
-
 44
44 -
 45
45 -
 46
46 -
 47
47 -
 48
48 -
 49
49 -
 50
50 -
 51
51 -
 52
52 -
 53
53 -
 54
54 -
55
-
56
-
57
-
58
-
59
-
60
-
61
-
62
-
63
-
64
-
65
-
66
-
67
-
68
-
69
-
70
-
71
-
72
-
73
-
74
-
75
-
76
-
77
-
78
-
79
-
80
-
81
-
82
-
83
-
84
-
85
-
86
-
87
-
88
-
89
-
90
-
91
-
92
-
93
-
94
-
95
-
96
-
97
-
98
-
99
-
100
-
101
-
102
-
103
-
104
-
105
-
106
-
107
-
108
-
109
-
110
-
111
-
112
-
113
-
114
-
115
-
116
-
117
-
118
-
119
-
120
-
121
-
122
-
123
-
124
-
125
-
126
-
127
-
128
-
129
-
130
-
131
 |
 |
