Canon BJC-55 BJC-55 Setup - Page 2
Install the Printer Driver Windows, Install the Printer Driver, Macintosh, Getting Help From Canon, - driver windows 7
 |
View all Canon BJC-55 manuals
Add to My Manuals
Save this manual to your list of manuals |
Page 2 highlights
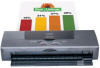
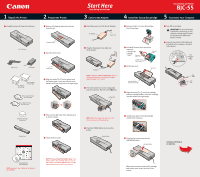
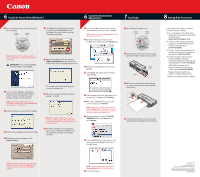
6 Install the Printer Driver (Windows®) Windows 1 Be sure that the printer is off, then turn on your computer. POWER Lamp off POWER Button 6 Click Start. (If the Printer Driver button is not red, select Printer Driver, then click Start.) The printer driver will start loading automatically. 6 Install the Printer Driver (Macintosh®) Macintosh 1 Turn on your Mac® and insert the "BJC-55 Setup Software & User's Guide" CD-ROM. NOTE: Screen shots may differ depending on the operating system used. 2 Open the Printer Driver folder on the CD-ROM, then double-click the Installer icon. 7 Load Paper 1 Be sure that your printer is on. POWER Lamp on POWER Button NOTE: For Windows® XP or Windows 2000, log on to Windows as an Administrator before continuing. IMPORTANT: If you see the Add New Hardware Wizard, click Cancel. 7 When the Printer Port window appears, TURN THE PRINTER ON so the printer port (connection) can be automatically detected. 3 Read the License Agreement, then click Accept. 4 Click Install. The printer driver will load automatically. 2 Close any open software applications, then insert the "BJC-55 Setup Software & User's Guide" CD-ROM. The setup program should run automatically. NOTE: If the setup program does not run, click Start, then Run, then type D:\msetup.exe, where D is your CD-ROM drive. 3 Read the Welcome screen, then click Next. 4 Read the License Agreement, then click Yes. 5 When the main menu appears, click Install Software. The software will begin identifying the printer port being used. 8 When the Terminate Installation window appears, click OK. NOTE: Remember to register your product to ensure product support. The serial number is located on the inside of the printer, behind the battery pack. 9 When the installation and registration process has completed, click Exit. If you are prompted to restart the computer, click Yes. 5 If the message "No other applications can be running..." displays, click Continue. 6 When the "Installation was successful" screen displays, click Restart. NOTE: Access your CD-ROM, double-click on Product Registration to register your product. The serial number is located on the inside of the printer, behind the battery pack. 7 After the computer restarts, TURN THE PRINTER ON. Select the Apple menu, then Chooser. 8 Click the BJC-55 icon in the Chooser. The printer name will highlight and move to the right panel. 2 Open the front cover and move your paper guide to the right to match your paper size. LTR Letter Paper Guide 3 With the side you want to print on facing up, insert a sheet of paper into the printer until it stops. 4 Hold the sheet for about 2 seconds; it will automatically feed partially into the printer. 8 Getting Help From Canon Canon offers a full range of customer technical support* options: • For e-mail support, the latest driver downloads and answers to frequently asked questions (www.canontechsupport.com) • 24-hour, 7-day-a-week, automated support for troubleshooting issues on most current products (1-800-423-2366) • 24-hour, Fax-On-Demand System for product specifications and technical information (1-800-526-4345) • Technical support, free of service charges, Monday-Saturday (excluding holidays) for products still under warranty** (1-757-413-2848) NOTE: Within Canada, call for technical support 24 hours a day, 7 days a week (1-800-OK-CANON) *Support program specifics are subject to change without notice. **Refer to the warranty card for details. NOTE: If you are prompted to restart Windows, remove the CD-ROM, then click OK. After the computer restarts, insert the CD-ROM and continue. NOTE: To use the BJ Print Monitor, click the Backgrounding button to the On position. 9 Close the Chooser 40-42316-0602 Part no. QA7-2445 ©2002 Canon U.S.A., Inc. Canon is a registered trademark of Canon Inc. All other products and brand names are registered trademarks or trademarks of their respective owners. Specifications subject to change without notice. PRINTED IN JAPAN
-
 1
1 -
 2
2
 |
 |