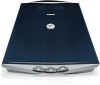
Canon CanoScan 3200F CanoScan 3200/3200F Quick Start Guide - Page 10
Windows - color image scanner
 |
View all Canon CanoScan 3200F manuals
Add to My Manuals
Save this manual to your list of manuals |
Page 10 highlights
Try Scanning Windows 3 Click the Acquire icon or click the [File] menu and select [Acquire]. Macintosh 3 Click the Acquire icon or click the [File] menu and select [Acquire]. If an error message appears, click the [File] menu, choose [Select Source], select your scanner model name and click the [Select] button. If an error message appears, click the [File] menu, choose [Select Source], select your scanner model name and click the [OK] button. ScanGear CS will start. Mac OS X ScanGear CS will start. 4 Select the [Select source]. You can select from the following options. Photo (Color)/Magazine (Color)/Newspaper (B&W)/Document (Grayscale). 5 Click [Preview]. After calibration, the preview scan will start and gradually display the image. The image is automatically cropped at its original size. If you want to trim the image further, drag the mouse diagonally to select the area. • Do not open the document cover while a scan is in progress. 6 Select the [Destination]. You can select [Print] or [Image display]. When [Print] is selected, the output resolution is set to 300 dpi. When [Image display] is selected, it is set to 150 dpi. [Print] is selected in this example. 8
-
 1
1 -
2
-
3
-
4
-
 5
5 -
 6
6 -
 7
7 -
 8
8 -
 9
9 -
 10
10 -
 11
11 -
 12
12 -
 13
13 -
 14
14 -
 15
15 -
16
-
17
-
18
-
19
-
20
 |
 |
