Canon EOS-1D Mark IV Professional Products 2010 Brochure - Page 15
Camera Live View Function - sports settings
 |
UPC - 013803119602
View all Canon EOS-1D Mark IV manuals
Add to My Manuals
Save this manual to your list of manuals |
Page 15 highlights
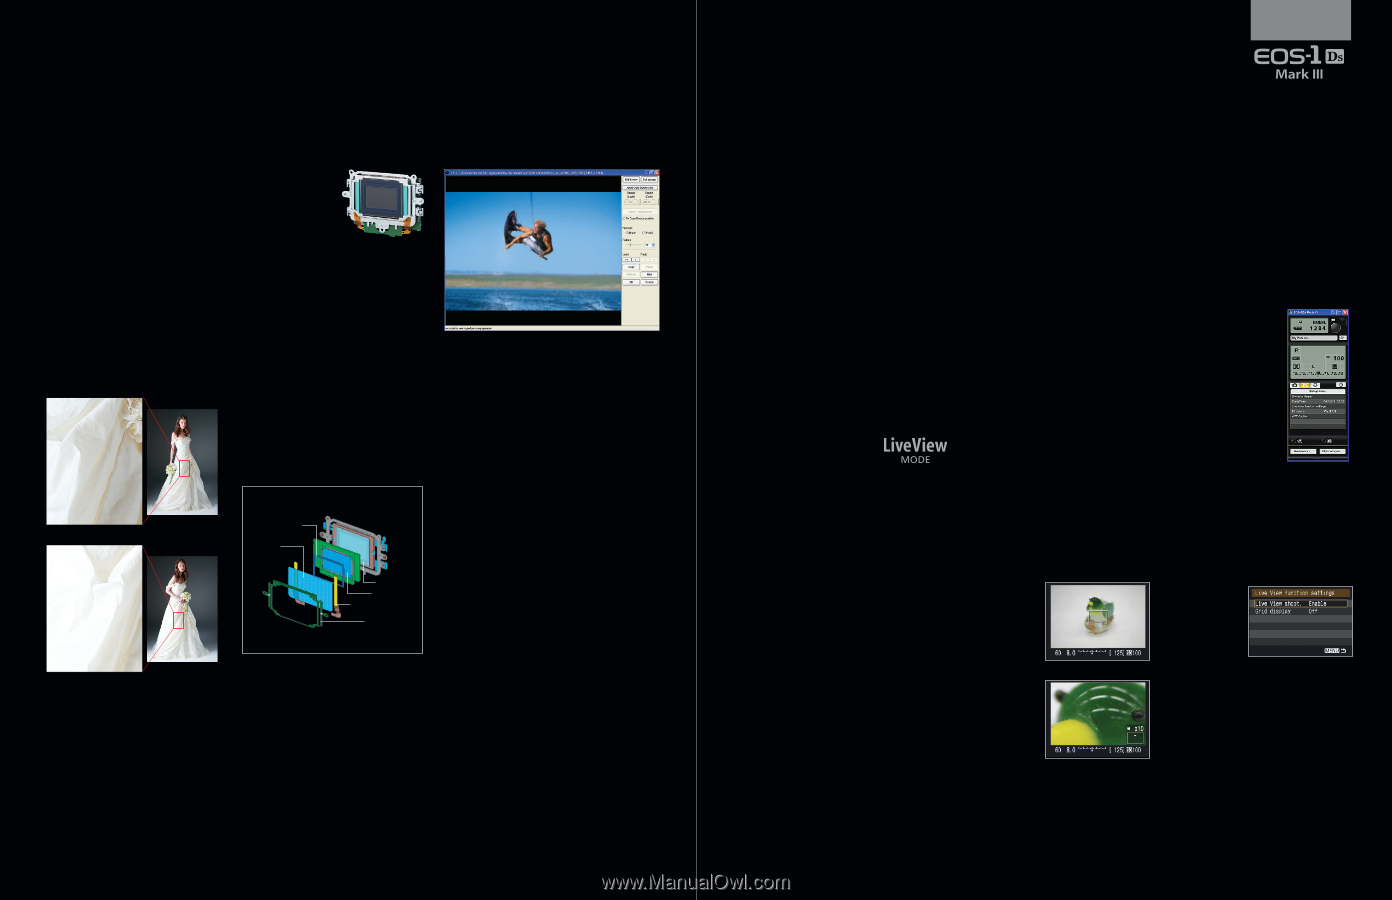
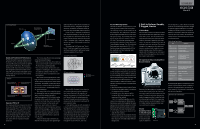
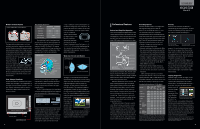
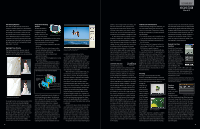
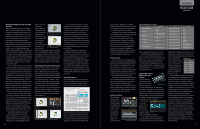
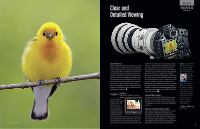
File Naming Options Each EOS-1Ds Mark III body comes with a unique, 4-character prefix for its file numbers. It also offers two user-defined options to tailor file naming to the shooter's needs: the user can set their own first four characters for file names (ABCD1234.jpg) or set the first three characters, and have the camera add the 4th to indicate size of the file (L for full-resolution, M for M1, N for M2, or S for Small JPEG/Small RAW-ABCL1234.CR2). Highlight Tone Priority This feature extends the dynamic range of highlights by about one stop and improves gradation within highlight areas. By expanding Highlight Tone Priority: ON Highlight Tone Priority: OFF the range from the correct exposure level (18% gray) to the maximum allowable highlight level, the gradation from the grays to the highlights becomes smoother and loss in highlight detail is minimized. If [C.Fn II-3; 1: Enable] is set, the ISO range is ISO 200-3200 (EOS-1Ds Mark III: 20-1600).* When active, zeros in the ISO display are lower case (2oo, 4oo, etc). Depending on shooting conditions, noise in the shadow areas may increase slightly. *Standard output sensitivity. Recommended exposure index. Integrated Cleaning System The EOS-1Ds Mark III incorporates the EOS Integrated Cleaning System, which is a com- Self Cleaning Sensor Unit plete anti-dust system. It suppresses dust generation and dust adhering to the sensor, removes dust and makes any remaining dust less noticeable. • The shutter has been improved to generate less dust. • The IR-cut filter's anti-static charge surface prevents attracting dust due to static charge. • The sensor unit is self-cleaning. • Dust Delete Data can be obtained and appended to images. • Manual cleaning of the imaging sensor using air is still an option. The compact Self Cleaning Sensor Unit is optimized for the full-frame EOS-1Ds Mark III. On the front infrared-absorption glass, two thin, single-layer piezo-electric elements are Self Cleaning Sensor Unit Construction Diagram Sealing material Infraredabsorption glass CMOS sensor Low-pass filter Piezoelectric element Support material attached. By applying ultrasonic vibration to the infrared absorption glass, the adhering dust is shaken off. The removed dust particles stick onto adhesive material around the infrared absorption glass. Also, to prevent dust from entering the sensor unit, the assembly is secured with sealing material around the perimeter. Unlike some competitors who vibrate an extra glass plate, the EOS-1Ds Mark III vibrates the infrared absorption glass directly, so the optical performance is not degraded by an extra layer of glass and the unit can be kept compact. The Self Cleaning Sensor Unit can therefore be incor- Dust in the image is deleted by Digital Photo Professional software using "Dust Delete Data." porated in a conventional size body. Operation timing is either Auto or Manual. The default setting has the unit operating for about 3.5 seconds whenever you turn the power switch ON or OFF. While the unit is operating, the LCD monitor displays a logo indicating that sensor cleaning is being executed. If the menu is set to [Auto cleaning: Disable], the auto cleaning is not executed. When the menu is set to [Clean now], you can clean the sensor whenever you wish. It takes about 4 seconds. During the cleaning, ultrasonic vibration is applied to the infraredabsorption glass and the shutter is cocked three times so that the dust falls off the infrared-absorption glass and any dust resettling on the shutter curtains is also shaken off. During sensor cleaning, whether started automatically or manually, pressing the shutter button halfway or pressing the Menu button will immediately terminate the cleaning and the camera will be ready to shoot. Because the unit has very low power consumption, cleanings do not significantly affect the number of possible shots, even if the default Auto setting is selected. To prevent the piezo-electric elements from overheating and to ensure proper cleaning, the unit cannot operate again within 3 seconds of finishing operation. Also, if the unit operates five times successively at intervals shorter than 10 seconds, it will not operate again for 10 seconds. During the stoppage, the [Clean now] menu option can not be selected. The position and size of any remaining dust 29 TECHNOLOGY particles can be mapped onto each image, and the dust "cloned-out" with supplied Canon Digital Photo Professional software. This removal of dust takes place with a simple mouse click, and can be automatically performed on one or hundreds of images at a time. A "Dust Delete Data" test image needs to be taken to enable this, and after it's taken, the location of any remaining dust is added to each subsequent image. Activated via a Menu setting, the user simply sets their camera lens to infinity, and fills the frame with a plain white subject located about 1 or 2 feet away. A test shot is taken, with the camera switching momentarily to Av mode at f/22. The LCD monitor confirms whether Dust Delete Data was successfully acquired. Dust Delete Data can be updated whenever the photographer feels it's necessary. Live View Function Live View Function is a significant addition to the professional SLR shooter's arsenal. It is a terrific problemsolver for all those situations in which it would be awkward, difficult or impossible to look through the viewfinder to compose, meter and shoot. In response to the particular requests of studio and remote sports photographers, EVF (Electronic ViewFinder) shooting with a computer, wired or wireless, is possible with the EOS-1Ds Mark III. By connecting the camera via USB to a computer with the EOS Utility 2.0 software provided, the computer will display in real time the image output by the camera's imaging sensor. You can then check and adjust the focus, subject framing and so forth in real time and shoot remotely. With the optional Wireless File Transmitter WFT-E2 II A* or WFT-E2A attached, you can use a wireless LAN and see the Remote Live View Function on a computer without using a cable. Key features of Live View Function include a 100% field-of-view, precise manual focusing with 5x and 10x magnification, the ability to pre-visualize exposure, framing and focusing on a computer monitor, easy checking for moiré and false color, displaying film-related aspect ratios and having a video-out terminal for TV display. Camera Live View Function Instead of looking through the viewfinder, you can shoot while viewing the scene on the camera's LCD monitor. Compared to looking through the viewfinder, it provides the following advantages: 1. The real-time picture can be magnified by 5x or 10x to help make focusing more precise. 2. Shoot while checking the composition on the LCD monitor. 3. You can view a live histogram before the shot is taken (C.Fn IV-16-1, then press the INFO button to apply histogram). Live View Function is extremely effective in a variety of conditions. It's applied by first enabling it with a menu setting, and then pressing the SET button. The reflex mirror will then lock up, the shutter will open, and the image output from the CMOS sensor will be displayed in real time and 100% image coverage on the camera's LCD monitor. Press the SET button again and the reflex mirror will go back down and the shooting with Live View Function will end. Focusing Focusing is manual-only with Live View Function. Use the Multi-controller to move the AF point aimed over the area on which you want to focus, then press the Magnify button to enlarge the image by 5x or 10x at the AF point's position. Press the button again to return to normal view. At Live View Function enabled 5x or 10x magni- fication, you can focus manually while looking at the LCD monitor. To make it easier to focus during the magnified With 10x magnification view, image sharpness is applied at a higher setting on the LCD monitor than it really is. Pressing the depth-of-field preview button stops down to the aperture that will be used to take the picture. It will simulate the shooting exposure and you can check both the exposure level and depth-of-field. If you use depth-of-field preview during regular viewfinder shooting, the viewfinder will look dark and it may be difficult to see the depth-of-field. However, with Live View Function shooting, a clever simulation is displayed so checking the depth-of-field is easier as long as the exposure setting is near the metering's correct exposure. Remote Live View Function Remote Live View Function is controlled through the EOS Utility software included on the EOS Digital Solution Disk, Ver.14 or higher. The camera can be connected, either wired with the provided USB 2.0 HiSpeed cable, or wirelessly with the Wireless File Transmitter WFT-E2 II A* or WFT-E2A. To get started, the camera must be set to enable Live View Function. Then, click the [Starting Live View Function] selection on the Remote Live View Function screen. *This device has not been authorized as required by the rules of the Federal Communications Commission. This device is not, and may not, be offered for sale or lease, or sold or leased, until authorization is obtained. Function Settings The metering mode is set to AF point-linked Evaluative meter- Live View Function settings ing. Other shooting settings (Shooting mode, Drive mode, Image Size, ISO speed, Exposure Compensation, etc.) can be set in the same way as during viewfinder shooting. The meter- ing timer is 16 seconds (including AE lock). Focus presets with super telephoto lenses cannot be used. Even during shooting with Live View Function, the power will turn off after the [Auto power off] time elapses. During Live View Function, pressing the MENU or Playback button will terminate the Live View Function shooting and the menu screen or image play- back will appear. 30
-
 1
1 -
2
-
3
-
4
-
5
-
6
-
7
-
8
-
9
-
 10
10 -
 11
11 -
 12
12 -
 13
13 -
 14
14 -
 15
15 -
 16
16 -
 17
17 -
 18
18 -
 19
19 -
 20
20 -
21
-
22
-
23
-
24
-
25
-
26
-
27
-
28
-
29
-
30
-
31
-
32
 |
 |