Canon EOS Digital Rebel EOS DIGITAL Software Instruction Manual (EOS Viewer Ut - Page 195
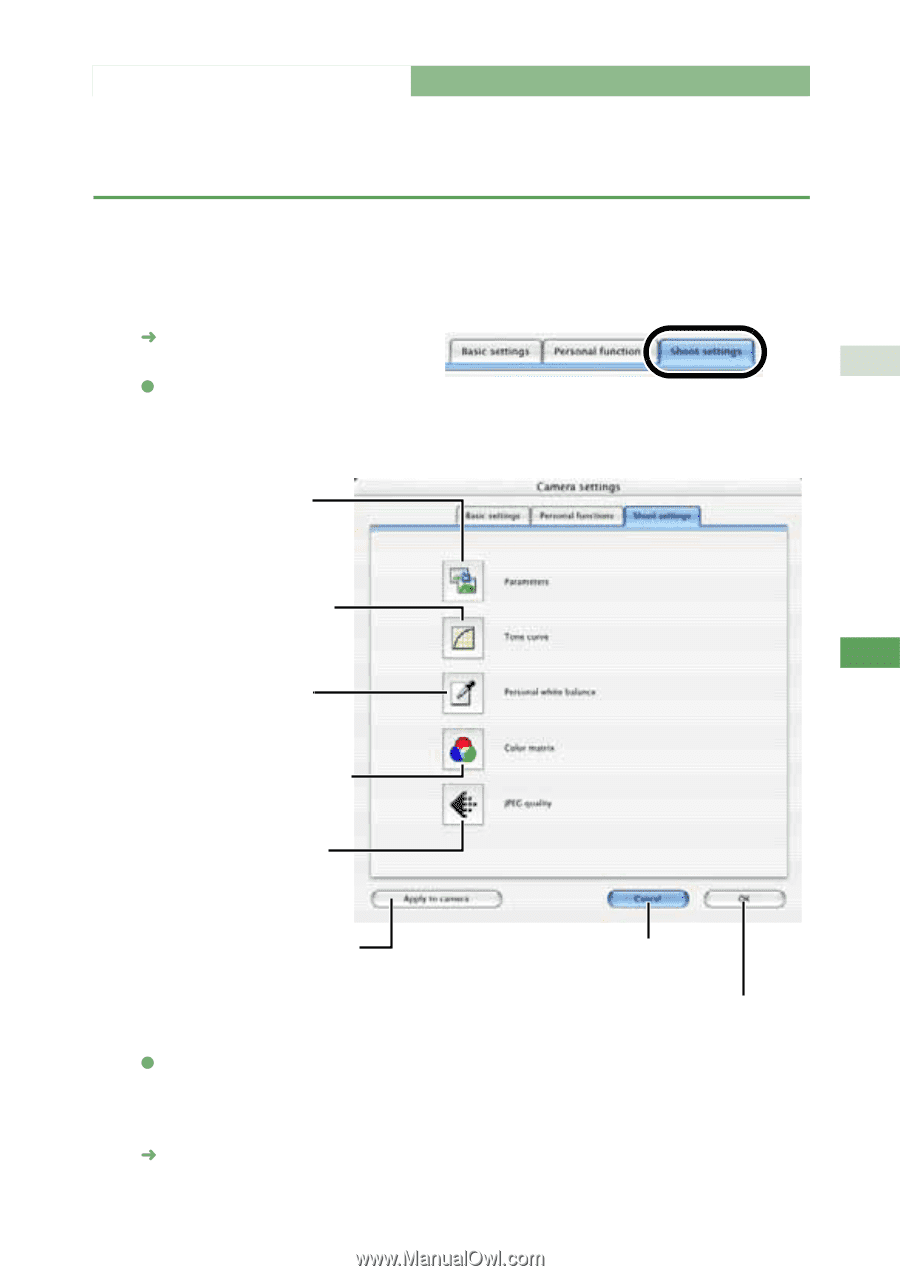
Display the [Camera settings] dialog box, Select the [Shoot settings] tab., Click one of the buttons
 |
View all Canon EOS Digital Rebel manuals
Add to My Manuals
Save this manual to your list of manuals |
Page 195 highlights
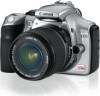
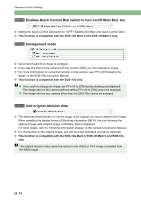
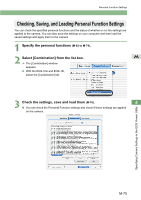
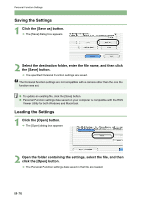
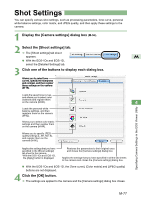
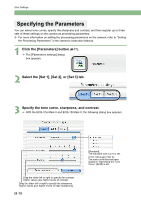
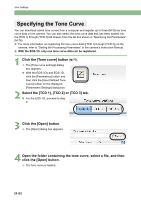
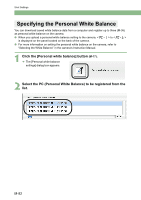
Shot Settings You can specify various shot settings, such as processing parameters, tone curve, personal white balance settings, color matrix, and JPEG quality, and then apply these settings to the camera. 1 Display the [Camera settings] dialog box (M-56). 2 Select the [Shoot settings] tab. ¿ The [Shoot settings] tab sheet appears. M O With the EOS-1Ds and EOS-1D, select the [Detailed Settings] tab. 3 Click one of the buttons to display each dialog box. Allows you to select tone curves, specify the sharpness and contrast, and then register these settings on the camera (M-78). Loads the saved tone curves, and allows you to select color channels and register them on the camera (M-80). 4 Loads the personal white balance settings, and then registers them on the camera (M-82). Allows you to select color matrix settings and then register them on the camera (M-84). Allows you to specify JPEG quality settings (L, M1, M2, S), and register them on the camera (M-86). Specifying Camera Settings in the EOS Viewer Utility Applies the settings that you have specified in the [Shoot settings] tab sheet to the camera. *With the EOS-1Ds and EOS-1D, the [Apply] button is displayed. Restores the parameters to their original ones and closes the [Camera settings] dialog box. Applies the settings that you have specified in all the tab sheets to the camera and closes the [Camera settings] dialog box. O With the EOS-1Ds and EOS-1D, the [Tone curve], [Color matrix] and [JPEG quality] buttons are not displayed. 4 Click the [OK] button. ¿ The settings are applied to the camera and the [Camera settings] dialog box closes. M-77
-
 1
1 -
2
-
3
-
4
-
5
-
6
-
7
-
8
-
9
-
10
-
11
-
12
-
13
-
14
-
15
-
16
-
17
-
18
-
19
-
20
-
21
-
22
-
23
-
24
-
25
-
26
-
27
-
28
-
29
-
30
-
31
-
32
-
33
-
34
-
35
-
36
-
37
-
38
-
39
-
40
-
41
-
42
-
43
-
44
-
45
-
46
-
47
-
48
-
49
-
50
-
51
-
52
-
53
-
54
-
55
-
56
-
57
-
58
-
59
-
60
-
61
-
62
-
63
-
64
-
65
-
66
-
67
-
68
-
69
-
70
-
71
-
72
-
73
-
74
-
75
-
76
-
77
-
78
-
79
-
80
-
81
-
82
-
83
-
84
-
85
-
86
-
87
-
88
-
89
-
90
-
91
-
92
-
93
-
94
-
95
-
96
-
97
-
98
-
99
-
100
-
101
-
102
-
103
-
104
-
105
-
106
-
107
-
108
-
109
-
110
-
111
-
112
-
113
-
114
-
115
-
116
-
117
-
118
-
119
-
120
-
121
-
122
-
123
-
124
-
125
-
126
-
127
-
128
-
129
-
130
-
131
-
132
-
133
-
134
-
135
-
136
-
137
-
138
-
139
-
140
-
141
-
142
-
143
-
144
-
145
-
146
-
147
-
148
-
149
-
150
-
151
-
152
-
153
-
154
-
155
-
156
-
157
-
158
-
159
-
160
-
161
-
162
-
163
-
164
-
165
-
166
-
167
-
168
-
169
-
170
-
171
-
172
-
173
-
174
-
175
-
176
-
177
-
178
-
179
-
180
-
181
-
182
-
183
-
184
-
185
-
186
-
187
-
188
-
189
-
 190
190 -
 191
191 -
 192
192 -
 193
193 -
 194
194 -
 195
195 -
 196
196 -
 197
197 -
 198
198 -
 199
199 -
 200
200 -
201
-
202
-
203
-
204
-
205
-
206
-
207
-
208
-
209
-
210
-
211
-
212
-
213
-
214
-
215
-
216
-
217
-
218
-
219
-
220
-
221
-
222
 |
 |