Canon Elura 60 ELURA70/ELURA65/ELURA60 Instruction Manual - Page 135
About the NETWORK Mode
 |
UPC - 013803040166
View all Canon Elura 60 manuals
Add to My Manuals
Save this manual to your list of manuals |
Page 135 highlights
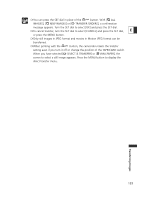
About the NETWORK Mode The NETWORK mode is for use with DV Messenger version 2 (Windows XP only). Set the camcorder to NETWORK mode and connect it to the computer using a DV E (IEEE1394) cable. For details on DV Messenger version 2, refer to the DV Network Software Instruction Manual. Connection 1. Install DV Messenger. 2. Connect the power adapter to the camcorder. 3. Press the small button below the POWER switch and turn the POWER switch to NETWORK. POWER CAMERA PLAY (VCR) NETWORK 4. Connect the camcorder to the computer using a DV cable. • "NETWORK MODE" appears on the camcorder screen. • When you have connected the camcorder to the computer, start DV Messenger. You can now operate the camcorder from the computer using DV Messenger. ❍ When DV Messenger is started and set up for communication, the video picture appears on the computer screen. ❍ In NETWORK mode, the camcorder can only be operated from the computer, except for the following functions: - When the DV Messenger [CAMERA] control panel is displayed: Zoom and focus (when DV Messenger set to autofocus) - When the DV Messenger [VCR] control panel is displayed: Volume adjustment of the built-in speaker ❍ The image stabilizer and digital zoom cannot be used with DV Messenger. ❍ The camcorder cannot be operated with the wireless controller. Additional Information 135
-
 1
1 -
2
-
3
-
4
-
5
-
6
-
7
-
8
-
9
-
10
-
11
-
12
-
13
-
14
-
15
-
16
-
17
-
18
-
19
-
20
-
21
-
22
-
23
-
24
-
25
-
26
-
27
-
28
-
29
-
30
-
31
-
32
-
33
-
34
-
35
-
36
-
37
-
38
-
39
-
40
-
41
-
42
-
43
-
44
-
45
-
46
-
47
-
48
-
49
-
50
-
51
-
52
-
53
-
54
-
55
-
56
-
57
-
58
-
59
-
60
-
61
-
62
-
63
-
64
-
65
-
66
-
67
-
68
-
69
-
70
-
71
-
72
-
73
-
74
-
75
-
76
-
77
-
78
-
79
-
80
-
81
-
82
-
83
-
84
-
85
-
86
-
87
-
88
-
89
-
90
-
91
-
92
-
93
-
94
-
95
-
96
-
97
-
98
-
99
-
100
-
101
-
102
-
103
-
104
-
105
-
106
-
107
-
108
-
109
-
110
-
111
-
112
-
113
-
114
-
115
-
116
-
117
-
118
-
119
-
120
-
121
-
122
-
123
-
124
-
125
-
126
-
127
-
128
-
129
-
 130
130 -
 131
131 -
 132
132 -
 133
133 -
 134
134 -
 135
135 -
 136
136 -
 137
137 -
 138
138 -
 139
139 -
 140
140 -
141
-
142
-
143
-
144
-
145
-
146
-
147
-
148
-
149
-
150
-
151
-
152
-
153
-
154
-
155
-
156
-
157
-
158
-
159
-
160
-
161
-
162
 |
 |
