Canon FS300 FS30/FS31/FS300 Pixela Image Mixer Installation Guide - Page 6
ImageMixer 3 SE Transfer
 |
View all Canon FS300 manuals
Add to My Manuals
Save this manual to your list of manuals |
Page 6 highlights
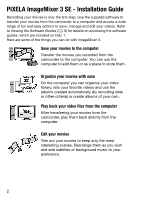
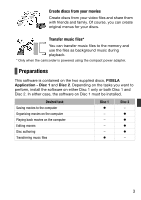
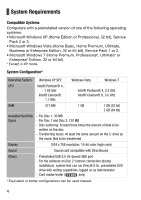
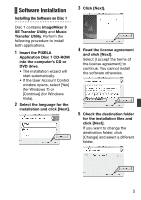
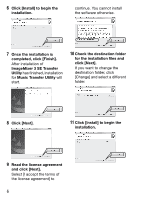
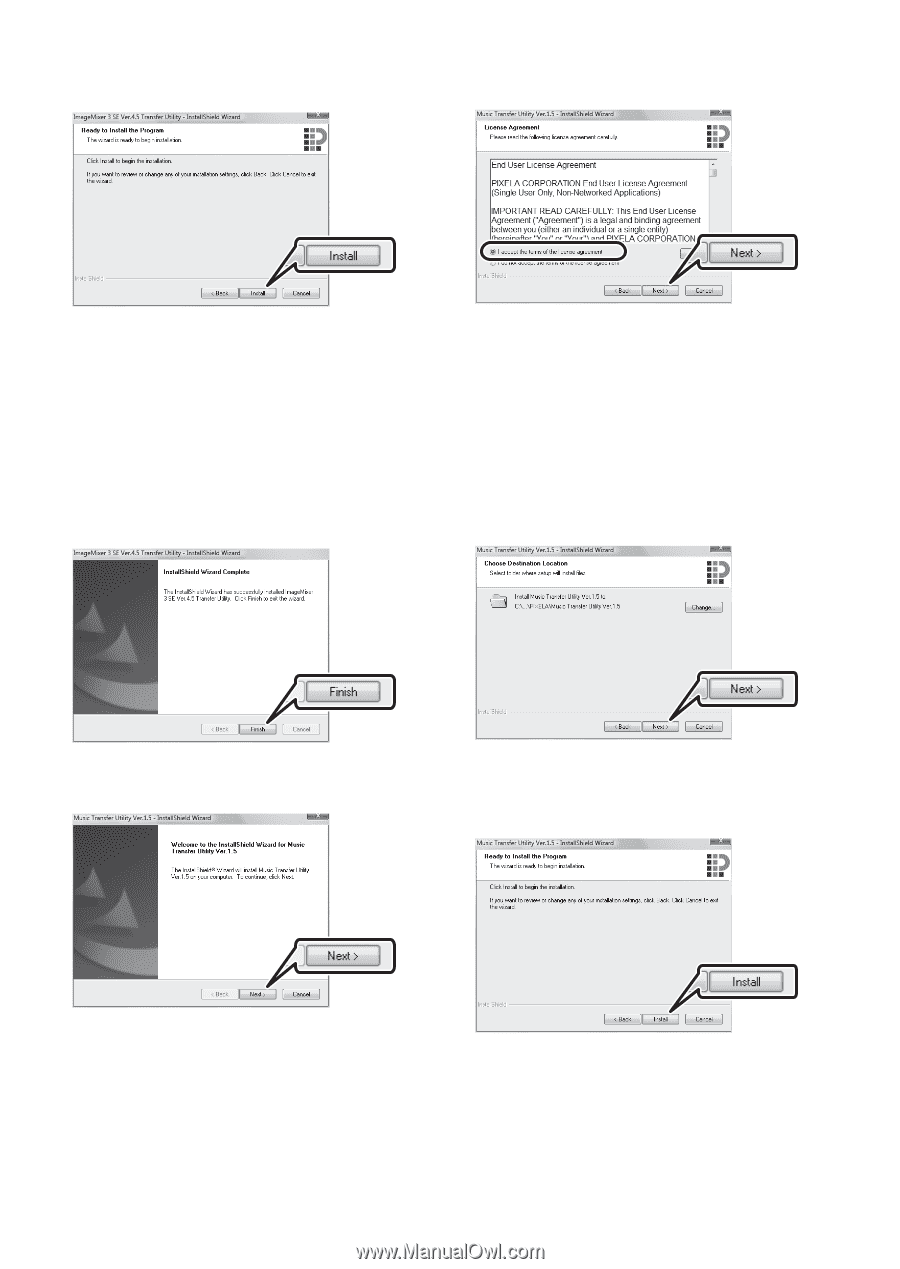
6 Click [Install] to begin the installation. continue. You cannot install the software otherwise. 7 Once the installation is completed, click [Finish]. After installation of ImageMixer 3 SE Transfer Utility has finished, installation for Music Transfer Utility will start. 10 Check the destination folder for the installation files and click [Next]. If you want to change the destination folder, click [Change] and select a different folder. 8 Click [Next]. 11 Click [Install] to begin the installation. 9 Read the license agreement and click [Next]. Select [I accept the terms of the license agreement] to 6
-
 1
1 -
 2
2 -
 3
3 -
 4
4 -
 5
5 -
 6
6 -
 7
7 -
 8
8 -
 9
9 -
 10
10
 |
 |
6
6
Click [Install] to begin the
installation.
7
Once the installation is
completed, click [Finish].
After installation of
ImageMixer 3 SE Transfer
Utility
has finished, installation
for
Music Transfer Utility
will
start.
8
Click [Next].
9
Read the license agreement
and click [Next].
Select [I accept the terms of
the license agreement] to
continue. You cannot install
the software otherwise.
10
Check the destination folder
for the installation files and
click [Next].
If you want to change the
destination folder, click
[Change] and select a different
folder.
11
Click [Install] to begin the
installation.