Canon Macro Ring Lite MR-14EX II Instruction Manual - Page 73
Troubleshooting Guide
 |
View all Canon Macro Ring Lite MR-14EX II manuals
Add to My Manuals
Save this manual to your list of manuals |
Page 73 highlights
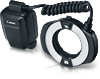
Troubleshooting Guide If a problem occurs with the flash, first refer to this Troubleshooting Guide. If this Troubleshooting Guide does not resolve the problem, contact your dealer or nearest Canon Service Center. Normal Shooting The power does not turn on. Make sure that the batteries are installed in the correct orientation (p.14). Make sure that the battery compartment cover is closed (p.14). Replace the batteries with new ones. Insert batteries into the flash unit, even when using an external power source (p.68). The MR-14EX II does not fire. Insert the mounting foot into the camera's hot shoe all the way, slide the lock lever to the right, and secure the control unit to the camera (p.15). If the indication remains displayed for 30 sec. or longer, replace the batteries (p.14). If the electrical contacts of the control unit or camera are dirty, wipe the contacts (p.9) using a dry cloth. The power turns off by itself. The MR-14EX II's auto power off has activated. Press the shutter button halfway, or press the test flash button (p.18). Pictures are underexposed or overexposed. If there is a highly reflective object in the picture, use FE lock (p.29). If the main subject looks very dark or very bright, set flash exposure compensation (p.27). With high-speed sync, the faster the shutter speed, the lower the guide number will be. Move closer to the subject (p.30). Do not fire slave C directly pointing toward the main subject (p.44). 71
-
 1
1 -
2
-
3
-
4
-
5
-
6
-
7
-
8
-
9
-
10
-
11
-
12
-
13
-
14
-
15
-
16
-
17
-
18
-
19
-
20
-
21
-
22
-
23
-
24
-
25
-
26
-
27
-
28
-
29
-
30
-
31
-
32
-
33
-
34
-
35
-
36
-
37
-
38
-
39
-
40
-
41
-
42
-
43
-
44
-
45
-
46
-
47
-
48
-
49
-
50
-
51
-
52
-
53
-
54
-
55
-
56
-
57
-
58
-
59
-
60
-
61
-
62
-
63
-
64
-
65
-
66
-
67
-
 68
68 -
 69
69 -
 70
70 -
 71
71 -
 72
72 -
 73
73 -
 74
74 -
 75
75 -
 76
76 -
 77
77 -
 78
78 -
79
-
80
-
81
-
82
-
83
-
84
-
85
-
86
-
87
-
88
-
89
-
90
-
91
-
92
-
93
-
94
-
95
-
96
-
97
-
98
-
99
-
100
-
101
-
102
-
103
-
104
-
105
-
106
-
107
-
108
-
109
-
110
-
111
-
112
-
113
-
114
-
115
-
116
-
117
-
118
-
119
-
120
-
121
-
122
-
123
-
124
-
125
-
126
-
127
-
128
-
129
-
130
-
131
-
132
-
133
-
134
-
135
-
136
-
137
-
138
-
139
-
140
-
141
-
142
-
143
-
144
-
145
-
146
-
147
-
148
-
149
-
150
-
151
-
152
-
153
-
154
-
155
-
156
-
157
-
158
-
159
-
160
-
161
-
162
-
163
-
164
-
165
-
166
-
167
-
168
-
169
-
170
-
171
-
172
-
173
-
174
-
175
-
176
-
177
-
178
-
179
-
180
-
181
-
182
-
183
-
184
-
185
-
186
-
187
-
188
-
189
-
190
-
191
-
192
-
193
-
194
-
195
-
196
-
197
-
198
-
199
-
200
-
201
-
202
-
203
-
204
-
205
-
206
-
207
-
208
-
209
-
210
-
211
-
212
-
213
-
214
-
215
-
216
-
217
-
218
-
219
-
220
-
221
-
222
-
223
-
224
-
225
-
226
-
227
-
228
-
229
-
230
-
231
-
232
-
233
-
234
-
235
-
236
-
237
-
238
-
239
-
240
-
241
-
242
-
243
-
244
-
245
-
246
-
247
-
248
-
249
-
250
-
251
-
252
-
253
-
254
-
255
-
256
-
257
-
258
-
259
-
260
 |
 |
