Canon N1240U CanoScan N670U/N676U/N1240U Toolbox3.0 for Win/Mac Guide - Page 15
Copy Settings 3/5 - drivers seven
 |
UPC - 013803007404
View all Canon N1240U manuals
Add to My Manuals
Save this manual to your list of manuals |
Page 15 highlights
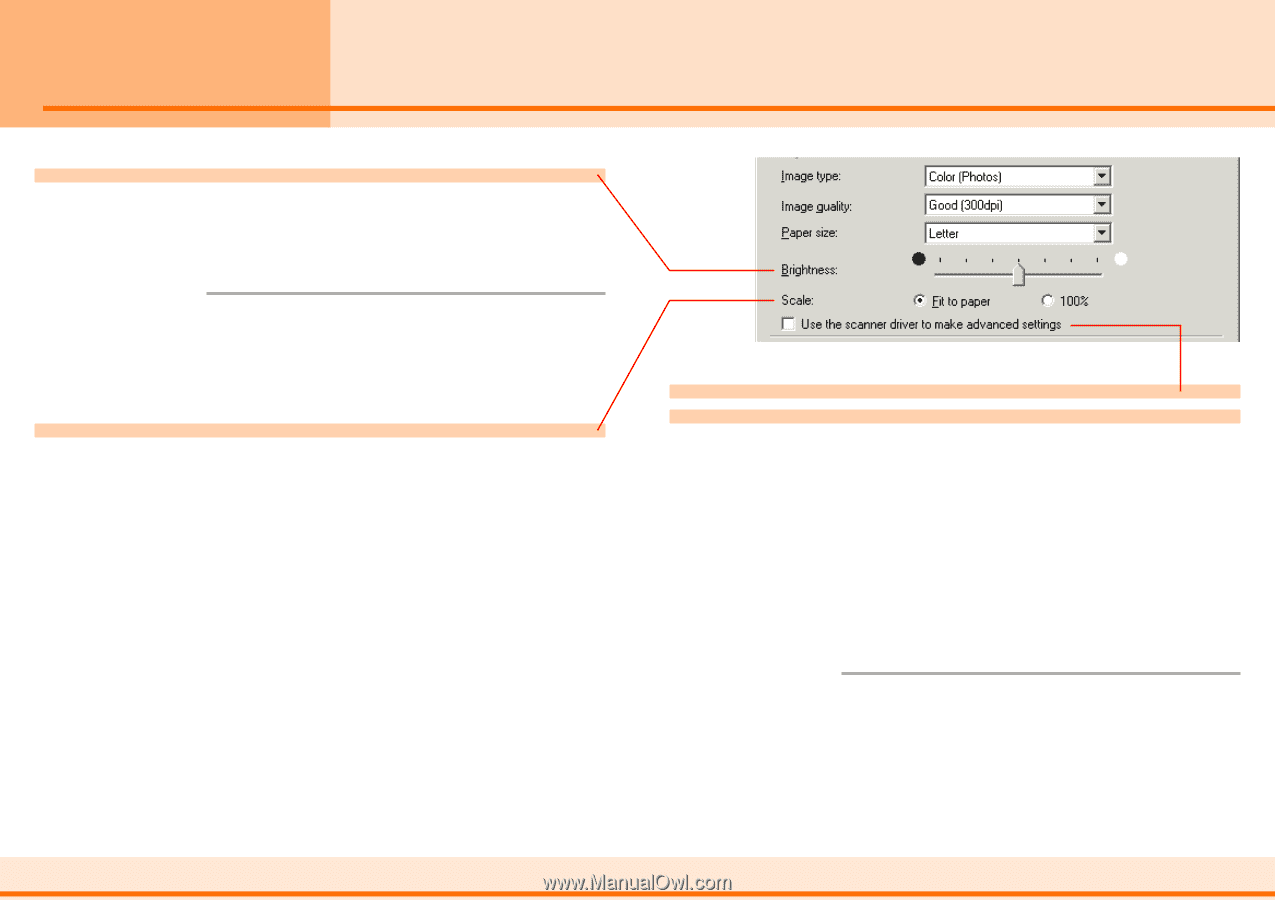
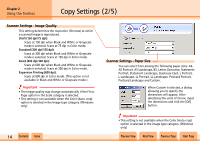
Chapter 2 Using the Toolbox Copy Settings (3/5) Scanner Settings - Brightness You can adjust the brightness by dragging the tab left or right. Moving it left darkens the image and moving it right brightens it. f Note • This category sets the threshold value for black and white when the Black and White option is selected in the Image type category. Scanner Settings - Scale This setting allows you to expand or reduce the size of an image for printing to fit the paper specified in the Paper size category. Fit to paper: Automatically adjusts the size of the entire printed image to fit the size of paper specified for printing. Since it cannot change the width-to-height ratio, it may leave a white space on the sides or top and bottom of an image if the original item and the printing paper have different shapes. 100%: Prints the image at the original size of the item. Scanner Settings - Use the Scanner Driver to Make Advanced Settings If this setting is left unchecked, clicking the [Copy] button at the dialog's bottom right starts the scan immediately. If a check mark is placed beside the setting, clicking the [Copy] button displays the ScanGear CS-U window, allowing you to adjust various settings in detail. The Image type,Image quality, Paper size, and Brightness settings cannot be set via the Toolbox when a check mark is placed beside this setting. Set these settings in the ScanGear CS-U window. f Note • If you place multiple photos on the document glass and use the Multi-Photo Mode setting in the ScanGear CS-U window, the images will be scanned as a single composite image by the Toolbox Copy function. w w 15 Contents Index Previous View Next View Previous Page Next Page
-
 1
1 -
2
-
3
-
4
-
5
-
6
-
7
-
8
-
9
-
 10
10 -
 11
11 -
 12
12 -
 13
13 -
 14
14 -
 15
15 -
 16
16 -
 17
17 -
 18
18 -
 19
19 -
 20
20 -
21
-
22
-
23
-
24
-
25
-
26
-
27
-
28
-
29
-
30
-
31
-
32
-
33
-
34
-
35
-
36
-
37
-
38
-
39
-
40
-
41
-
42
-
43
-
44
-
45
-
46
-
47
-
48
-
49
-
50
-
51
 |
 |