Canon PIXMA MP750 PIXMA MP750/780 Quick Start Guide - Page 46
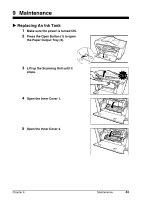
Close the Inner Cover 1.
 |
View all Canon PIXMA MP750 manuals
Add to My Manuals
Save this manual to your list of manuals |
Page 46 highlights
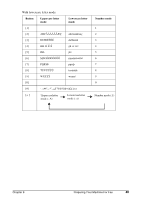
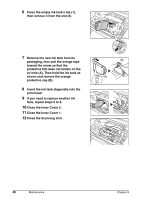
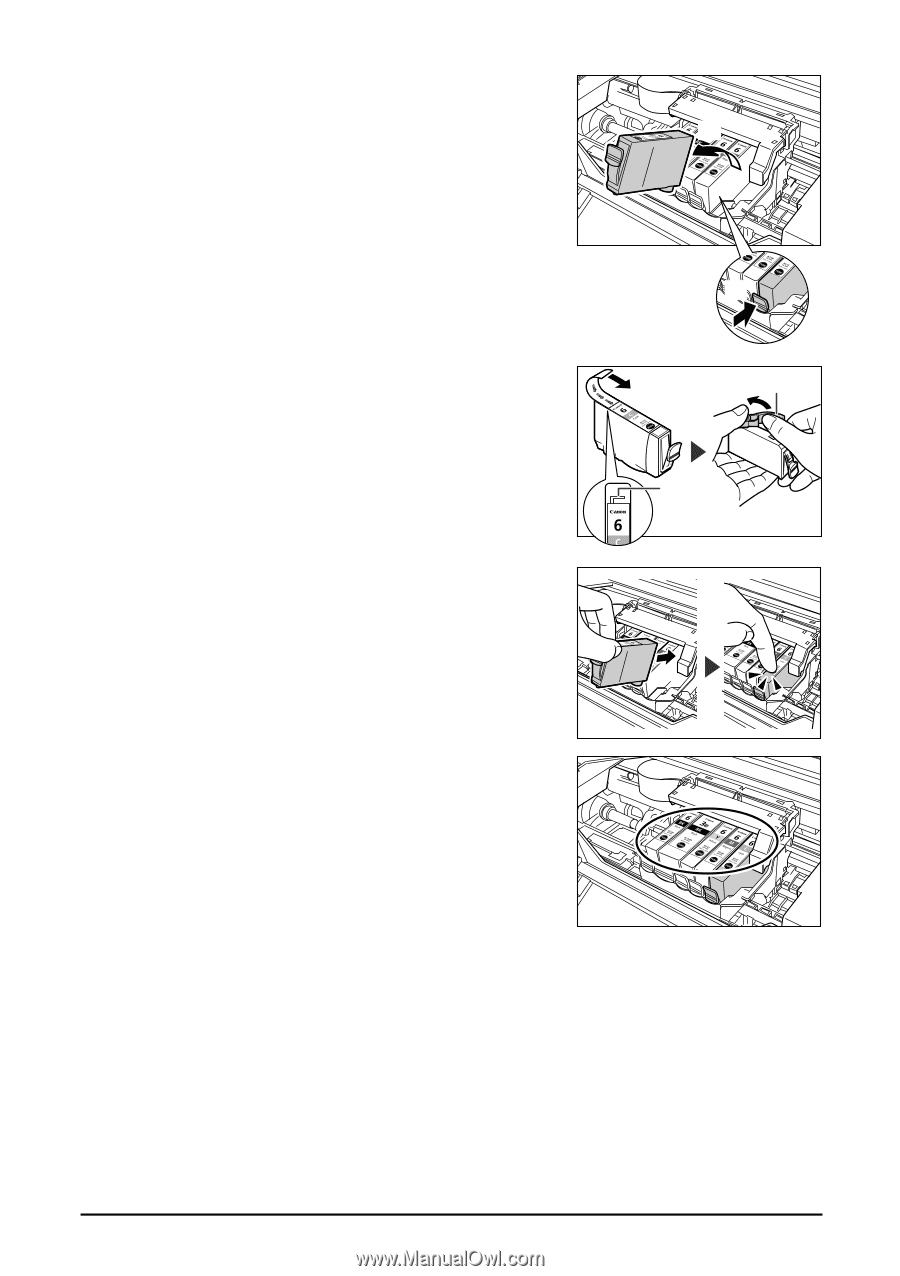
6 Press the empty ink tank's tab (1), then remove it from the slot (2). (2) 7 Remove the new ink tank from its packaging, then pull the orange tape toward the arrow so that the protective film does not remain on the air hole (A). Then hold the ink tank as shown and remove the orange protective cap (B). 8 Insert the ink tank diagonally into the print head. 9 If you need to replace another ink tank, repeat steps 6 to 8. 10 Close the Inner Cover 2. 11 Close the Inner Cover 1. 12 Close the Scanning Unit. (1) (B) (A) 45 Maintenance Chapter 9
-
 1
1 -
2
-
3
-
4
-
5
-
6
-
7
-
8
-
9
-
10
-
11
-
12
-
13
-
14
-
15
-
16
-
17
-
18
-
19
-
20
-
21
-
22
-
23
-
24
-
25
-
26
-
27
-
28
-
29
-
30
-
31
-
32
-
33
-
34
-
35
-
36
-
37
-
38
-
39
-
40
-
 41
41 -
 42
42 -
 43
43 -
 44
44 -
 45
45 -
 46
46 -
 47
47 -
 48
48 -
 49
49
 |
 |
45
Maintenance
Chapter 9
6
Press the empty ink tank’s tab (1),
then remove it from the slot (2).
7
Remove the new ink tank from its
packaging, then pull the orange tape
toward the arrow so that the
protective film does not remain on the
air hole (A). Then hold the ink tank as
shown and remove the orange
protective cap (B).
8
Insert the ink tank diagonally into the
print head.
9
If you need to replace another ink
tank, repeat steps 6 to 8.
10
Close the Inner Cover 2.
11
Close the Inner Cover 1.
12
Close the Scanning Unit.
(1)
(2)
(B)
(A)