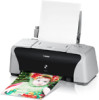
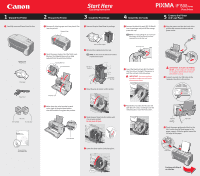
Canon PIXMA iP1500 iP1500 Easy Setup Instructions - Page 2
Windows, Printer Driver Installation, OS X Printer Driver Installation - software
 |
View all Canon PIXMA iP1500 manuals
Add to My Manuals
Save this manual to your list of manuals |
Page 2 highlights
6 Windows®Printer Driver Installation 6 Mac ®OS X Printer Driver Installation 1 Turn the computer on and LEAVE THE PRINTER OFF. NOTE: For Windows® XP or Windows 2000, log on to Windows as an Administrator before continuing. IMPORTANT: If you see the Found New Hardware Wizard, click Cancel. 6 When the "Printer Connection" window appears, TURN THE PRINTER ON. The printer will initialize for about one minute. NOTE: For Mac OS 9.x printer driver instructions, refer to the "Appendix" of the Quick Start Guide. 1 Turn on your Mac and your printer and insert the "Setup Software & User's Guide" CD-ROM. 2 Double-click the CD-ROM icon, then the Mac OS X folder, then the Printer Driver folder. 9 When the message "The software was successfully installed" appears, click Restart. 10 Access your CD-ROM again. From the Application folder, double-click the Easy-PhotoPrint icon. Follow the onscreen instructions. 2 Close any open software applications including anti-virus, computer security and other software. Then insert the "Setup Software & User's Guide" CD-ROM. The setup program should run automatically. NOTE: If the setup does not run automatically, click Start, then Run, then type D:\msetup.exe, where D is your CD-ROM drive. 3 When the main menu appears, click Easy Install and follow on-screen instructions. IMPORTANT: If your computer cannot detect a computer port, click Help and refer to the online instructions. 7 Follow the on-screen instructions to install the remaining software. When the "Installation Results" window appears, click OK. 8 Follow the on-screen instructions to register your product. NOTE: Select Easy Install in order to install application software, electronic manual and printer driver. Select Custom Install in order to choose the options you would like to install. 4 When the "Easy Install" window appears, click Install. 9 When the "Installation completed successfully" window appears, click Exit. NOTE: If a message prompting you to restart the computer appears, click Restart. 3 Double-click the PIXMA iP1500 270.pkg icon. NOTE: When the "Authenticate" screen appears, enter your administrator name and password. If you do not know your administrator name or password, click , then follow the on-screen instructions. 4 When the "Welcome to the BJ printer driver Installer" screen appears, click Continue. 5 Read the Software License Agreement and click Continue, then click Agree. 6 Select a destination for the printer driver to be installed. Then click Continue. 11 When the "Installation is completed" screen appears, click OK. 12 Double-click on the Product Registration icon, found in the Mac OS X folder, to register your product. NOTE: · When you print out for the first time, it takes approximately one minute until the printer starts printing. · If ruled lines are displaced or the print result is unsatisfactory, align the Print Head. Refer to "Aligning Print Head" in the User's Guide. 5 Read the License Agreement, then click Yes to continue. Then, installation of the driver and electronic instruction manual starts. NOTE: · When you print out for the first time, it takes approximately one minute until the printer starts printing. · If ruled lines are displaced or the print result is unsatisfactory, align the Print Head. Refer to "Aligning Print Head" in the User's Guide. 7 Click Install. When the "Authenticate" screen appears, enter your administrator name and password, then click OK. NOTE: If you do not know your administrator name or password, click , then follow the on-screen instructions. 8 When a message asking for your confirmation to proceed with the installation, click Continue Installation. QA7-3248-V02 ©2004 Canon Inc. Canon is a registered trademark of Canon Inc. All other products and brand names are registered trademarks or trademarks of their respective owners. Specifications subject to change without notice. Printed in Vietnam
-
 1
1 -
 2
2
 |
 |