Canon PIXMA iP4700 iP4700 series Getting Started - Page 16
Important Information for the Installation, Matte Photo Paper MP-101, Execute, MP-101 - photo printer
 |
View all Canon PIXMA iP4700 manuals
Add to My Manuals
Save this manual to your list of manuals |
Page 16 highlights
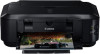
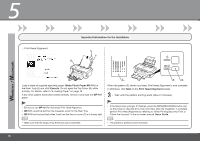
5 □ Print Head Alignment Important Information for the Installation C A B D Load a sheet of supplied speciality paper (Matte Photo Paper MP-101) in the Rear Tray (A) and click Execute. Do not open the Top Cover (B) while printing. For details, refer to "6 Loading Paper" on page 16. If any other papers have been loaded already, remove it and load the MP-101 paper. E F G When the pattern (E) shown is printed, Print Head Alignment is now complete. In Windows, click Next on the Print Head Alignment screen. • Wait until the pattern printing ends (about 5 minutes). • Be sure to use MP-101 for Automatic Print Head Alignment. • MP-101 cannot be fed from the Cassette. Load it in the Rear Tray. • MP-101 has front and back sides. Load it so that the cut corner (C) is at the top right. • If the Alarm lamp (orange) (F) flashes, press the RESUME/CANCEL button (G) on the printer to clear the error, then click Next. After the installation is complete, perform Print Head Alignment by referring to "When Printing Becomes Faint or Colors Are Incorrect" in the on-screen manual: Basic Guide. • Make sure that the Output Tray Extension (D) is extended. • The pattern is printed in blue and black. 14
-
 1
1 -
2
-
3
-
4
-
5
-
6
-
7
-
8
-
9
-
10
-
 11
11 -
 12
12 -
 13
13 -
 14
14 -
 15
15 -
 16
16 -
 17
17 -
 18
18 -
 19
19 -
 20
20 -
 21
21 -
22
-
23
-
24
-
25
-
26
 |
 |
