Canon PowerShot ELPH 310 HS Software Guide for Macintosh - Page 44
Configuring Image Information Settings, Setting Ratings, Inserting Comments
 |
View all Canon PowerShot ELPH 310 HS manuals
Add to My Manuals
Save this manual to your list of manuals |
Page 44 highlights
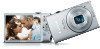
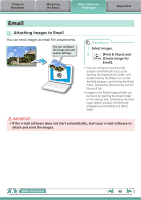
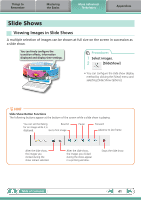
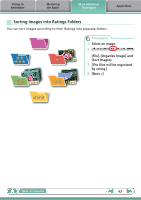
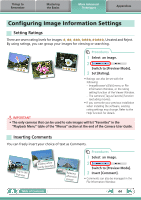
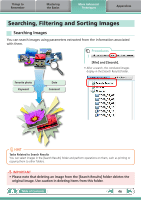
Things to Remember Mastering the Basics More Advanced Techniques Appendices Configuring Image Information Settings Setting Ratings There are seven rating levels for images: , , , , , Unrated and Reject. By using ratings, you can group your images for viewing or searching. Procedures 1 Select an image. 2 Switch to [Preview Mode]. 3 Set [Rating]. • Ratings can also be set with the following: - ImageBrowser's [Edit] menu or File Information Window, or the rating setting function of the Viewer Window. - The camera's [Tag as Favorite] function (excluding movies). • If you overwrite your previous installation when installing the software, existing rating settings may change. Refer to the Help function for details. IMPORTANT • The only cameras that can be used to rate images will list "Favorites" in the "Playback Menu" table of the "Menus" section at the end of the Camera User Guide. Inserting Comments You can freely insert your choice of text as Comments. Trip blue to the sea Esnanddleyssbweahcihtees Relaxing afternoon snooze Procedures 1 Select an image. 2 Switch to [Preview Mode]. 3 Insert [Comment]. • Comments can also be managed in the File Information Window. Table of Contents 44
-
 1
1 -
2
-
3
-
4
-
5
-
6
-
7
-
8
-
9
-
10
-
11
-
12
-
13
-
14
-
15
-
16
-
17
-
18
-
19
-
20
-
21
-
22
-
23
-
24
-
25
-
26
-
27
-
28
-
29
-
30
-
31
-
32
-
33
-
34
-
35
-
36
-
37
-
38
-
 39
39 -
 40
40 -
 41
41 -
 42
42 -
 43
43 -
 44
44 -
 45
45 -
 46
46 -
 47
47 -
 48
48 -
 49
49 -
50
-
51
-
52
-
53
-
54
-
55
-
56
-
57
-
58
-
59
-
60
-
61
 |
 |