Canon PowerShot G1 X PowerShot G1 X Getting Started - Page 10
Charging the Battery - mark
 |
View all Canon PowerShot G1 X manuals
Add to My Manuals
Save this manual to your list of manuals |
Page 10 highlights
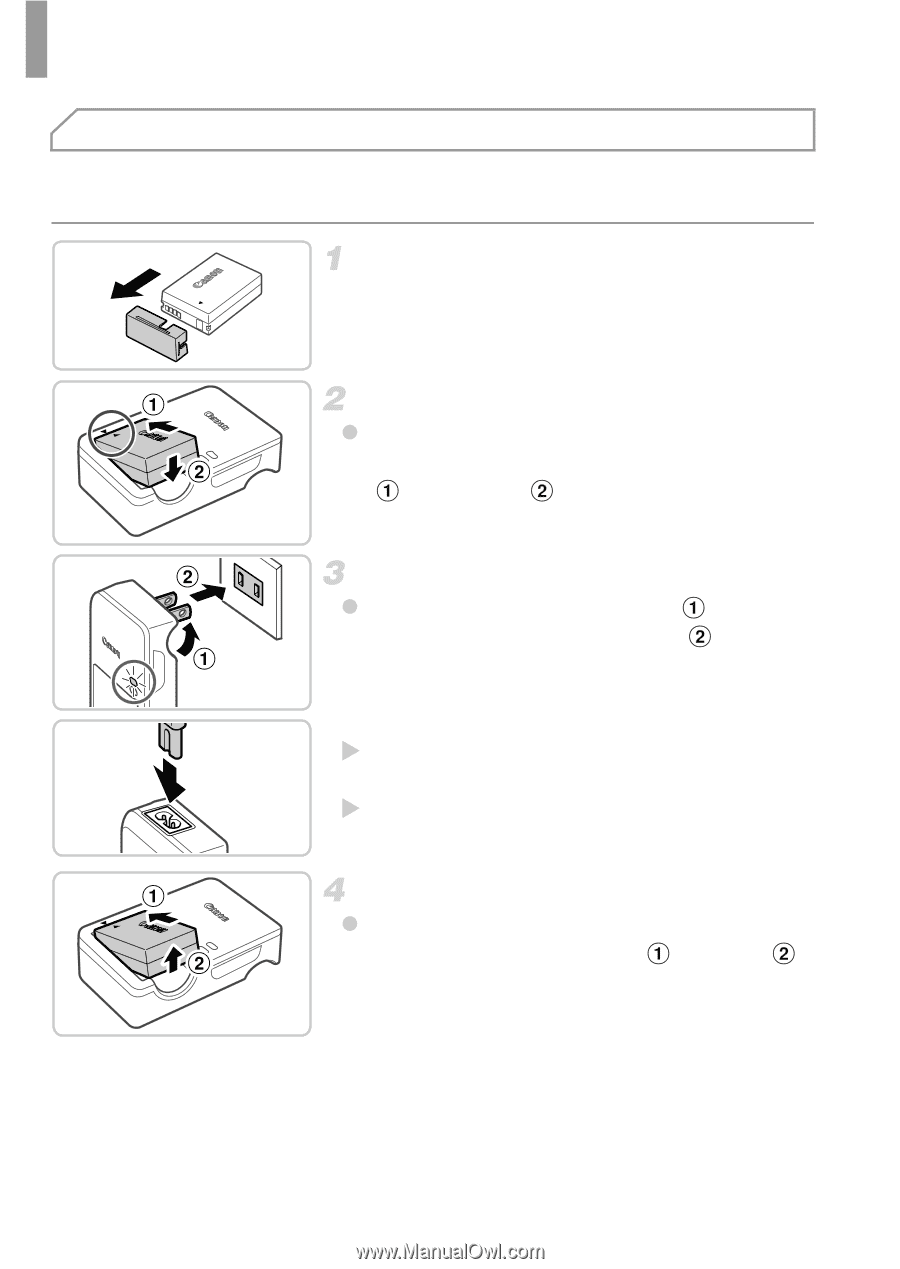
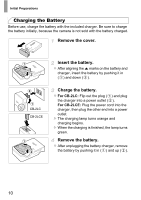
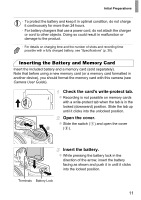
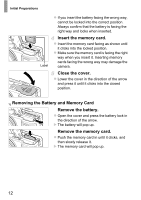
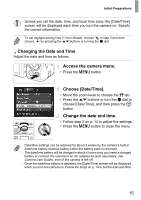
Initial Preparations Charging the Battery Before use, charge the battery with the included charger. Be sure to charge the battery initially, because the camera is not sold with the battery charged. Remove the cover. CB-2LC CB-2LCE Insert the battery. z After aligning the o marks on the battery and charger, insert the battery by pushing it in ( ) and down ( ). Charge the battery. z For CB-2LC: Flip out the plug ( ) and plug the charger into a power outlet ( ). For CB-2LCE: Plug the power cord into the charger, then plug the other end into a power outlet. X The charging lamp turns orange and charging begins. X When the charging is finished, the lamp turns green. Remove the battery. z After unplugging the battery charger, remove the battery by pushing it in ( ) and up ( ). 10
-
 1
1 -
2
-
3
-
4
-
 5
5 -
 6
6 -
 7
7 -
 8
8 -
 9
9 -
 10
10 -
 11
11 -
 12
12 -
 13
13 -
 14
14 -
 15
15 -
16
-
17
-
18
-
19
-
20
-
21
-
22
-
23
-
24
-
25
-
26
-
27
-
28
-
29
-
30
-
31
-
32
-
33
-
34
-
35
-
36
 |
 |