Canon S750 S750 Quick Start Guide - Page 15
Columns B to F, enter their numbers
 |
View all Canon S750 manuals
Add to My Manuals
Save this manual to your list of manuals |
Page 15 highlights
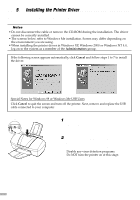
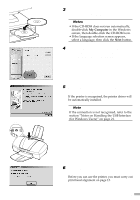
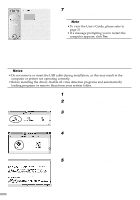
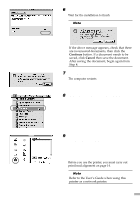
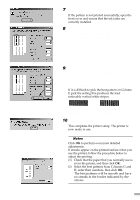
7 After the pattern is printed, click Yes. If the pattern is not printed successfully, open the front cover and ensure that the ink tanks are correctly installed. 8 Look at the print-out. From the patterns in Column A, select the most even, least irregular pattern and enter the number. 9 In the same way, one by one, select the most even patterns printed with the least irregularities from each of Columns B to F, enter their numbers, and click OK. If it is difficult to pick the best pattern on Column F, pick the setting that produces the least noticeable vertical white stripes. Less noticeable white stripes More noticeable white stripes 10 Click Cancel. This completes the printer setup. The printer is now ready to use. ¯Notes Click OK to perform even more detailed adjustments. If streaks appear on the printed surface when you use the printer, follow the procedure below to adjust the printing. (1) Check that the paper that you normally use is set in the printer, and then click OK. (2) Select the best patterns from Columns G and H, enter their numbers, then click OK. The best patterns will be smooth and have no streaks in the border indicated by the arrows. 13
-
 1
1 -
2
-
3
-
4
-
5
-
6
-
7
-
8
-
9
-
 10
10 -
 11
11 -
 12
12 -
 13
13 -
 14
14 -
 15
15 -
 16
16 -
 17
17 -
 18
18 -
 19
19 -
 20
20 -
21
-
22
-
23
-
24
-
25
-
26
 |
 |
