Canon VIXIA HG10 Backup Utility Ver.1 Instruction Manual - Page 3
Preparing to Use the Software, Connecting the Camcorder to the, Computer, Starting Backup Utility - hard disk drive
 |
View all Canon VIXIA HG10 manuals
Add to My Manuals
Save this manual to your list of manuals |
Page 3 highlights
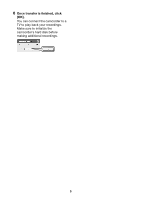
Preparing to Use the Software Turn on the computer and start Windows. Before you use this software, copy Backup Utility and instruction manual to your computer. 1 Insert the Backup Utility CD-ROM into the computer's CD or DVD drive. 2 From Computer (in Windows Vista) or My Computer (in Windows XP), double-click the icon of the drive in which you inserted the disc. 3 Double-click [English]. 4 Copy the folder [HGBACKUP] to your computer's desktop. Connecting the Camcorder to the Computer Connect the camcorder to the computer to back up your video data or to transfer it back to the camcorder. 1 Connect the camcorder to a power outlet. Insert a fully charged battery pack and power the camcorder using the compact power adapter. 2 Turn on the camcorder and set it in video playback mode. Refer to the camcorder's instruction manual. 3 Connect the camcorder to the computer using the USB cable. IMPORTANT Do not disconnect the camcorder's power source or USB cable while using this software. Doing so may result in damage to the camcorder's hard disk and/or permanent data loss. Insert a fully charged battery pack into the camcorder in advance and use the compact power adapter. Do not allow the USB cable to be inadvertently disconnected. Before disconnecting the USB cable, use the "Safely Remove Hardware" icon in the System Tray to end the connection. Starting Backup Utility The first time you use this software, make sure to read the license agreement. 1 Open the desktop folder [HGBACKUP]. 2 Double-click the icon [HGBACKUP.exe]. If this is the first time you are using this software, the license agreement will appear. Continue to step 3. If you have already agreed to the license agreement, the main menu will appear. Skip directly to the section corresponding to the desired function in the main menu. 3 Read the license agreement and select [I agree]. The main menu will appear. 3
-
 1
1 -
 2
2 -
 3
3 -
 4
4 -
 5
5 -
 6
6 -
 7
7
 |
 |
