Canon iP4200 Service Manual - Page 22
Printer unit and bottom case unit assembly
 |
UPC - 013803048438
View all Canon iP4200 manuals
Add to My Manuals
Save this manual to your list of manuals |
Page 22 highlights
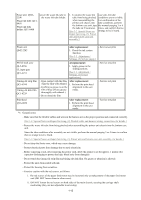
(II) Paper feed motor side wiring (3) Printer unit and bottom case unit assembly In assembling the printer unit chassis into the bottom case unit, be cautious of the following points to protect the waste ink tube from being pinched: (I) At replacement of the platen unit (QM2-2202), purge unit (QM2-2208), waste ink tube (QC1-6458), or waste ink tube holder (QC1-6460), fix the waste ink tube to the printer chassis and waste ink tube holder with tape (at 2 locations). If the tube is pinched and blocked, proper purging is prevented, resulting in ink leakage or strange noise. (No specific tape is specified. In the sample photo below, (1) is the orange tape, and (2) is a clear adhesive tape, such as Sellotape or Scotch tape.) 1-17
-
 1
1 -
2
-
3
-
4
-
5
-
6
-
7
-
8
-
9
-
10
-
11
-
12
-
13
-
14
-
15
-
16
-
 17
17 -
 18
18 -
 19
19 -
 20
20 -
 21
21 -
 22
22 -
 23
23 -
 24
24 -
 25
25 -
 26
26 -
 27
27 -
28
-
29
-
30
-
31
-
32
-
33
-
34
-
35
-
36
-
37
-
38
-
39
-
40
-
41
-
42
-
43
-
44
-
45
-
46
-
47
-
48
-
49
-
50
-
51
-
52
-
53
-
54
-
55
-
56
-
57
 |
 |

(II)
Paper feed motor side wiring
(3)
Printer unit and bottom case unit assembly
In assembling the printer unit chassis into the bottom case unit,
be cautious of the following points
to protect the
waste ink tube from being pinched:
(I)
At replacement of the platen unit (QM2-2202), purge unit (QM2-2208), waste ink tube (QC1-6458), or waste
ink tube holder (QC1-6460), fix the waste ink tube to the printer chassis and waste ink tube holder with tape (at
2 locations).
If the tube is pinched and blocked, proper purging is prevented, resulting in ink leakage or strange noise.
(No specific tape is specified. In the sample photo below, (1) is the orange tape, and (2) is a clear adhesive tape,
such as Sellotape or Scotch tape.)
1-17