Canon imageCLASS MF5880dn imageCLASS MF5880dn/5850dn Starter Guide - Page 15
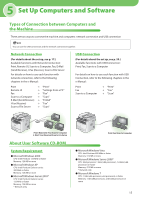
Set Up Network Connection, Connect the LAN Cable, Compatible LAN Cables
 |
View all Canon imageCLASS MF5880dn manuals
Add to My Manuals
Save this manual to your list of manuals |
Page 15 highlights
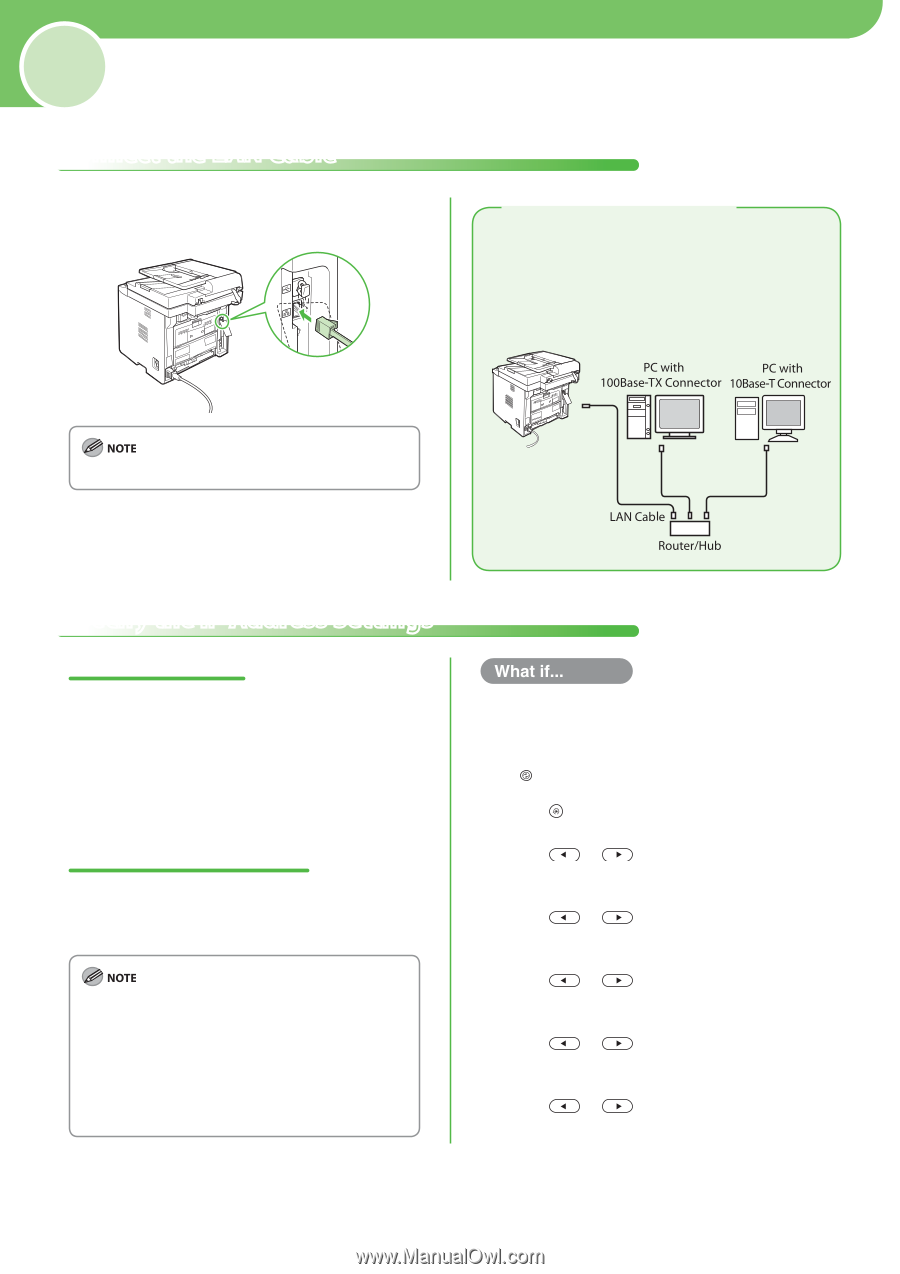
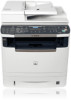
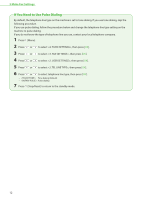
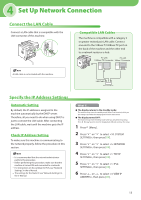
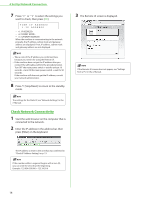
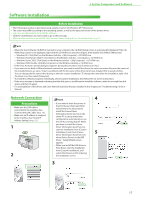
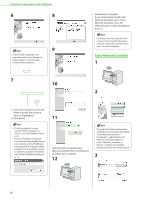
4 Set Up Network Connection Connect the LAN Cable Connect a LAN cable that is compatible with the LAN connector of this machine. Compatible LAN Cables The machine is compatible with a category 5 or greater twisted pair LAN cable. Connect one end to the 10Base-T/100Base-TX port on the back of the machine and the other end to a network router or a hub. A LAN cable is not included with the machine. Specify the IP Address Settings Automatic Setting By default, the IP address is assigned to the machine automatically by the DHCP server. Therefore, all you need to do when using DHCP is just to connect the LAN cable. After connecting the LAN cable, wait until the machine gets the IP address. Check IP Address Setting To make sure this machine is communicating to the network properly, follow the procedure in this section. - It is recommended that the network administrator perform this procedure. - Before performing this procedure, make sure that the machine is turned ON and connected to a network. - For instructions on the settings for IPv6, see "Network Settings," in the e-Manual. - The settings for the Static IP, see "Network Settings," in the e-Manual. ● The display returns to the standby mode: The machine may enter the standby mode (Auto Clear function) while you are setting it up. Make the setting again from the main menu. ● The display turned OFF: The machine may enter the Sleep mode while you are performing setup. Press [Energy Saver] to turn the display back ON and continue the setup. 1 Press [Menu]. 2 Press or to select , then press [OK]. 3 Press or to select , then press [OK]. 4 Press or to select , then press [OK]. 5 Press or to select , then press [OK]. 6 Press or to select , then press [OK]. 13
-
 1
1 -
2
-
3
-
4
-
5
-
6
-
7
-
8
-
9
-
 10
10 -
 11
11 -
 12
12 -
 13
13 -
 14
14 -
 15
15 -
 16
16 -
 17
17 -
 18
18 -
 19
19 -
 20
20 -
21
-
22
-
23
-
24
-
25
-
26
-
27
-
28
 |
 |