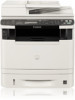
Canon imageCLASS MF5960dn imageCLASS MF5960dn/MF5950dw Starter Guide - Page 2
Setting Up the Machine to Suit Your Needs - toner
 |
View all Canon imageCLASS MF5960dn manuals
Add to My Manuals
Save this manual to your list of manuals |
Page 2 highlights
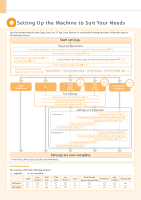
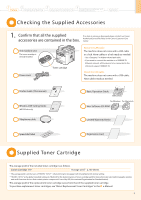
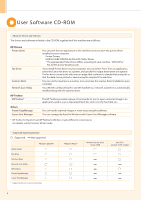
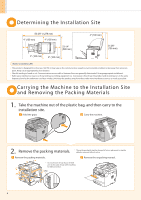
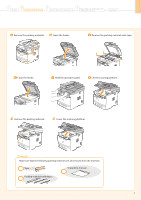
Setting Up the Machine to Suit Your Needs Specify settings related to the Copy, Print, Fax, PC Fax, Scan, Remote UI and ,Media Printing functions. Follow the steps in the flowchart below. Start settings. Required Operations Carrying the Machine to the Installation Site and Removing the Packing Materials P. 6 Preparing the Toner Cartridges P. 8 Attach the Optional Drawer P. 10 Loading Paper P. 10 Settings for paper sizes and paper types are required after turning the power ON. P. 13 Connecting the Power Cord P. 11 Turning the Power ON and Specifying the Initial Settings Language Settings Country and Region Settings Time Zone Settings Current Time Settings P. 12 Copy Media Print Fax Print Scan USB Connection Print Scan Network Connection Remote Settings from UI PC Fax PC Fax a Computer Fax Settings Registering the Sender Information P. 14 Selecting the Receive Mode P. 15 Connecting a Telephone Line P. 16 Settings in a Computer For Windows Connecting to Wired LAN P. 19 Connecting to Wireless LAN*1 Wireless LAN Setting Guide Checking the IP Address P. A-3 Installing the Software P. 20 Connecting a USB Cable P. 22 For Macintosh Connecting to Wired LAN P. 19 Connecting to Wireless LAN*1 Wireless LAN Setting Guide Checking the IP Address P. A-3 Installing the Software P. 25 Connecting a USB Cable P. 26 Settings are now complete. *1 The wireless LAN function is available only for MF5950dw. Available Features The machine offers the following features. : available : not available MF5960dn Copy Print (2-sided) Print (PS) Print (PCL) MF5950dw Fax (PC Fax) Scan Send to Email/ Remote UI Store to Shared Folder ADF (2-sided) Wireless LAN 2
-
 1
1 -
 2
2 -
 3
3 -
 4
4 -
 5
5 -
 6
6 -
 7
7 -
 8
8 -
9
-
10
-
11
-
12
-
13
-
14
-
15
-
16
-
17
-
18
-
19
-
20
-
21
-
22
-
23
-
24
-
25
-
26
-
27
-
28
-
29
-
30
-
31
-
32
-
33
-
34
-
35
-
36
 |
 |
