Canon imageFORMULA CR-50 CR-50/80 Installation Guide - Page 15
Turning OFF the Power, Windows recognizes the CR-50/80 as new hardware,
 |
View all Canon imageFORMULA CR-50 manuals
Add to My Manuals
Save this manual to your list of manuals |
Page 15 highlights
3 Windows recognizes the CR-50/80 as new hardware, and installation starts automatically. (Windows 7) NOTE The CR-50/80 will be registered as "CANON CR-50 USB" or "CANON CR-80 USB" in the Imaging Device directory. Turning OFF the Power 1 Turn OFF your computer. 2 To turn OFF the scanner, slide the Power Switch to the left. (OFF) CAUTION • Wait at least 10 seconds before turning the scanner back ON. • For your safety, disconnect the power plug from the power outlet if you are not using the scanner for a long period of time. 15
-
 1
1 -
2
-
3
-
4
-
5
-
6
-
7
-
8
-
9
-
 10
10 -
 11
11 -
 12
12 -
 13
13 -
 14
14 -
 15
15 -
 16
16 -
 17
17 -
 18
18 -
 19
19 -
 20
20 -
21
 |
 |

15
3
Windows recognizes the CR-50/80 as new hardware, and
installation starts automatically.
NOTE
The CR-50/80 will be registered as “CANON CR-50 USB” or
“CANON CR-80 USB” in the Imaging Device directory.
Turning OFF the Power
1
Turn OFF your computer.
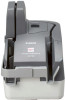
2
To turn OFF the scanner, slide the Power Switch to the
left.
CAUTION
• Wait at least 10 seconds before turning the scanner back
ON.
• For your safety, disconnect the power plug from the power
outlet if you are not using the scanner for a long period of
time.
(Windows 7)
(OFF)