Canon imageFORMULA DR-3080C Color Startup Guide - Page 24
Turning the Power On/Off
 |
View all Canon imageFORMULA DR-3080C Color manuals
Add to My Manuals
Save this manual to your list of manuals |
Page 24 highlights
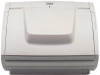
Turning the Power On/Off Follow the procedures described below when turning the power on and off. Turning the Power On 1. Turn on the scanner. The power switch is located on the lower right front corner of the scanner. To turn the scanner on, press the power switch. When the power indicator lights green, the scanner is on. 2. Turn on the PC. Note If you are using Windows 95/98/Me/2000 or Windows XP, then the first time that you turn on your PC after connecting this scanner to your PC, Windows Plug and Play automatically displays a screen prompting you to install the scanner driver. Follow the instructions on the screen to proceed with the installation. ● If you are using Windows 95, the "Found New Hardware" dialog box appears. 1. Select "Driver from disk provided by hardware manufacturer" and then click the OK button. 2. Load the setup disc into your CD-ROM drive. 3. In the "Copy manufacturer's files from" box, type "D:\INF\Win95" (where "D" is the name of your CD-ROM drive), and then click the OK button. ● If you are using Windows 95 (OSR2), the "Update Device Driver Wizard" dialog box appears. 1. Click the Next button. 2. Click Other locations. 3. Load the setup disc into the computer's CD-ROM drive. 4. Type "D:\INF\Win95" (where "D" is the drive letter assigned to your CD- ROM drive) and then click the OK button. 5. Click the Finish button. 20 Installing the Scanner
-
 1
1 -
2
-
3
-
4
-
5
-
6
-
7
-
8
-
9
-
10
-
11
-
12
-
13
-
14
-
15
-
16
-
17
-
18
-
 19
19 -
 20
20 -
 21
21 -
 22
22 -
 23
23 -
 24
24 -
 25
25 -
 26
26 -
 27
27 -
 28
28 -
 29
29 -
30
-
31
-
32
-
33
-
34
-
35
-
36
-
37
-
38
-
39
-
40
-
41
-
42
-
43
-
44
-
45
-
46
-
47
-
48
-
49
-
50
-
51
-
52
-
53
-
54
-
55
-
56
-
57
-
58
-
59
-
60
 |
 |
