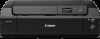
Canon imagePROGRAF PRO-300 PRO-300 Getting Started Guide - Page 4
Installing the Print Head, Open the top cover.
 |
View all Canon imagePROGRAF PRO-300 manuals
Add to My Manuals
Save this manual to your list of manuals |
Page 4 highlights
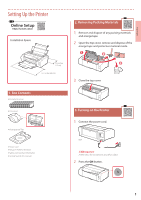
Setting Up the Printer 3 Use the {, } and OK buttons to select a language. 4. Installing the Print Head 1 Open the paper output tray. 2 Open the top cover. 4 Press the OK button. 5 Set the date and time, and then press the OK button. Caution Do not touch the print head holder until it stops moving. 3 Firmly raise the print head lock lever until it stops. 4 Remove the print head from its package. Important There may be some transparent or light color ink on the inside of the bag the print head comes in - this has no effect on print quality. Be careful not to get ink on yourself when handling these items. 2
-
 1
1 -
 2
2 -
 3
3 -
 4
4 -
 5
5 -
 6
6 -
 7
7 -
 8
8 -
 9
9 -
 10
10 -
11
-
12
-
13
-
14
-
15
-
16
-
17
-
18
-
19
-
20
 |
 |

2
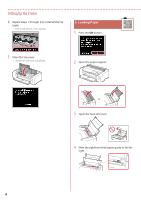
Setting Up the Printer
3
Use the
{
,
}
and
OK
buttons to select a
language.
4
Press the
OK
button.
5
Set the date and time, and then press the
OK
button.
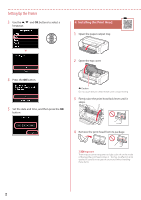
4. Installing the Print Head
1
Open the paper output tray.
2
Open the top cover.
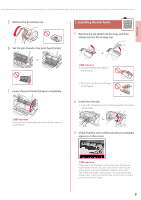
Caution
Do not touch the print head holder until it stops moving.
3
Firmly raise the print head lock lever until it
stops.
4
Remove the print head from its package.
Important
There may be some transparent or light color ink on the inside
of the bag the print head comes in - this has no effect on print
quality. Be careful not to get ink on yourself when handling
these items.