Canon imagePROGRAF W2200S Setup Guide - Page 26
Important, illustration, pull down to remove.
 |
View all Canon imagePROGRAF W2200S manuals
Add to My Manuals
Save this manual to your list of manuals |
Page 26 highlights
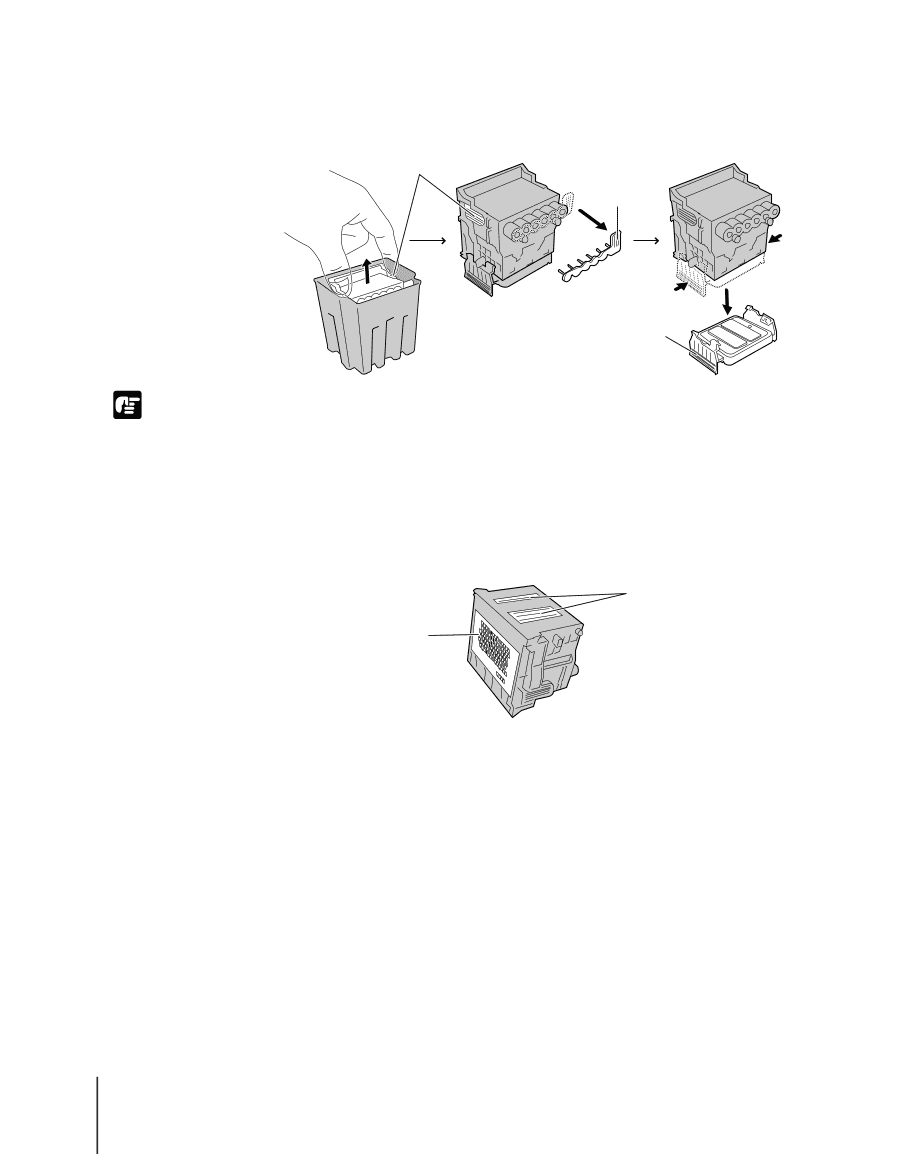
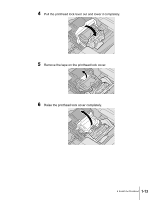
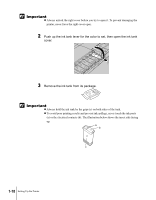
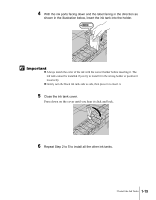
7 Hold the new printhead by its grips (a) and remove it from its case, then remove the first orange protective cap (b). While pressing inward on the tabs (d) of the second protective cap (c) as shown in the illustration, pull down to remove. a b d d c Important z The nozzles under protective cap 2 (c) are covered with ink for their protection. Handle the printhead carefully to avoid touching these nozzles or dropping the printhead and causing ink stains. z When handling the printhead, always hold it by the grips (a) on the left and right sides. z To prevent poor printing results, never touch the exposed nozzles (e) or electrical contacts (f) on the printhead. The illustration below shows the insert side facing up. e f z Never try to re-attach the protective caps or packing material removed from the printhead. Discard these items immediately in compliance with local regulations regarding the disposal of such items. 1-14 Setting Up the Printer
-
 1
1 -
2
-
3
-
4
-
5
-
6
-
7
-
8
-
9
-
10
-
11
-
12
-
13
-
14
-
15
-
16
-
17
-
18
-
19
-
20
-
 21
21 -
 22
22 -
 23
23 -
 24
24 -
 25
25 -
 26
26 -
 27
27 -
 28
28 -
 29
29 -
 30
30 -
 31
31 -
32
-
33
-
34
-
35
-
36
-
37
-
38
-
39
-
40
-
41
-
42
-
43
-
44
-
45
-
46
-
47
-
48
-
49
-
50
-
51
-
52
-
53
-
54
-
55
-
56
-
57
-
58
-
59
-
60
-
61
-
62
-
63
-
64
-
65
-
66
-
67
-
68
-
69
-
70
-
71
-
72
-
73
-
74
-
75
-
76
-
77
-
78
-
79
-
80
-
81
-
82
-
83
-
84
-
85
-
86
-
87
-
88
-
89
-
90
-
91
-
92
-
93
-
94
-
95
-
96
-
97
-
98
-
99
-
100
-
101
-
102
-
103
-
104
-
105
-
106
-
107
-
108
-
109
-
110
-
111
-
112
-
113
-
114
-
115
-
116
-
117
-
118
-
119
-
120
-
121
-
122
-
123
-
124
-
125
-
126
-
127
-
128
-
129
-
130
-
131
-
132
-
133
 |
 |