Canon imagePROGRAF W8400 PPlugIn-E.pdf - Page 9
Starting the Print Plug-In, Export, Data Export - imageprograf w8400pg
 |
View all Canon imagePROGRAF W8400 manuals
Add to My Manuals
Save this manual to your list of manuals |
Page 9 highlights
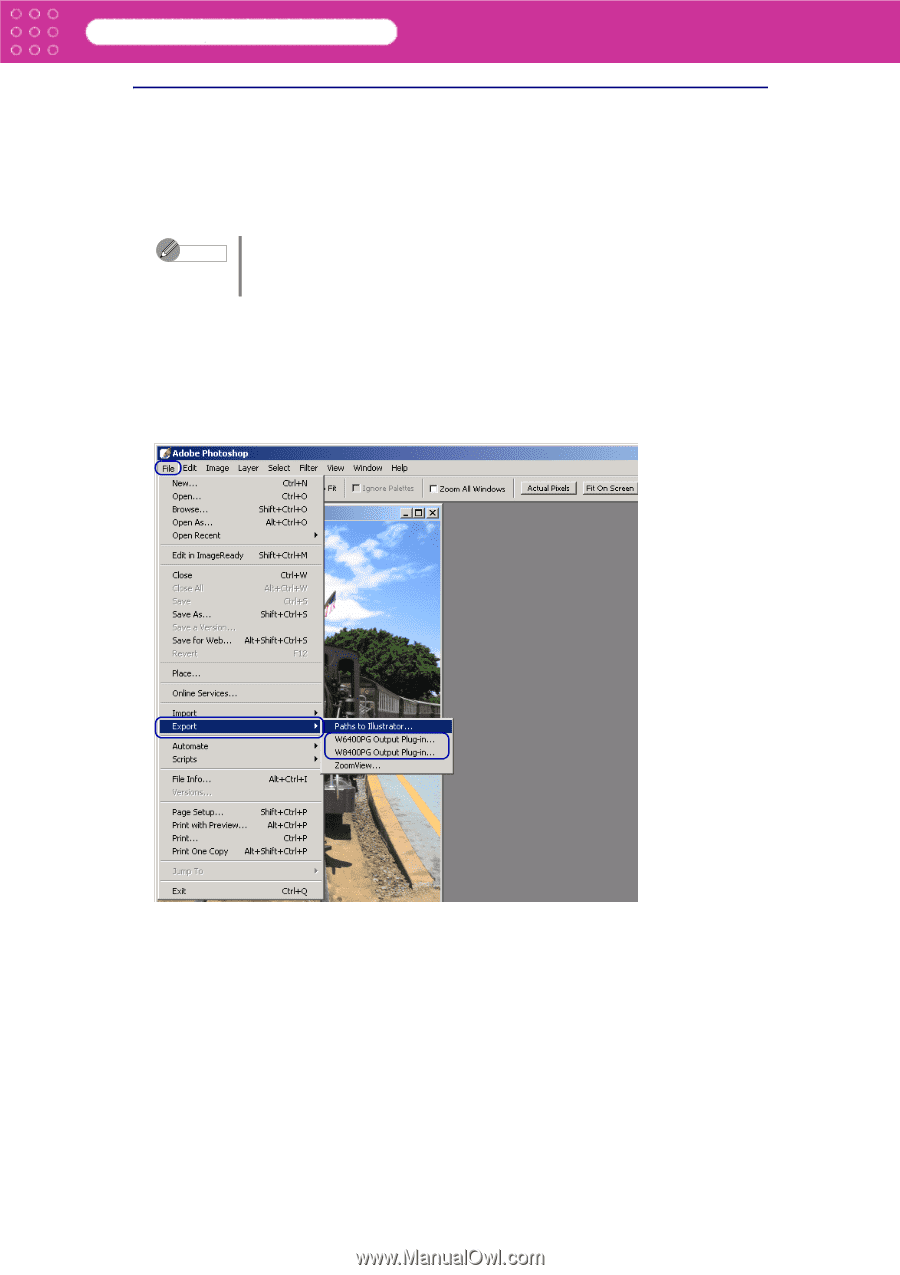
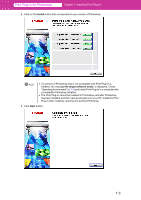
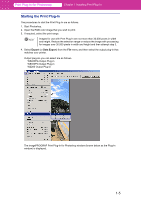
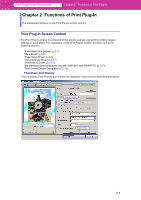
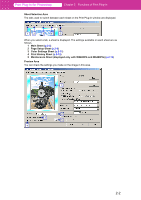
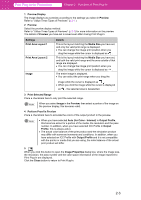
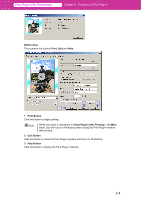
Print Plug-In for Photoshop Chapter 1 Installing Print Plug-In Starting the Print Plug-In The procedures to start the Print Plug-In are as follows. 1. Start Photoshop. 2. Open the RGB color image that you wish to print. 3. If required, select the print range. Note Images for use with Print Plug-In are not more than 30,000 pixels in width and height. Reduce the selection range or reduce the image with processing for images over 30,000 pixels in width and height and then attempt step 3. 4. Select Export (or Data Export) from the File menu and then select the output plug-in that matches your printer. Output plug-ins you can select are as follows. W6400PG Output Plug-in W8400PG Output Plug-in W2200 Output Plug-in The imagePROGRAF Print Plug-In for Photoshop window (known below as the Plug-In window) is displayed. 1-5
-
 1
1 -
2
-
3
-
 4
4 -
 5
5 -
 6
6 -
 7
7 -
 8
8 -
 9
9 -
 10
10 -
 11
11 -
 12
12 -
 13
13 -
 14
14 -
15
-
16
-
17
-
18
-
19
-
20
-
21
-
22
-
23
-
24
-
25
-
26
-
27
-
28
-
29
-
30
-
31
-
32
-
33
-
34
-
35
-
36
-
37
-
38
-
39
-
40
-
41
-
42
-
43
-
44
-
45
-
46
-
47
-
48
-
49
-
50
-
51
-
52
-
53
-
54
-
55
-
56
-
57
-
58
-
59
-
60
-
61
-
62
-
63
-
64
-
65
-
66
-
67
-
68
-
69
-
70
-
71
-
72
-
73
-
74
-
75
-
76
-
77
-
78
-
79
-
80
-
81
 |
 |