Canon imageRUNNER 1435i imageRUNNER 1400 Series Startedr Guide - Page 7
Connecting viaUSB Cable, Setting a Paper Size and Type, Specifying Initial Fax Settings and, - imagerunner 1435if driver
 |
View all Canon imageRUNNER 1435i manuals
Add to My Manuals
Save this manual to your list of manuals |
Page 7 highlights
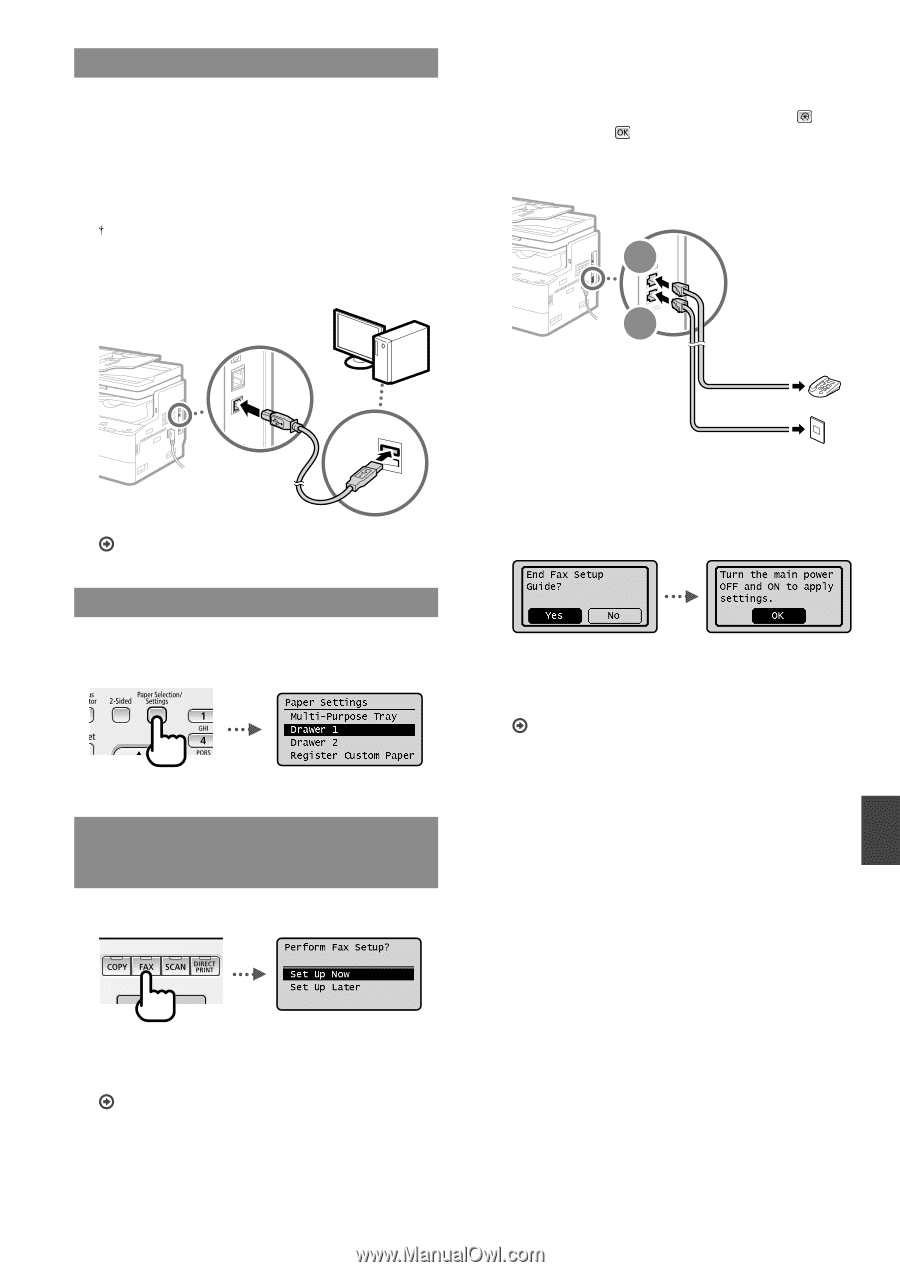
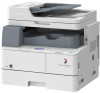
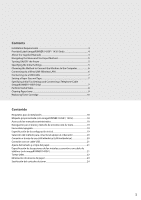
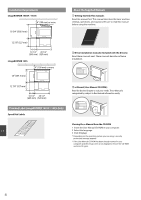
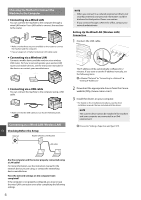
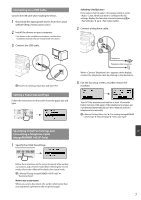
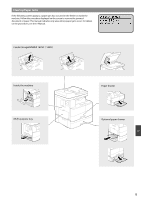
Connecting via a USB Cable Connect the USB cable after installing the drivers. 1 Download the appropriate drivers from the Canon website (http://www.canon.com/). 2 Install the drivers on your computer. For details on the installation procedures, see the driver installation manuals that are included with the drivers. 3 Connect the USB cable. Proceed to "Setting a Paper Size and Type" (P.7). Setting a Paper Size and Type Follow the instructions on the screen to set the paper size and type. Selecting If you select , the receive mode is set to . Later, when you want to configure the fax settings, display the fax setup screen by pressing ▶ ▶ ▶ . 2 Connect a telephone cable. B A Telephone Telephone line connector When appears on the display, connect the telephone cable by referring to the illustration. 3 Exit the fax setup screen, and then restart the machine. Turn OFF the machine and wait for at least 10 seconds before turning it ON again. If the telephone line types are not detected automatically, see the e-Manual and set a telephone line manually. e-Manual "Setting Menu List" ▶ "Fax Settings (imageRUNNER 1435iF Only)" ▶ "Basic Settings" ▶ "Select Line Type" Specifying Initial Fax Settings and En Connecting a Telephone Cable (imageRUNNER 1435iF Only) 1 Specify the initial fax settings. Follow the instructions on the screen to specify a fax number, a unit name, and a receive mode. When selecting the receive mode, refer to the e-Manual for details about each mode. e-Manual "Faxing (imageRUNNER 1435iF Only)" ▶ "Receiving Faxes" How to use a user name When you send a document, the sender information that you registered is printed on the recipient's paper. 7
-
 1
1 -
 2
2 -
 3
3 -
 4
4 -
 5
5 -
 6
6 -
 7
7 -
 8
8 -
 9
9 -
 10
10 -
 11
11 -
 12
12 -
13
-
14
-
15
-
16
-
17
-
18
-
19
-
20
-
21
-
22
-
23
-
24
-
25
-
26
-
27
-
28
-
29
-
30
-
31
-
32
 |
 |