Casio EX S10 User Guide - Page 108
Viewing User Documentation (PDF Files), To transfer computer screen captures to the camera - manual pdf
 |
UPC - 079767623289
View all Casio EX S10 manuals
Add to My Manuals
Save this manual to your list of manuals |
Page 108 highlights
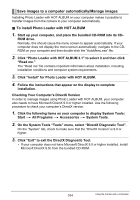
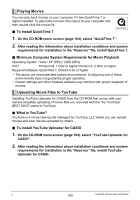
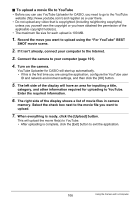
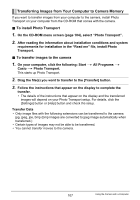
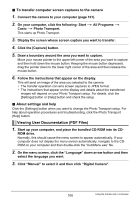
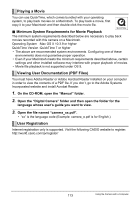
. To transfer computer screen captures to the camera 1. Connect the camera to your computer (page 101). 2. On your computer, click the following: Start * All Programs * Casio * Photo Transport. This starts up Photo Transport. 3. Display the screen whose screen capture you want to transfer. 4. Click the [Capture] button. 5. Draw a boundary around the area you want to capture. Move your mouse pointer to the upper left corner of the area you want to capture and then hold down the mouse button. Keeping the mouse button depressed, drag the pointer down to the lower right corner of the area and then release the mouse button. 6. Follow the instructions that appear on the display. This will send an image of the area you selected to the camera. • The transfer operation converts screen captures to JPEG format. • The instructions that appear on the display and details about the transferred images will depend on your Photo Transport setup. For details, click the [Settings] button or [Help] button and check the setup. . About settings and help Click the [Settings] button when you want to change the Photo Transport setup. For help about operation procedures and troubleshooting, click the Photo Transport [Help] button. Viewing User Documentation (PDF Files) 1. Start up your computer, and place the bundled CD-ROM into its CD- ROM drive. Normally, this should cause the menu screen to appear automatically. If your computer does not display the menu screen automatically, navigate to the CDROM on your computer and then double-click the "AutoMenu.exe" file. 2. On the menu screen, click the "Language" down arrow button and then select the language you want. 3. Click "Manual" to select it and then click "Digital Camera". 108 Using the Camera with a Computer
-
 1
1 -
2
-
3
-
4
-
5
-
6
-
7
-
8
-
9
-
10
-
11
-
12
-
13
-
14
-
15
-
16
-
17
-
18
-
19
-
20
-
21
-
22
-
23
-
24
-
25
-
26
-
27
-
28
-
29
-
30
-
31
-
32
-
33
-
34
-
35
-
36
-
37
-
38
-
39
-
40
-
41
-
42
-
43
-
44
-
45
-
46
-
47
-
48
-
49
-
50
-
51
-
52
-
53
-
54
-
55
-
56
-
57
-
58
-
59
-
60
-
61
-
62
-
63
-
64
-
65
-
66
-
67
-
68
-
69
-
70
-
71
-
72
-
73
-
74
-
75
-
76
-
77
-
78
-
79
-
80
-
81
-
82
-
83
-
84
-
85
-
86
-
87
-
88
-
89
-
90
-
91
-
92
-
93
-
94
-
95
-
96
-
97
-
98
-
99
-
100
-
101
-
102
-
 103
103 -
 104
104 -
 105
105 -
 106
106 -
 107
107 -
 108
108 -
 109
109 -
 110
110 -
 111
111 -
 112
112 -
 113
113 -
114
-
115
-
116
-
117
-
118
-
119
-
120
-
121
-
122
-
123
-
124
-
125
-
126
-
127
-
128
-
129
-
130
-
131
-
132
-
133
-
134
-
135
-
136
-
137
-
138
-
139
-
140
-
141
-
142
-
143
-
144
-
145
-
146
-
147
-
148
-
149
-
150
-
151
-
152
-
153
-
154
-
155
-
156
-
157
-
158
-
159
-
160
-
161
-
162
-
163
-
164
-
165
-
166
-
167
 |
 |