Casio XJ-A256 User Guide
Casio XJ-A256 Manual
 |
View all Casio XJ-A256 manuals
Add to My Manuals
Save this manual to your list of manuals |
Casio XJ-A256 manual content summary:
- Casio XJ-A256 | User Guide - Page 1
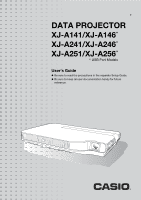
E DATA PROJECTOR XJ-A141/XJ-A146* XJ-A241/XJ-A246* XJ-A251/XJ-A256* * USB Port Models User's Guide z Be sure to read the precautions in the separate Setup Guide. z Be sure to keep all user documentation handy for future reference. - Casio XJ-A256 | User Guide - Page 2
DLP User's Guide are subject to change without notice. z Copying of this manual, either in part or its entirety is forbidden. You are allowed to use this manual product or this manual. z CASIO COMPUTER CO., LTD. shall not be held liable for any loss or lost profits due to loss of data due to - Casio XJ-A256 | User Guide - Page 3
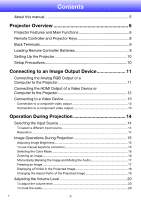
the Analog RGB Output of a Computer to the Projector 11 Connecting the HDMI Output of a Video Device or Computer to the Projector 12 Connecting to a Video Device 13 Connection to a composite video output 13 Connection to a component video output 13 Operation During Projection 14 Selecting the - Casio XJ-A256 | User Guide - Page 4
(USB Port Models Only 42 Wireless Main Menu (USB Port Models Only 42 Operational Info Main Menu 42 Restore All Defaults Main Menu 42 Cleaning the Projector 43 Cleaning the Projector Exterior 43 Cleaning the Lens 43 Cleaning Intake and Exhaust Vents 43 Troubleshooting 44 Indicators 44 Error - Casio XJ-A256 | User Guide - Page 5
Projector Troubleshooting 47 Appendix 49 Remote Controller Signal Range 49 Projection Distance and Screen Size 50 Aspect Ratio Setting and Projection Image 51 Supported Signals 53 Specifications 55 About this manual... All of the operations in this manual are explained using the remote - Casio XJ-A256 | User Guide - Page 6
Main Functions XJ-A141/XJ-A146/XJ-A241/XJ-A246/XJ-A251/XJ-A256 z Mercury-free Hybrid Light Source: A CASIO-original laser and LED hybrid light source delivers high luminance from 2,500 to 3,000 lumens. This projector does not use a mercury lamp, making it environmentally friendly. z Slim and compact - Casio XJ-A256 | User Guide - Page 7
PCs and HD video input sources. XJ-A146/XJ-A246/XJ-A256 z Projection of Data from USB Memory or a Memory Card without a Computer: USB memory or a memory card (using a commercially available USB card reader) can be connected directly to the projector's USB port. The projector comes with special - Casio XJ-A256 | User Guide - Page 8
Projector Keys Operations in this manual are presented based on the remote controller that comes with the projector. Major operation keys are also provided on the projector unit, so the most of the same procedures can also be performed directly on the projector emitter CLASS 1 LED PRODUCT Cursor keys - Casio XJ-A256 | User Guide - Page 9
Serial port* Speaker HDMI port USB port (XJ-A146/XJ-A246/XJ-A256 only) Anti-theft lock hole Intake vents Power connector * This serial port is for connecting a separately available special cable (YK-5) to control the projector from a computer. Loading Remote Controller Batteries Important - Casio XJ-A256 | User Guide - Page 10
optimum projection relative to the screen. XJ-A141/XJ-A146 XJ-A241/XJ-A246/XJ-A251/XJ-A256 Screen Screen Make sure the projector is at a right angle to the screen. Position the projector so the lens side is at the edge of the table, etc. z The projector can be configured for projection from - Casio XJ-A256 | User Guide - Page 11
and the computer before connecting them. z Take care so the volume level of the computer is not set too high. Projector AV terminal COMPUTER terminal Computer To monitor terminal (analog RGB output terminal) Bundled mini D-Sub cable Audio cable (commercially available) To line output terminal - Casio XJ-A256 | User Guide - Page 12
terminal of the output device on one end and a connector that matches the projector's HDMI port (HDMI Type A Socket) on the other end. z For information about HDMI video signal supported by the projector, see page 54. z The projector supports L-PCM 32kHz, 44.1kHz, and 48kHz HDMI audio signals. 12 - Casio XJ-A256 | User Guide - Page 13
project images from the composite video output or component video output of a connected video device. Important! Always turn off the projector and the video device before connecting them. Connection to a composite video output Projector AV terminal Video device To video output terminal Yellow To - Casio XJ-A256 | User Guide - Page 14
resolution of your projector, see the "DLP chip" item of the "Specifications" (page 55). See the user documentation that comes with your computer for details about changing its settings. z Change the "Aspect Ratio" setting to "True" (Applies only to models that support WXGA video resolution). With - Casio XJ-A256 | User Guide - Page 15
Note (for USB port model users) Use the setup menu (page wireless adapter. 1. Press the [BRIGHT] key. z This displays the brightness adjustment window. 2. Use the [W] and [X] keys to adjust image brightness. 3. To hide the window, press the [ESC] key. To use manual keystone correction The projector - Casio XJ-A256 | User Guide - Page 16
Selecting the Color Mode You can select from among various different color mode settings in accordance with image contents and projection conditions. Important! The color mode cannot be selected in the following cases. z When "Off" is selected for the Eco Mode setting (page 23) To change the color - Casio XJ-A256 | User Guide - Page 17
source, press the [FREEZE] key. z This will capture the image that is on the screen at the moment you press [FREEZE] and stores it in projector memory. That image remains projected on the screen. 2. To restore projection of the image from an input source, press the [ESC] key. B 17 - Casio XJ-A256 | User Guide - Page 18
Displaying a Pointer in the Projected Image You can select from among different pointer styles, including various arrow styles, for display in the projected image. Pointers can be used during a presentation to indicate or highlight a specific part of the image. Note Depending on the pointer style - Casio XJ-A256 | User Guide - Page 19
settings for the projected image. Available settings depend on your projector model as shown below. For details about the meaning of True XJ-A141/XJ-A146 Pressing the [ASPECT] key will toggle between settings in accordance with the current input source as shown below. Input Source Video, Component - Casio XJ-A256 | User Guide - Page 20
Adjusting the Volume Level You can use the remote controller keys to adjust the volume level of the audio that is output from the projector's speaker or the AV terminal. To adjust the volume level 1. Press the [VOLUME] key. z This causes the [Volume] screen to appear on the projected image. 2. - Casio XJ-A256 | User Guide - Page 21
Presentation Timer The presentation timer shows the amount of presentation timing remaining. You can configure the presentation times so it is displayed in the projected image. Timer To specify timer display position and countdown time settings 1. Press the [TIMER] key. z This will cause the timer - Casio XJ-A256 | User Guide - Page 22
while a timer countdown operation is in progress will stop the countdown and return the countdown start time to the "Start Time" setting. Any other projector operations do not have any affect on the timer. To pause the timer countdown 1. While a timer countdown is in progress, press the [TIMER] key - Casio XJ-A256 | User Guide - Page 23
): Enables manual adjustment to balance the needs of low-power, quiet operation and projection brightness. Off : Give top priority to projection brightness. Important! z While "On (Auto)" is selected as the Eco Mode setting, make sure that the brightness sensor on the top of the projector is not - Casio XJ-A256 | User Guide - Page 24
Adjustment 1 Main Menu". z (for USB port model users) Use the setup menu (page 25) to select the connected to the USB port or via the wireless adapter. Using the [FUNC] Key Pressing port model users) When the input source is an external device connected to the USB port or via the wireless adapter, - Casio XJ-A256 | User Guide - Page 25
Configuring Advanced Projector Settings Your projector has a setup menu that you can use to configure advanced settings. Basic Setup Menu Operations Displaying the Setup Menu Pressing the [MENU] key displays the - Casio XJ-A256 | User Guide - Page 26
J Signal Name Indicator Note z The setup menu items that you can change depend on whether or not an image signal is being input to the projector, and on the currently selected input source. Perform the procedure below after starting projection of an image from an input source. z This example covers - Casio XJ-A256 | User Guide - Page 27
) might turn on automatically when power is restored after being cut off by a power outage, tripping of a breaker, etc. Note z Direct Power On causes the projector to turn on automatically as soon as it is plugged into a power outlet. This greatly reduces the amount of time it takes until you are - Casio XJ-A256 | User Guide - Page 28
to have the password cleared. 1. Personal identification (original or copy of your driver's license, employee I.D., etc.) 2. Projector unit Note that your CASIO distributor will not be able to clear the password of your projector unless you bring both of the items listed above. Also, keep the - Casio XJ-A256 | User Guide - Page 29
", and then press the [ENTER] key. z This will display a dialog box prompting you to enter the current password. 4. Enter the current password. z If the projector is still protected by the factory default password, perform the key operation shown below to enter it. [INPUT] [AUTO] [BLANK] [FREEZE - Casio XJ-A256 | User Guide - Page 30
box without doing anything. 3. After you are finished, press the [MENU] key to exit the setup menu. Entering the Password when Turning On the Projector When you turn on the projector while password protection is turned on will cause a password input dialog box to appear on the projection screen. All - Casio XJ-A256 | User Guide - Page 31
Restoring Projector Settings to Their Initial Factory Defaults You can use the procedures in this section to restore all of the settings on a particular main menu or - Casio XJ-A256 | User Guide - Page 32
To restore all settings on the setup menu to their initial factory defaults 1. Press the [MENU] key to display the setup menu. 2. Use the [T] key to select "Restore All Defaults" and then press the [ENTER] key. 3. After confirming that "Restore All Defaults" sub-menu is selected, press the [ENTER] - Casio XJ-A256 | User Guide - Page 33
Input: This column shows the input source for which each setting is supported. Input source names are abbreviated as follows: R : RGB input C : component video input V : video input H : HDMI (PC) input D : HDMI (DTV) input W : Wireless LAN input (USB port models only) U : USB input (USB port models - Casio XJ-A256 | User Guide - Page 34
menu defaults when there is no input signal will restore defaults for the currently selected input source. *1 The same setting value is saved for both wireless LAN input (W) and USB input (U). B 34 - Casio XJ-A256 | User Guide - Page 35
correct. When this happens, use this setting to adjust the phase manually. Use this sub-menu to return all of the sub-menu Use this sub-menu to adjust the volume level of the projector's speaker or the AV terminal. z Changing this setting when there wireless LAN input (W) and USB input (U). B 35 - Casio XJ-A256 | User Guide - Page 36
/XJ-A251/XJ-A256 only): Projects the input signal at its actual size (1 input source dot equal to one projector output pixel dot) in the center of the projector's projection screen. If the input signal resolution exceeds the projector's output resolution, the excess is cut off. Input Source: Video - Casio XJ-A256 | User Guide - Page 37
. Blue: Select this option to project a blue screen. Black*: Select this option to project a black screen. Logo: Select this option to project the projector's built-in logo screen. Restore Menu R C V H D W U N Source Defaults Specific Use this sub-menu to return all of the sub-menu items on the - Casio XJ-A256 | User Guide - Page 38
Single Use this sub-menu to specify manually the type of signal being input from the projector's AV terminal. Auto*: Select this setting to have the projector switch the video signal system automatically in accordance with the input signal from the video device that is connected to the AV terminal - Casio XJ-A256 | User Guide - Page 39
Off: Select this option to turn off auto keystone correction. Auto Adjust R N Source Specific Use this sub-menu to select whether the projector should detect the RGB input signal type (resolution, frequency) and adjust the projection image accordingly (auto adjust). 1*: Select this option to turn - Casio XJ-A256 | User Guide - Page 40
Restore Menu R C V H D W U N Single Defaults Note (for USB port model users) If you have Portuguese, Turkish, or Russian selected as the projector's language, selecting an external device connected to the projector's USB port or wireless adapter as the input source will cause some menus and - Casio XJ-A256 | User Guide - Page 41
the projector detect select audio output from the projector's built-in speaker or to output from the projector's built-in speaker projector. On: Select this setting when using the projector ! Do not use this projector at altitudes greater than projector will make that device the input source automatically. - Casio XJ-A256 | User Guide - Page 42
, see the "Wireless Function Guide" on the CD-ROM that comes with the projector. Operational Info Main Menu Setting Name Input Setting Unit Description Input Signal R C V H D W U N Source Specific This sub-menu item shows the currently selected input signal (RGB, Component, Video, HDMI (PC - Casio XJ-A256 | User Guide - Page 43
, you should use a vacuum cleaner to clean away accumulated dust and dirt periodically as shown below. Important! z Continued use of the projector after dust has accumulated around the intake vents can cause overheating of internal components and lead to malfunction. z Certain operating conditions - Casio XJ-A256 | User Guide - Page 44
projector is in standby. Projector is warming up after being turned on. Projector is on and standing by for use. Projector is performing internal power down processes. "On (Auto)" or "On (Manual)" is selected for the projector let you know what the problem is when a projector error occurs. When an - Casio XJ-A256 | User Guide - Page 45
go out. Next, reconnect the power cord and turn the projector back on. If the error occurs again when you turn power back on, contact your retailer or nearest authorized CASIO Service Center. Power has turned off automatically due to a fan problem. Confirm that the POWER/STANDBY indicator is lit red - Casio XJ-A256 | User Guide - Page 46
. Zoom and focus cannot be performed due to some trouble in the optical drive circuit. Turn off the projector and then turn it back on again. If the error occurs again when you turn power back on, contact your retailer or nearest authorized CASIO Service Center. Press the [ESC] key to clear the - Casio XJ-A256 | User Guide - Page 47
CASIO Service Center. Projector Troubleshooting Check the following items whenever you experience any problem with the projector. Problem "RGB" is selected while the projector's COMPUTER terminal is connected to the component video output terminal of a video device. On the setup menu, - Casio XJ-A256 | User Guide - Page 48
35. z If the input source is a video camera or document camera, check to make sure there is no problem with the input source device. The message " authorized CASIO service center for replacement. Important! z Try performing the following steps, which may or may not return the projector to normal - Casio XJ-A256 | User Guide - Page 49
Range When performing an operation on the remote controller, point it at the remote control signal receiver on the back or front of the projector. The following illustration shows the range of the remote controller signal. ±30 degrees max. 5 meters (16.4 feet) max. Front ±30 degrees max. 5 meters - Casio XJ-A256 | User Guide - Page 50
shows the relationship between the distance and projected image size. Projection Size Approximate Projection Distance XJ-A141/XJ-A146 XJ-A241/XJ-A246/XJ-A251/XJ-A256 Screen Size Diagonal (cm) Minimum Distance (m / feet) Maximum Distance h* (m / feet) Minimum Distance (m / feet) Maximum - Casio XJ-A256 | User Guide - Page 51
the aspect ratio setting of the projector. XJ-A241/XJ-A246/XJ-A251/XJ-A256 Input source: RGB or HDMI (PC) Input Signal Normal Full 4:3 True SVGA (800 × 600) XGA (1024 × 768) WXGA (1280 × 800) SXGA (1280 × 1024) Input source: Video - Casio XJ-A256 | User Guide - Page 52
XJ-A141/XJ-A146 Input source: RGB or HDMI (PC) Input Signal Normal Full SVGA (800 × 600) XGA (1024 × 768) WXGA (1280 × 800) SXGA (1280 × 1024) Input source: Video, component or HDMI (DTV) Input Signal Normal 16:9 4:3 Aspect Image Squeezed Image Letter Box Image B 52 - Casio XJ-A256 | User Guide - Page 53
Supported Signals Important! Even if a signal is listed in the table below, it does not guarantee that you will be able to display its images correctly. - Casio XJ-A256 | User Guide - Page 54
Frequency (kHz) 56.3 67.5 37.5 45.0 28.1 33.7 31.3 16.6 31.5 15.7 Vertical Frequency (Hz) 50 60 50 60 50 60 50 50 60 60 Video Signal Signal Name NTSC NTSC4.43 PAL PAL-M PAL-N PAL60 SECAM Horizontal Frequency (kHz) 15.7 15.7 15.6 15.7 15.6 15.7 15.6 Vertical Frequency (Hz) 60 - Casio XJ-A256 | User Guide - Page 55
Name XJ-A141/XJ-A146 XJ-A241/XJ-A246 XJ-A251/XJ-A256 Brightness (ANSI Lumens) 2500 3000 Projection System DLP DLP chip XJ-A146/XJ-A246/XJ-A256 only z CASIO COMPUTER CO., LTD. makes no guarantees concerning the operation or suitability of any USB device that you connect to the projector - Casio XJ-A256 | User Guide - Page 56
MA1202-B
-
 1
1 -
 2
2 -
 3
3 -
 4
4 -
 5
5 -
 6
6 -
 7
7 -
8
-
9
-
10
-
11
-
12
-
13
-
14
-
15
-
16
-
17
-
18
-
19
-
20
-
21
-
22
-
23
-
24
-
25
-
26
-
27
-
28
-
29
-
30
-
31
-
32
-
33
-
34
-
35
-
36
-
37
-
38
-
39
-
40
-
41
-
42
-
43
-
44
-
45
-
46
-
47
-
48
-
49
-
50
-
51
-
52
-
53
-
54
-
55
-
56
 |
 |
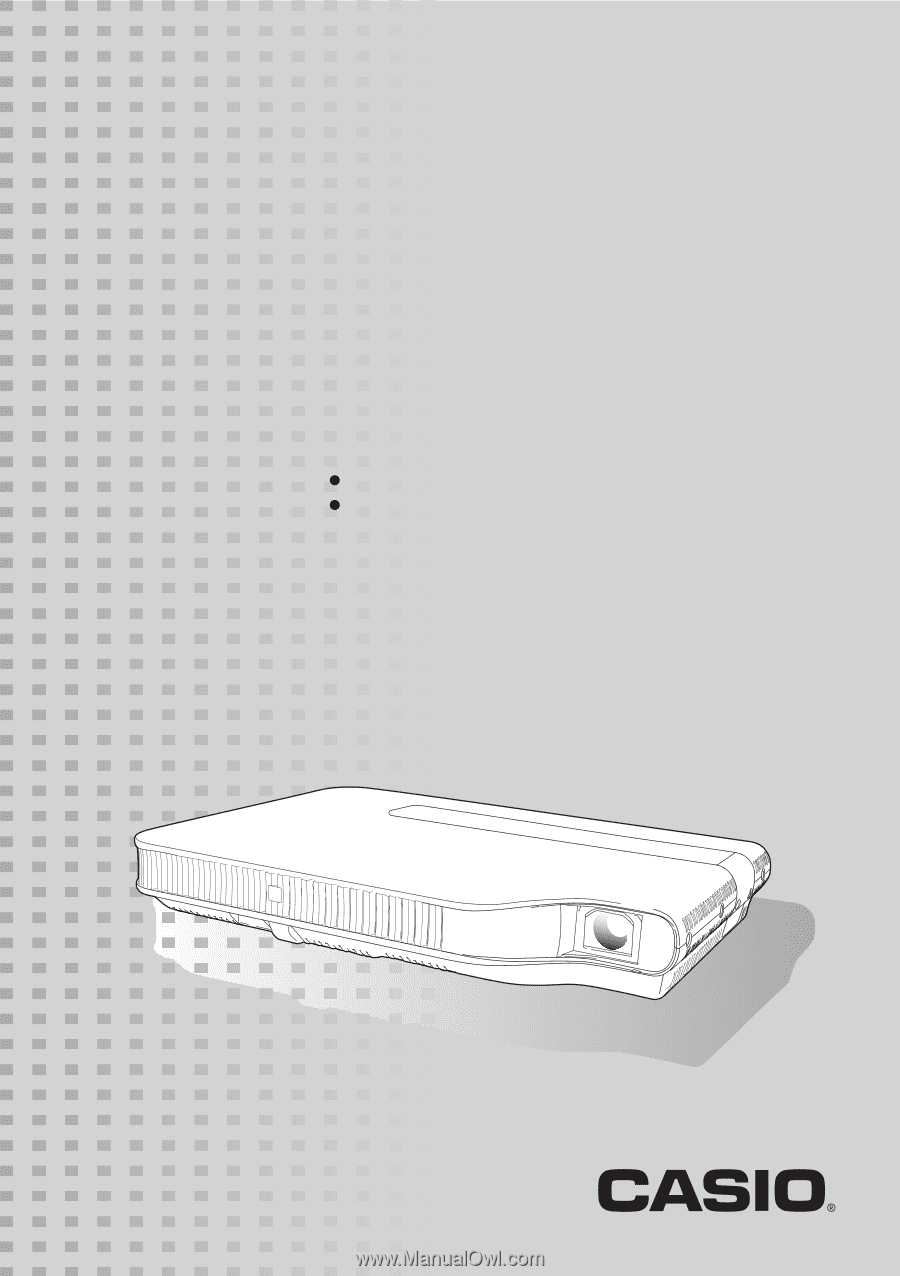
DATA PROJECTOR
XJ-A141/XJ-A146
*
XJ-A241/XJ-A246
*
XJ-A251/XJ-A256
*
User’s Guide
Be sure to read the precautions in the separate Setup Guide.
Be sure to keep all user documentation handy for future
reference.
E
*
USB Port Models