Casio XJ-M140 Setup Guide - Page 13
Getting Ready
 |
View all Casio XJ-M140 manuals
Add to My Manuals
Save this manual to your list of manuals |
Page 13 highlights
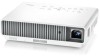
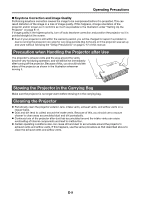
Getting Ready Loading Remote Controller Batteries Important! z Be sure to use alkaline batteries only. *Caution RISK OF EXPLOSION IF BATTERY IS REPLACED BY AN INCORRECT TYPE. DISPOSE OF USED BATTERIES ACCORDING TO THE INSTRUCTIONS. 1. Open the battery cover on the back of the remote controller. 2. Load two new batteries into the case, making sure that their positive (+) and negative (-) ends are facing correctly. 3. Close the battery cover on the back of the remote controller. Replacing Remote Controller Batteries Open the battery cover on the back of the remote controller, replace the old batteries with new ones, and then close the battery cover. Important! z To avoid running down the batteries, store the remote control unit so its buttons are not pressed inadvertently. Setting Up the Projector Locate the projector on a desk, table, or stand that is firm and level. Make sure to allow sufficient space around the sides and back of the projector for proper ventilation. The following illustrations show how the projector should be oriented for optimum projection relative to the screen. XJ-M140/XJ-M145/XJ-M150/XJ-M155 XJ-M240/XJ-M245/XJ-M250/XJ-M255 Screen Screen Make sure the projector is at a right angle to the screen. Position the projector so the lens side is at the edge of the table, etc. z The projector can be configured for projection from the back of a screen. For details, see the User's Guide on the CD-ROM that comes with the projector. E-11
-
 1
1 -
2
-
3
-
4
-
5
-
6
-
7
-
 8
8 -
 9
9 -
 10
10 -
 11
11 -
 12
12 -
 13
13 -
 14
14 -
 15
15 -
 16
16 -
 17
17 -
 18
18 -
19
-
20
-
21
-
22
-
23
-
24
-
25
-
26
 |
 |
