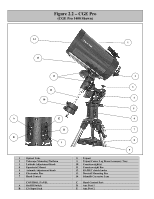
Celestron CGE PRO 925 HD Computerized Telescope CGE Pro Series Manual - Page 7
Attaching the Accessory Tray, Attaching the Electronics Pier, Attaching the Equatorial Mount
 |
View all Celestron CGE PRO 925 HD Computerized Telescope manuals
Add to My Manuals
Save this manual to your list of manuals |
Page 7 highlights
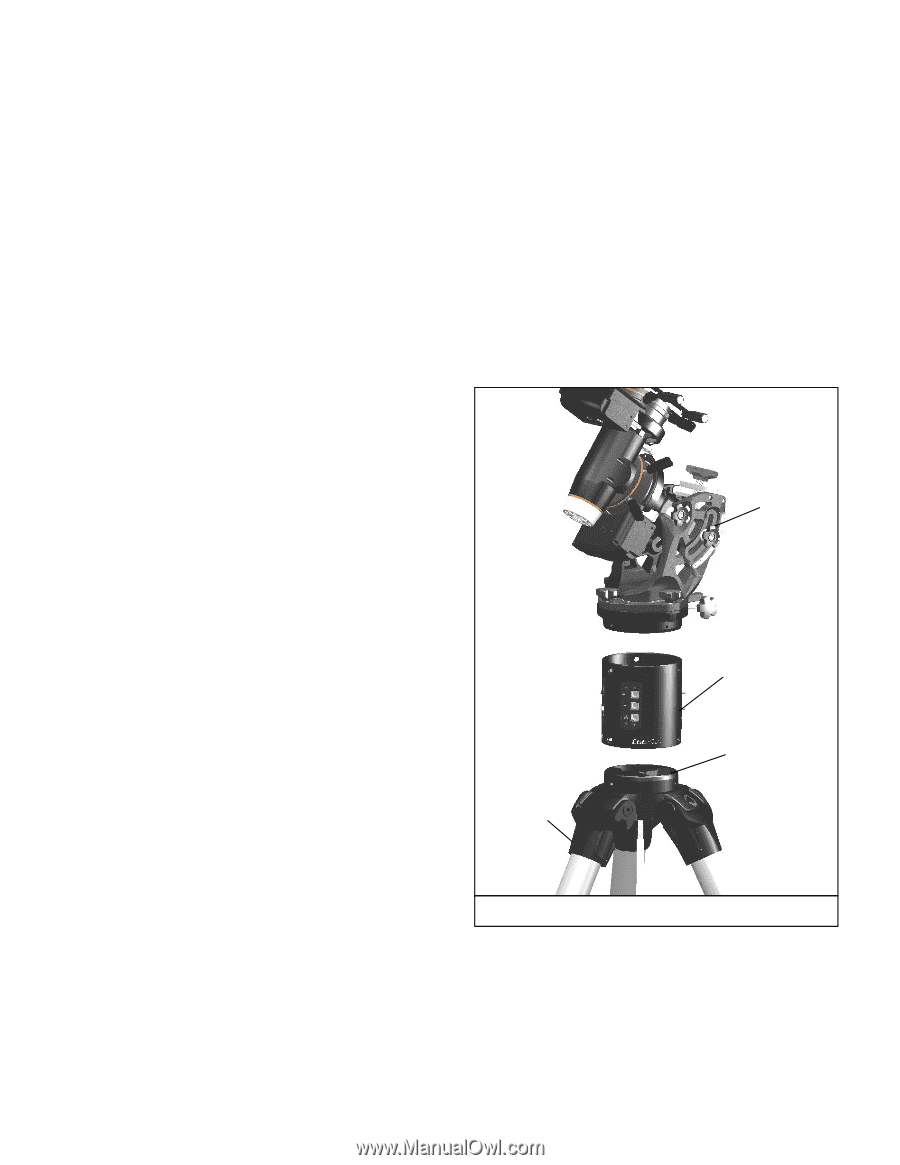
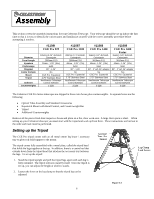
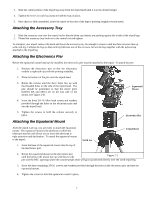
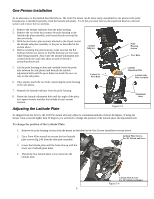
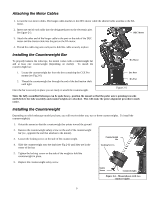
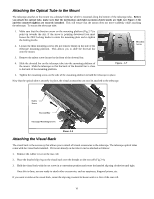
3. Slide the center portion of the tripod leg away from the tripod head until it is at the desired height. 4. Tighten the levers on each leg clamp to hold the legs in place. 5. Once that it is fully assembled, rotate the tripod so that one of the legs is pointing roughly towards north. Attaching the Accessory Tray 1. Slide the accessory tray over the central rod so that the three cup indents are pushing against the inside of the tripod legs. 2. Thread the accessory tray knob on to the central rod and tighten. To transport your tripod, remove the knob and lower the accessory tray far enough to rotate it until the three recesses line up with each leg. Collapse the legs so that each leg falls into one of the recesses. Secure the legs together with the nylon strap attached to the tripod leg. Attaching the Electronics Pier Before the equatorial mount head can be installed, the electronics pier must be attached to the tripod. To attach the pier: 1. Position the electronics pier so that the electronics module is right side up (with the printing readable). 2. Place the bottom of the pier over the tripod head. 3. Rotate the column until the three holes line up with the threaded holes on the side of the tripod head. The pier should be positioned so that the motor ports (labeled RA and DEC) are on the east side of the mount. (see figure 2-4) Equatorial Mount 4. Insert the three 3/8-16 Allen head screws and washers provided through the holes in the electronics pier and into the tripod head. 5. Tighten the screws to hold the column securely in place. Electronics Pier Attaching the Equatorial Mount After the tripod is set up, you are ready to attach the equatorial mount. The equatorial mount is the platform to which the telescope attaches and allows you to move the telescope in right ascension and declination. To attach the equatorial mount to the tripod: 1. Insert the base of the equatorial mount into the top of the electronics pier. North Leg Tripod Head 2. Rotate the equatorial mount on the electronics pier until the holes in the mount line up with those in the Figure 2-2 pier and the DEC opening (where the counterweight shaft will go) is positioned directly over the north tripod leg. 3. Insert the three remaining 3/8-16 screws and washers provided through the holes in the electronics pier and into the equatorial mount. 4. Tighten the screws to hold the equatorial mount in place. 7
-
 1
1 -
 2
2 -
 3
3 -
 4
4 -
 5
5 -
 6
6 -
 7
7 -
 8
8 -
 9
9 -
 10
10 -
 11
11 -
 12
12 -
13
-
14
-
15
-
16
-
17
-
18
-
19
-
20
-
21
-
22
-
23
-
24
-
25
-
26
-
27
-
28
-
29
-
30
-
31
-
32
-
33
-
34
-
35
-
36
-
37
-
38
-
39
-
40
-
41
-
42
-
43
-
44
-
45
-
46
-
47
-
48
-
49
-
50
-
51
-
52
-
53
-
54
-
55
-
56
-
57
-
58
-
59
-
60
-
61
-
62
-
63
-
64
-
65
-
66
-
67
-
68
-
69
-
70
-
71
-
72
 |
 |