Celestron Nightscape 8300 CCD Camera AstroFX Imaging Software Manual - Page 10
Smooth
 |
View all Celestron Nightscape 8300 CCD Camera manuals
Add to My Manuals
Save this manual to your list of manuals |
Page 10 highlights
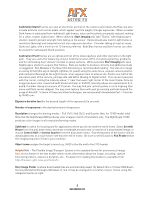
(Figure 6 - SMOOTH Screen) SMOOTH Is the fourth tab from the left (Figure 6) and a metaphor for the smoother appearance of an image after noise reduction has been applied. As stated, there is no substitute for Signal to eliminate noise but in the real world, time and weather constraints often necessitate the use of a smoothing filter. When the unattractive, grainy look of random noise (most noticeable in dim features) is reduced, an image may be further enhanced. (Figure 7) illustrates the "speckly" noise in the dim arms of a galaxy before and after smoothing. Selective Smoothing lets you slide left for less Low-Pass smoothing and right for more. Try to reach a level of attractive smoothness, stopping short of an unrealistic "plastic" look. Level Selection works similarly to STRETCH's Mid-level selection. Auto allows AFX to apply smoothing adaptively - background sky and dimmer areas are smoothed more aggressively than brighter ones (better signal). (Figure 7) Before After You can alternatively take control of which brightness levels to smooth by selecting Mouse and doubleclicking a point in the histogram or by dragging the green marker line to the desired brightness level. The dark portion at left represents shadows, the white portion at right represents highlights, and midtones are seen in the middle. Apply applies the filter. If you are not satisfied, simply click Undo to try again. When content, you can consider saving this version before moving ahead to the next tab. 9 www.celestron.com
-
 1
1 -
2
-
3
-
4
-
 5
5 -
 6
6 -
 7
7 -
 8
8 -
 9
9 -
 10
10 -
 11
11 -
 12
12 -
 13
13
 |
 |
