Celestron Omni XLT AZ 102 Instruction Manual - Page 13
Installing the Finderscope, Installing the Visual Back, Telescope Basics - refractor basic mount
 |
View all Celestron Omni XLT AZ 102 manuals
Add to My Manuals
Save this manual to your list of manuals |
Page 13 highlights
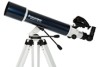
Installing the Finderscope To install the finderscope onto the telescope you must first mount the finderscope through the finder bracket and then attach it to the telescope. Toward the rear of the telescope tube (on refractors and Schmidt-Cassegrain) and front of the telescope tube (Newtonian), there is a small bracket with a set screw in it. This is where the finderscope bracket will be mounted. To install the finderscope: 1. Loosen the finderscope adjustment screws so they don't protrude into the bracket. Then slide the rubber O-ring over the eyepiece end of the finderscope (smallest diameter side) and roll it 2/3 of the way up into the slot (groove) in the finderscope. 2. Insert the eyepiece end of the finderscope through the narrow part of the bracket until the O-ring presses tightly between the finder and the inside of the bracket. Once it stops, then pull outward on the spring loaded adjustment screw and continue inserting the finderscope until it is approximately centered in the bracket. 3. Tighten the two adjustment screws until they make contact with the finderscope body. 4. Locate the mounting bracket near the front (open) end of the telescope. Figure 2-10 5. Loosen the set screw on the mounting bracket on the telescope so it does not protrude into the bracket. 6. Slide the finder bracket (attached to the finderscope) into the mounting bracket on the telescope. 7. The finderscope bracket will slide in from the back. The finderscope should be oriented so that the objective lens is toward the front (open) end of the telescope. 8. Tighten the set screw on the mounting bracket to hold the finderscope in place. For information on aligning your finderscope, see Telescope Basics section of this manual. Installing the Visual Back Only applicable to the Schmidt-Cassegrain, the visual back is the accessory that allows you to attach all visual accessories to the telescope. The Omni Schmidt-Cassegrain normally comes with the visual back installed. If in case it is not installed, follow these instructions for attaching it: 1. Remove the cover on the rear cell and then place the knurled slip ring on the visual back over the threads on the rear cell (Fig 2-11). 2. Hold the visual back with the set screw in a convenient position and rotate the knurled slip ring clockwise until tight. Once this is done, you are ready to attach other accessories, such as diagonals (for refractors and the SchmidtCassegrain), eyepieces, etc. If you want to remove the visual back, rotate the slip ring counterclockwise until it is free of the rear cell. 13
-
 1
1 -
2
-
3
-
4
-
5
-
6
-
7
-
 8
8 -
 9
9 -
 10
10 -
 11
11 -
 12
12 -
 13
13 -
 14
14 -
 15
15 -
 16
16 -
 17
17 -
 18
18 -
19
-
20
-
21
-
22
-
23
-
24
-
25
-
26
-
27
-
28
-
29
-
30
-
31
-
32
-
33
-
34
-
35
-
36
-
37
-
38
-
39
-
40
-
41
-
42
-
43
-
44
-
45
-
46
-
47
-
48
-
49
-
50
-
51
-
52
-
53
-
54
-
55
-
56
-
57
-
58
-
59
-
60
 |
 |
