Cisco 1811 User Instructions
Cisco 1811 - Integrated Services Router Manual
 |
UPC - 746320950822
View all Cisco 1811 manuals
Add to My Manuals
Save this manual to your list of manuals |
Cisco 1811 manual content summary:
- Cisco 1811 | User Instructions - Page 1
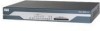
basic hardware configuration needed to install the CVO solution in your home/office. This is a known working configuration to assist you in your initial set-up and is not intended to cover all variations of home/office network environments. This guide is written based on Cisco 1811 routers. Ports on - Cisco 1811 | User Instructions - Page 2
modem/router using an Ethernet cable going from the Ethernet port on the ISP device, to the WAN/FE4 port on the CVO router as shown in Figure 1. Plug your PC into the CVO router using the LAN trusted port FE0 as shown in Figure 1. Cisco Virtual Office - End User Instructions for Cisco 1811 Router - Cisco 1811 | User Instructions - Page 3
will automatically direct you to the SDP welcome page, where you have to authenticate using the login username/password that you configured during the CCP Express setup (Figure 2). 78-18859-01 Cisco Virtual Office - End User Instructions for Cisco 1811 Router Set Up at Home or Small Office 3 - Cisco 1811 | User Instructions - Page 4
Figure 3 SDP Screen Step 3 Securely download the CVO router configuration. When the screen refreshes you will notice a field for site URL. Enter the URL provided by your network administrator (Figure 4). Cisco Virtual Office - End User Instructions for Cisco 1811 Router Set Up at Home or Small - Cisco 1811 | User Instructions - Page 5
Figure 4 URL Field CONFIGURE YOUR ROUTER Step 4 After you click Next you will see a Security Request confirmation accepted you will see the confirmation screen shown in Figure 6. 78-18859-01 Cisco Virtual Office - End User Instructions for Cisco 1811 Router Set Up at Home or Small Office 5 - Cisco 1811 | User Instructions - Page 6
address: a. restart your PC - this will automatically renew its IP address b. (advanced users) right click on your network adaptor icon in the systray and click repair as show in Figure 8: Cisco Virtual Office - End User Instructions for Cisco 1811 Router Set Up at Home or Small Office 6 78-18859 - Cisco 1811 | User Instructions - Page 7
wizards will guide you through the process of configuring your CVO router to connect to the Internet, as described next. 1. Figure 9 shows the welcome screen of CCP Express. Click "Next" to start the wizard. 78-18859-01 Cisco Virtual Office - End User Instructions for Cisco 1811 Router Set Up - Cisco 1811 | User Instructions - Page 8
CONFIGURE YOUR ROUTER Figure 9 Welcome Screen 2. Enter the desired login credentials and enable password, as well as the hostname and domain name for the router (Figure 10), then click "Next". Cisco Virtual Office - End User Instructions for Cisco 1811 Router Set Up at Home or Small Office 8 78 - Cisco 1811 | User Instructions - Page 9
10 Basic Configuration CONFIGURE YOUR ROUTER 3. Specify "Secure Device Provisioning" as the method for provisioning the router, as SDP will be used for the bootstrap config (Figure 11), then click "Next" 78-18859-01 Cisco Virtual Office - End User Instructions for Cisco 1811 Router Set Up - Cisco 1811 | User Instructions - Page 10
4. Choose the corresponding IP address assignment method (PPPoE or Static). For PPPoE, select the authentication method (CHAP or PAP), and provide the appropriate credentials provided to you by your ISP (Figure 12) Cisco Virtual Office - End User Instructions for Cisco 1811 Router Set Up at Home - Cisco 1811 | User Instructions - Page 11
Figure 12 PPPoE CONFIGURE YOUR ROUTER For Static IP addresses, specify the IP address and subnet mask to be used by the router (Figure 13). 78-18859-01 Cisco Virtual Office - End User Instructions for Cisco 1811 Router Set Up at Home or Small Office 11 - Cisco 1811 | User Instructions - Page 12
CONFIGURE YOUR ROUTER Figure 13 Static IP Addresses 5. Choose whether or not to create a default route (Figure 14), then click "Next". Cisco Virtual Office - End User Instructions for Cisco 1811 Router Set Up at Home or Small Office 12 78-18859-01 - Cisco 1811 | User Instructions - Page 13
Figure 14 Default Route CONFIGURE YOUR ROUTER 6. CCP Express displays a summary page of the basic configuration that you setup for the router. Click "Finish" to deliver it to the router (Figure 15 and Figure 16). 78-18859-01 Cisco Virtual Office - End User Instructions for Cisco 1811 Router Set - Cisco 1811 | User Instructions - Page 14
CONFIGURE YOUR ROUTER Figure 15 Summary Page PPPoE Cisco Virtual Office - End User Instructions for Cisco 1811 Router Set Up at Home or Small Office 14 78-18859-01 - Cisco 1811 | User Instructions - Page 15
Any use of actual IP addresses in illustrative content is unintentional and coincidental. © 2008 Cisco Systems, Inc. All rights reserved. Printed in the USA on recycled paper containing 10% postconsumer waste. 78-18859-01 Cisco Virtual Office - End User Instructions for Cisco 1811 Router Set Up at - Cisco 1811 | User Instructions - Page 16
CONFIGURE YOUR ROUTER Cisco Virtual Office - End User Instructions for Cisco 1811 Router Set Up at Home or Small Office 16 78-18859-01
-
 1
1 -
 2
2 -
 3
3 -
 4
4 -
 5
5 -
 6
6 -
 7
7 -
8
-
9
-
10
-
11
-
12
-
13
-
14
-
15
-
16
 |
 |

Americas Headquarters:
Cisco Systems, Inc., 170 West Tasman Drive, San Jose, CA 95134-1706
USA
Cisco Virtual Office – End User Instructions for
Cisco 1811 Router Set Up at Home or Small Office
Introduction
This document describes the end-user instructions to deploy the Cisco Virtual Office (CVO) for home or
small office use.
Cisco Virtual Office (CVO) solution offers a seamless home/small office experience comparable to
working in your company’s central office. CVO features support secure, always-on wired and wireless
(WLAN) data connectivity, voice services, and video capabilities.
Setup Your CVO Hardware
In this section you will be able to identify the basic hardware configuration needed to install the CVO
solution in your home/office. This is a known working configuration to assist you in your initial set-up
and is not intended to cover all variations of home/office network environments. This guide is written
based on Cisco 1811 routers.
Ports on the CVO Router
It is important that you understand which ports on the back of your CVO router are used for what
purposes.
•
FE1 to FE9: LAN Ports FE1 to FE9 are end-user device secure ports. Connect your
PC/Mac/Linux/IP phone equipment here.
•
FE0: Use the WAN/FE0 port to connect your CVO router to your Internet Service Provider (ISP)
device.