Cisco 7912G Administration Guide - Page 82
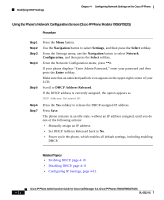
Navigation, Settings, Select, Network, Configuration, Enter, DHCP Address Released, Procedure
 |
UPC - 746320852409
View all Cisco 7912G manuals
Add to My Manuals
Save this manual to your list of manuals |
Page 82 highlights
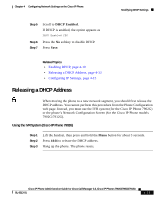
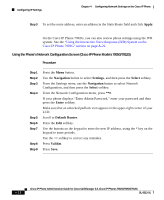
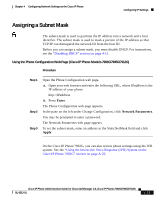
Modifying DHCP Settings Chapter 4 Configuring Network Settings on the Cisco IP Phone Using the Phone's Network Configuration Screen (Cisco IP Phone Models 7905G/7912G) Procedure Step 1 Step 2 Step 3 Step 4 Step 5 Step 6 Step 7 Press the Menu button. Use the Navigation button to select Settings, and then press the Select softkey. From the Settings menu, use the Navigation button to select Network Configuration, and then press the Select softkey. From the Network Configuration menu, press **#. If your phone displays "Enter Admin Password," enter your password and then press the Enter softkey. Make sure that an unlocked padlock icon appears in the upper-right corner of your LCD. Scroll to DHCP Address Released. If the DHCP address is currently assigned, the option appears as DHCP Address Released NO Press the Yes softkey to release the DHCP-assigned IP address. Press Save. The phone remains in an idle state, without an IP address assigned, until you do one of the following actions: • Manually assign an IP address. • Set DHCP Address Released back to No. • Power cycle the phone, which enables all default settings, including enabling DHCP. Related Topics • Enabling DHCP, page 4-10 • Disabling DHCP, page 4-11 • Configuring IP Settings, page 4-15 4-14 Cisco IP Phone Administration Guide for Cisco CallManager 3.3, Cisco IP Phones 7902G/7905G/7912G OL-6313-01
-
 1
1 -
2
-
3
-
4
-
5
-
6
-
7
-
8
-
9
-
10
-
11
-
12
-
13
-
14
-
15
-
16
-
17
-
18
-
19
-
20
-
21
-
22
-
23
-
24
-
25
-
26
-
27
-
28
-
29
-
30
-
31
-
32
-
33
-
34
-
35
-
36
-
37
-
38
-
39
-
40
-
41
-
42
-
43
-
44
-
45
-
46
-
47
-
48
-
49
-
50
-
51
-
52
-
53
-
54
-
55
-
56
-
57
-
58
-
59
-
60
-
61
-
62
-
63
-
64
-
65
-
66
-
67
-
68
-
69
-
70
-
71
-
72
-
73
-
74
-
75
-
76
-
 77
77 -
 78
78 -
 79
79 -
 80
80 -
 81
81 -
 82
82 -
 83
83 -
 84
84 -
 85
85 -
 86
86 -
 87
87 -
88
-
89
-
90
-
91
-
92
-
93
-
94
-
95
-
96
-
97
-
98
-
99
-
100
-
101
-
102
-
103
-
104
-
105
-
106
-
107
-
108
-
109
-
110
-
111
-
112
-
113
-
114
-
115
-
116
-
117
-
118
-
119
-
120
-
121
-
122
-
123
-
124
-
125
-
126
-
127
-
128
-
129
-
130
-
131
-
132
-
133
-
134
-
135
-
136
-
137
-
138
-
139
-
140
-
141
-
142
-
143
-
144
-
145
-
146
-
147
-
148
-
149
-
150
-
151
-
152
-
153
-
154
-
155
-
156
-
157
-
158
-
159
-
160
-
161
-
162
-
163
-
164
-
165
-
166
-
167
-
168
-
169
-
170
-
171
-
172
-
173
-
174
-
175
-
176
-
177
-
178
-
179
-
180
-
181
-
182
-
183
-
184
 |
 |
