Cisco AIR-AP1142N-A-K9 Hardware Installation Guide - Page 55
Enable Radio Interfaces, SSID, WEP Keys, Network Interfaces > Radio0-802.11B, Radio0-802.11G - default password
 |
View all Cisco AIR-AP1142N-A-K9 manuals
Add to My Manuals
Save this manual to your list of manuals |
Page 55 highlights
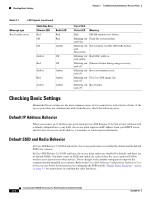
Chapter 3 Troubleshooting Autonomous Access Points Checking Basic Settings Enable Radio Interfaces To enable the radio interfaces, follow these instructions: Step 1 Step 2 Step 3 Step 4 Step 5 Step 6 Step 7 Step 8 Step 9 Step 10 Step 11 Use your web-browser to access your access point. At the prompt, enter the administrator username and password. The default username is Cisco and the default password is Cisco. The username and password are case sensitive. When the Summary Status page displays, click Network Interfaces > Radio0-802.11B or Radio0-802.11G and the radio status page displays. Click Settings and the radio settings page displays. Click Enable in the Enable Radio field. Click Apply. Click Network Interfaces > Radio0-802.11A and the radio status page displays. Click Settings and the radio settings page displays. Click Enable in the Enable Radio field. Click Apply. Close your web-browser. SSID Wireless clients attempting to associate with the access point must use the same SSID as the access point. If a client device's SSID does not match the SSID of an access point in radio range, the client device will not associate. The access point default SSID is tsunami. Refer to the Cisco IOS Software Configuration Guide for Cisco Aironet Access Points for instructions on how to configure an SSID. Note The default SSID (tsunami) is not supported in access points running Cisco IOS Release 12.3(4)JA or later. You must configure an SSID before client devices can associate to the access point. WEP Keys The WEP key you use to transmit data must be set up exactly the same on your access point and any wireless devices with which it associates. For example, if you set WEP Key 3 on your client adapter to 0987654321 and select it as the transmit key, you must also set WEP Key 3 on the access point to exactly the same value. The access point does not need to use Key 3 as its transmit key, however. Refer to the Cisco IOS Software Configuration Guide for Cisco Aironet Access Points for instructions on setting the access point's WEP keys. OL-8369-05 Cisco Aironet 1130AG Series Access Point Hardware Installation Guide 3-5
-
 1
1 -
2
-
3
-
4
-
5
-
6
-
7
-
8
-
9
-
10
-
11
-
12
-
13
-
14
-
15
-
16
-
17
-
18
-
19
-
20
-
21
-
22
-
23
-
24
-
25
-
26
-
27
-
28
-
29
-
30
-
31
-
32
-
33
-
34
-
35
-
36
-
37
-
38
-
39
-
40
-
41
-
42
-
43
-
44
-
45
-
46
-
47
-
48
-
49
-
 50
50 -
 51
51 -
 52
52 -
 53
53 -
 54
54 -
 55
55 -
 56
56 -
 57
57 -
 58
58 -
 59
59 -
 60
60 -
61
-
62
-
63
-
64
-
65
-
66
-
67
-
68
-
69
-
70
-
71
-
72
-
73
-
74
-
75
-
76
-
77
-
78
-
79
-
80
-
81
-
82
-
83
-
84
-
85
-
86
-
87
-
88
-
89
-
90
-
91
-
92
-
93
-
94
-
95
-
96
-
97
-
98
-
99
-
100
-
101
-
102
-
103
-
104
-
105
-
106
-
107
-
108
-
109
-
110
-
111
-
112
-
113
-
114
-
115
-
116
-
117
-
118
-
119
-
120
-
121
-
122
-
123
-
124
-
125
-
126
 |
 |
