Cisco ASR1006-10G-HA/K9 Installation Guide - Page 9
Attaching the Cable-Management Brackets to the Cisco ASR 1006 Router, Step 5 - ha ha ha
 |
View all Cisco ASR1006-10G-HA/K9 manuals
Add to My Manuals
Save this manual to your list of manuals |
Page 9 highlights
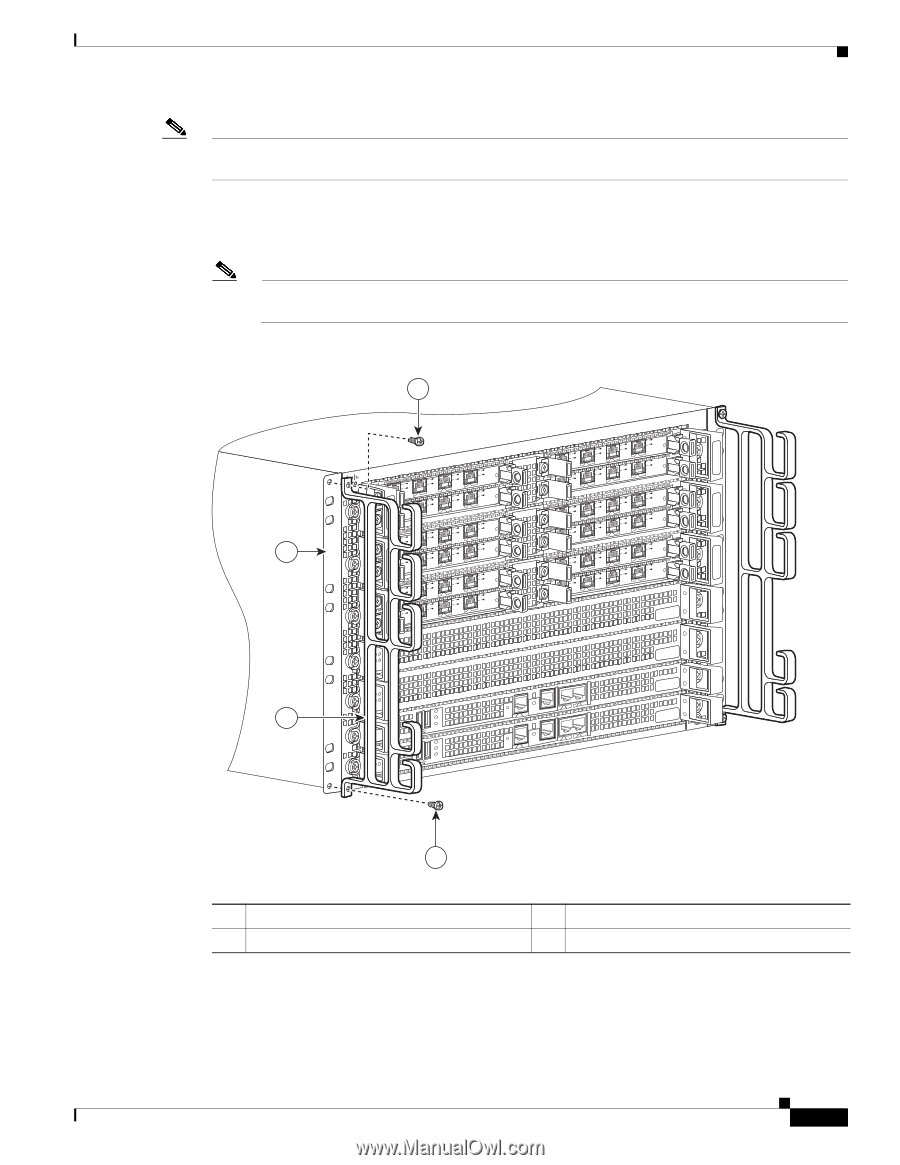
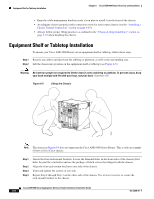
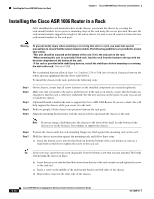
Chapter 6 Cisco ASR 1006 Router Overview and Installation Equipment Shelf or Tabletop Installation Note The cable-management brackets are installed on the chassis after you install the chassis rack-mount brackets. Step 5 Gather the two cable-management brackets and screws shipped with the chassis. Figure 6-6 shows the cable-management brackets attached on the front of the Cisco ASR 1006 Router when the chassis is placed on a table top or equipment shelf. Note Make certain that the cable-management 'U' feature device has the open end pointing upwards when you attach it to the chassis. Figure 6-6 Attaching the Cable-Management Brackets to the Cisco ASR 1006 Router 1 STATUS A/L C/A A/L C/A A/L C/A STATUS STATUS STATUS 3 0 0 0 0 0 A/L C/A A/L C/A A/L C/A A/L C/A A/L C/A 1 1 1 1 1 A/L C/A A/L C/A A/L C/A A/L C/A A/L C/A 2 2 2 2 2 A/L C/A A/L C/A A/L C/A A/L C/A A/L C/A A/L C/A 3 3 3 3 3 A/L C/A A/L C/A A/L C/A A/L C/A A/L C/A A/L C/A SPA-4XOC3-POS SPA-4XOC3-POS SPA-4XOC3-POS SPA-4XOC3-POS SPA-4XOC3-POS SPA-4XOC3-POS STATUS STATUS STATUS STATUS STATUS STATUS 0 0 0 0 0 0 A/L C/A A/L C/A A/L C/A A/L C/A A/L C/A A/L C/A 1 1 1 1 1 1 A/L C/A A/L C/A A/L C/A A/L C/A A/L C/A 2 2 2 2 2 2 A/L C/A A/L C/A A/L C/A A/L C/A A/L C/A 3 3 3 3 3 3 A/L C/A A/L C/A A/L C/A A/L C/A A/L C/A SPA-4XOC3-POS SPA-4XOC3-POS SPA-4XOC3-POS SPA-4XOC3-POS SPA-4XOC3-POS SPA-4XOC3-POS STATUS STATUS A/L C/A 3 A/L C/A 2 1 0 280036 2 1 1 Cable-management screws 2 Cable-management bracket 3 Chassis front rack-mount bracket -- Step 6 Step 7 Screw the cable-management bracket to each side of the rack-mount brackets already attached to the chassis. For each cable-management bracket, use two screws from the package of four screws. Ensure that all the screws are securely tightened. OL-13208-09 Cisco ASR 1000 Series Aggregation Services Routers Hardware Installation Guide 6-9
-
 1
1 -
2
-
3
-
 4
4 -
 5
5 -
 6
6 -
 7
7 -
 8
8 -
 9
9 -
 10
10 -
 11
11 -
 12
12 -
 13
13 -
 14
14 -
15
-
16
-
17
-
18
-
19
-
20
-
21
-
22
-
23
-
24
-
25
-
26
-
27
-
28
-
29
-
30
-
31
-
32
-
33
-
34
-
35
-
36
 |
 |