Cisco SPA2102 Administration Guide - Page 49
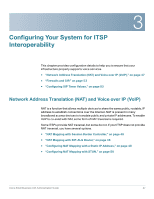
Configuring Your System for ITSP Interoperability, Firewalls and SIP, on Handle VIA rport - nat
 |
View all Cisco SPA2102 manuals
Add to My Manuals
Save this manual to your list of manuals |
Page 49 highlights
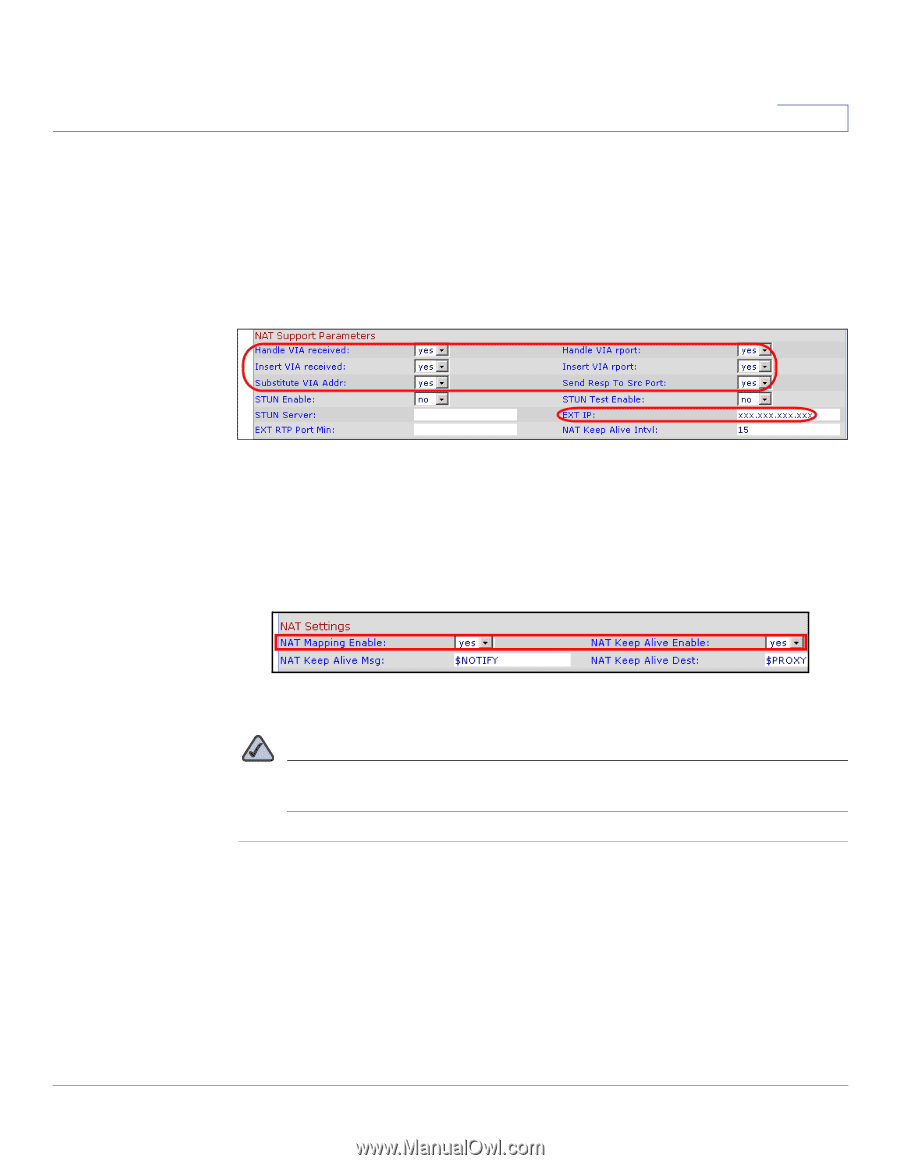
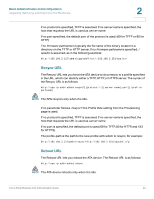
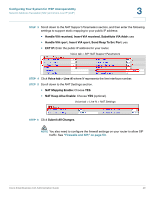
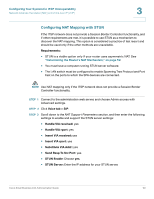
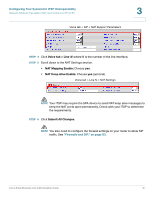
Configuring Your System for ITSP Interoperability Network Address Translation (NAT) and Voice over IP (VoIP) 3 STEP 3 Scroll down to the NAT Support Parameters section, and then enter the following settings to support static mapping to your public IP address: • Handle VIA received, Insert VIA received, Substitute VIA Addr: yes • Handle VIA rport, Insert VIA rport, Send Resp To Src Port: yes • EXT IP: Enter the public IP address for your router. Voice tab > SIP: NAT Support Parameters STEP 4 Click Voice tab > Line N, where N represents the line interface number. STEP 5 Scroll down to the NAT Settings section. • NAT Mapping Enable: Choose YES. • NAT Keep Alive Enable: Choose YES (optional). Voice tab > Line N > NAT Settings STEP 6 Click Submit All Changes. NOTE You also need to configure the firewall settings on your router to allow SIP traffic. See "Firewalls and SIP," on page 53. Cisco Small Business ATA Administration Guide 49
-
 1
1 -
2
-
3
-
4
-
5
-
6
-
7
-
8
-
9
-
10
-
11
-
12
-
13
-
14
-
15
-
16
-
17
-
18
-
19
-
20
-
21
-
22
-
23
-
24
-
25
-
26
-
27
-
28
-
29
-
30
-
31
-
32
-
33
-
34
-
35
-
36
-
37
-
38
-
39
-
40
-
41
-
42
-
43
-
 44
44 -
 45
45 -
 46
46 -
 47
47 -
 48
48 -
 49
49 -
 50
50 -
 51
51 -
 52
52 -
 53
53 -
 54
54 -
55
-
56
-
57
-
58
-
59
-
60
-
61
-
62
-
63
-
64
-
65
-
66
-
67
-
68
-
69
-
70
-
71
-
72
-
73
-
74
-
75
-
76
-
77
-
78
-
79
-
80
-
81
-
82
-
83
-
84
-
85
-
86
-
87
-
88
-
89
-
90
-
91
-
92
-
93
-
94
-
95
-
96
-
97
-
98
-
99
-
100
-
101
-
102
-
103
-
104
-
105
-
106
-
107
-
108
-
109
-
110
-
111
-
112
-
113
-
114
-
115
-
116
-
117
-
118
-
119
-
120
-
121
-
122
-
123
-
124
-
125
-
126
-
127
-
128
-
129
-
130
-
131
-
132
-
133
-
134
-
135
-
136
-
137
-
138
-
139
-
140
-
141
-
142
-
143
-
144
-
145
-
146
-
147
-
148
-
149
-
150
-
151
-
152
-
153
-
154
-
155
-
156
-
157
-
158
-
159
-
160
-
161
-
162
-
163
-
164
-
165
-
166
-
167
-
168
-
169
-
170
-
171
-
172
-
173
-
174
-
175
-
176
-
177
-
178
-
179
-
180
-
181
-
182
-
183
-
184
-
185
-
186
-
187
-
188
-
189
-
190
-
191
-
192
-
193
-
194
-
195
-
196
-
197
-
198
-
199
-
200
-
201
-
202
-
203
-
204
-
205
-
206
-
207
-
208
-
209
-
210
-
211
-
212
-
213
-
214
-
215
-
216
-
217
-
218
-
219
-
220
-
221
-
222
-
223
-
224
-
225
-
226
-
227
-
228
-
229
-
230
-
231
-
232
-
233
-
234
-
235
-
236
-
237
-
238
-
239
 |
 |