Cisco SR216 User Guide - Page 14
Connection Instructions
 |
UPC - 745883556519
View all Cisco SR216 manuals
Add to My Manuals
Save this manual to your list of manuals |
Page 14 highlights
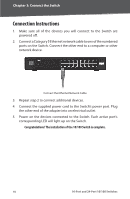
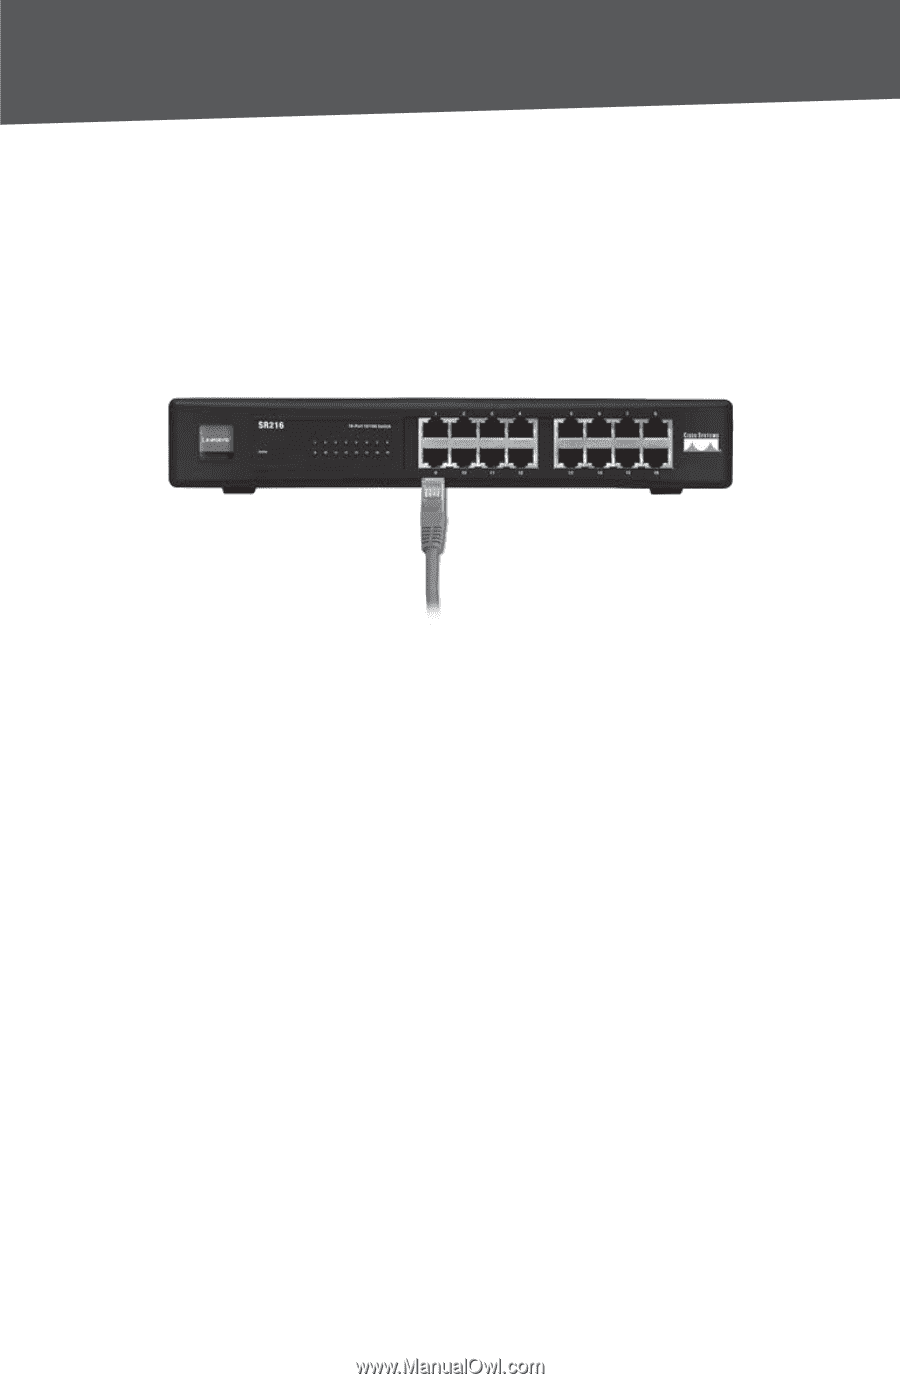
Chapter 3: Connect the Switch Connection Instructions 1 . Make sure all of the devices you will connect to the Switch are powered off. 2 . Connect a Category 5 Ethernet network cable to one of the numbered ports on the Switch. Connect the other end to a computer or other network device. Connect the Ethernet Network Cable 3 . Repeat step 2 to connect additional devices. 4 . Connect the supplied power cord to the Switch's power port. Plug the other end of the adapter into an electrical outlet. 5 . Power on the devices connected to the Switch. Each active port's corresponding LED will light up on the Switch. Congratulations! The installation of the 10/100 Switch is complete. 10 16-Port and 24-Port 10/100 Switches
-
 1
1 -
2
-
3
-
4
-
5
-
6
-
7
-
8
-
 9
9 -
 10
10 -
 11
11 -
 12
12 -
 13
13 -
 14
14 -
 15
15 -
 16
16 -
 17
17 -
 18
18 -
 19
19 -
20
-
21
-
22
-
23
-
24
-
25
-
26
-
27
-
28
-
29
-
30
-
31
-
32
 |
 |
10
16-Port and 24-Port 10/100 Sw±tches
Chapter ²: Connect the Sw±tch
Connection Instructions
Make sure all of the devices you will connect to the Switch are
powered off°
Connect a Category 5 Ethernet network cable to one of the numbered
ports on the Switch° Connect the other end to a computer or other
network device°
Connect the Ethernet Network Cable
Repeat step 2 to connect additional devices°
Connect the supplied power cord to the Switch’s power port° Plug
the other end of the adapter into an electrical outlet°
Power on the devices connected to the Switch° Each active port’s
corresponding LED will light up on the Switch°
Congratulations! The installation of the 10/100 Switch is complete.
1°
2°
3°
4°
5°