Cisco VWIC-2MFT-T1 Installation Instructions - Page 10
Configuring the VWIC-2MFT-T1-DIR, VWIC-2MFT-E1-DIR, Y-Cable Specifications - pri
 |
UPC - 746320228402
View all Cisco VWIC-2MFT-T1 manuals
Add to My Manuals
Save this manual to your list of manuals |
Page 10 highlights
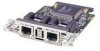
Step 4 Step 5 Step 6 Connect the other end of the Y-cable to the BTS patch or demarcation panel at your site. Turn on power to the routers. Check that the CD LEDs goes on, which means that the card's internal DSU/CSU is communicating with the DSU/CSU at the T1 or E1 service provider central office. For non-redundant configurations, use a straight-through, shielded RJ-48C-to-RJ-48C cable. Note If you choose to use the T1/E1 Multiflex VWIC in a non-redundant configuration, you must close the relays on the card using the standalone subcommand. For more information, see the "Cisco MWR 1941-DC Mobile Wireless Edge Router Software Configuration Guide." Step 1 Step 2 Step 3 Step 4 Step 5 Confirm that the router is turned off. Connect one end of the cable to the T1 or E1 port on the card. Connect the other end to the BTS patch or demarcation panel at your site. Turn on power to the router. Check that the CD LED goes on, which means that the card's internal DSU/CSU is communicating with the DSU/CSU at the T1 or E1 service provider central office. Configuring the VWIC-2MFT-T1-DIR, VWIC-2MFT-E1-DIR For information about configuring the T1/E1 Multiflex VWICs, see the "Cisco MWR 1941-DC Mobile Wireless Edge Router Software Configuration Guide." Y-Cable Specifications Depending on the Cisco MWR 1941-DC router implementation, the T1/E1 Multiflex VWIC can be used in a standalone router or in redundant Cisco MWR 1941-DC router configurations. For redundant configurations, a special Y-cable is required to connect the active and standby routers. The Y-cable provides a dual E1 or T1 PRI connection. This section describes the specifications of the Y-cable. • T1/E1 Multiflex VWIC Y-cables should be made with 4 twisted-pair, shielded, 28-gauge cables. • The cable length of each stub (from the RJ-48C connector to the junction point) should not exceed 3 inches (76 mm). • The cable length from junction point to the patch panel is determined by the customer. VWIC-2MFT-T1-DIR, VWIC-2MFT-E1-DIR Installation Instructions 10 78-15842-01
-
 1
1 -
2
-
3
-
4
-
 5
5 -
 6
6 -
 7
7 -
 8
8 -
 9
9 -
 10
10 -
 11
11 -
 12
12 -
 13
13 -
 14
14 -
 15
15 -
16
-
17
-
18
 |
 |
