Cobra CPI 480 CPI480_MANL - Page 6
Connecting Cables, Mounting - fuse
 |
View all Cobra CPI 480 manuals
Add to My Manuals
Save this manual to your list of manuals |
Page 6 highlights
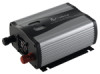
Installation Mounting and Connecting Cables Mounting • To mount your inverter: 1. Place the inverter on a flat surface with the mounting bracket against the mounting surface. Mounting Brackets Installation Connecting Cables 2. Connect cable to the Power Input Terminals on right side panel of the inverter. The red terminal is positive (+) and the black terminal is negative (-). Insert the ends of the cables onto the terminals and tighten the screws to clamp the cables safely. Connect Terminals 2. Mount to secure surface using mounting hardware that is corrosion resistant (not included). Mounting Hardware 3. Connect cable to your vehicle's cigarette lighter socket. Connect Power Source The inverter can be mounted horizontally or vertically. Connecting Cables • Power wire and wiring are very important to the performance of the inverter. Because the inverter has a low voltage, high current input, low resistance wiring is essential between the battery and inverter. This is so it can deliver the maximum amount of energy to the load. Only use the cables provided with your power inverter. On/Off Switch to Off To connect the cables between the inverter and the battery: 1. Turn the On/Off Switch on the inverter to the off position. If the power source is a DC power supply, switch it off as well. 6 NOTE If the inverter is to be used at levels above 150 watts for extended periods of time, a direct connection to the battery is recommended. Do not use the cigarette cord for loads higher than 150 watts. Please contact your local dealer or customer assistance for the proper cord for direct to battery connections. CAUTION Reverse polarity connections (positive to negative) will blow inverter fuses and may permanently damage the unit. Such damage is not covered by the warranty. CAUTION Remove any jewelry (watch, ring, etc.). Be careful not to short circuit the battery with any metallic object (wrench, etc.). Nothing Comes Close to a Cobra® 7
-
 1
1 -
 2
2 -
 3
3 -
 4
4 -
 5
5 -
 6
6 -
 7
7 -
 8
8 -
 9
9 -
 10
10 -
 11
11
 |
 |
