Compaq 6000 Hardware Reference Guide - HP Compaq 6000 Pro Microtower Model - Page 33
Removing the External Drives,
 |
UPC - 894582579463
View all Compaq 6000 manuals
Add to My Manuals
Save this manual to your list of manuals |
Page 33 highlights
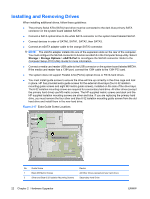
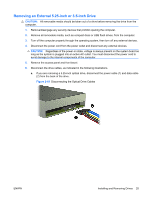
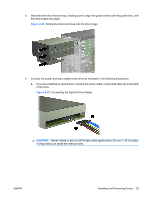
7. A latch drive bracket with release tabs secures the drives in the drive bay. Lift the release tab on the latch drive bracket (1) for the drive you want to remove, then slide the drive from its drive bay (2). Figure 2-22 Removing the External Drives 8. Remove the four guide screws (two on each side) from the old drive. You will need these screws to install a new drive. ENWW Installing and Removing Drives 27
-
 1
1 -
2
-
3
-
4
-
5
-
6
-
7
-
8
-
9
-
10
-
11
-
12
-
13
-
14
-
15
-
16
-
17
-
18
-
19
-
20
-
21
-
22
-
23
-
24
-
25
-
26
-
27
-
 28
28 -
 29
29 -
 30
30 -
 31
31 -
 32
32 -
 33
33 -
 34
34 -
 35
35 -
 36
36 -
 37
37 -
 38
38 -
39
-
40
-
41
-
42
-
43
-
44
-
45
-
46
-
47
-
48
-
49
-
50
-
51
-
52
-
53
-
54
-
55
-
56
-
57
-
58
-
59
-
60
-
61
 |
 |
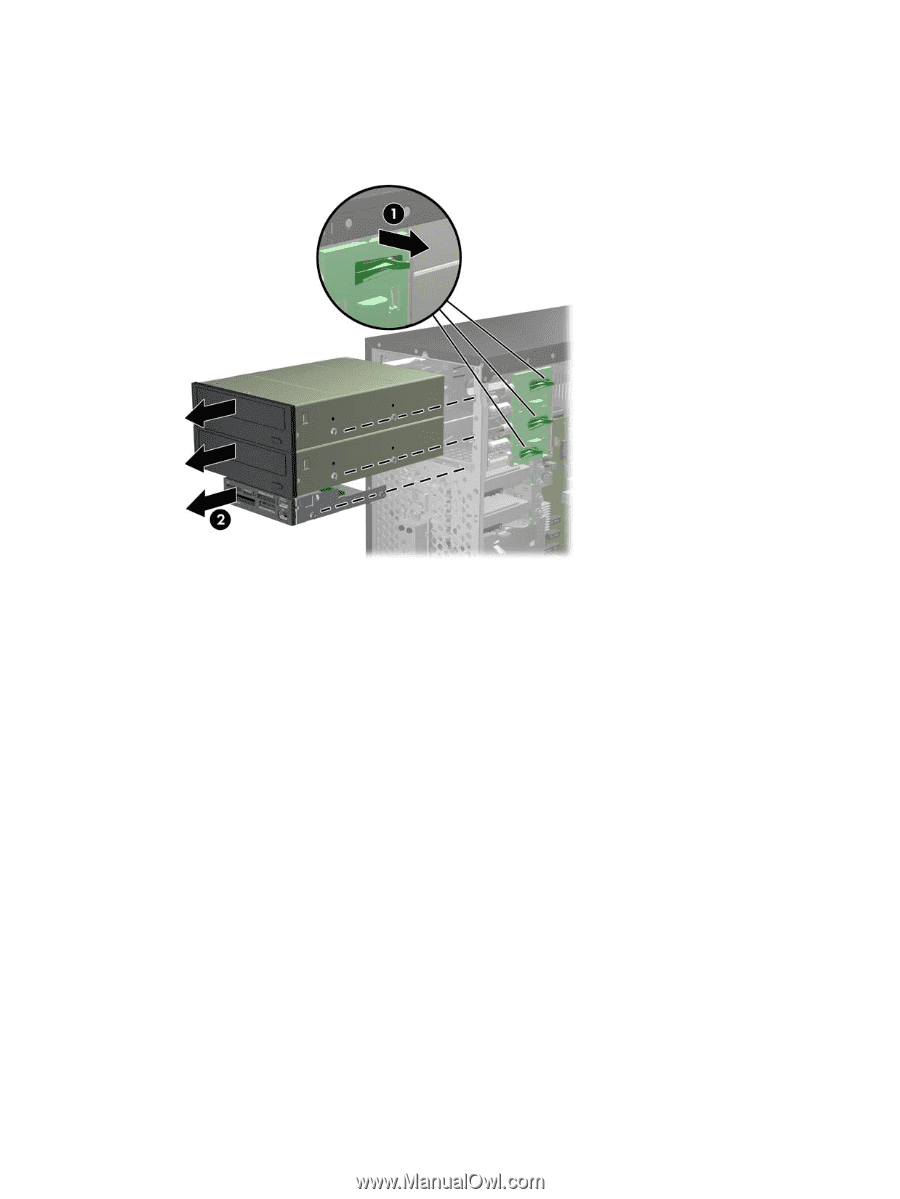
7.
A latch drive bracket with release tabs secures the drives in the drive bay. Lift the release tab on
the latch drive bracket (1) for the drive you want to remove, then slide the drive from its drive bay
(2).
Figure 2-22
Removing the External Drives
8.
Remove the four guide screws (two on each side) from the old drive. You will need these screws
to install a new drive.
ENWW
Installing and Removing Drives
27